Use cases
This chapter is mainly dedicated to the appearance of the application and a description of the individual paths that the end user will follow depending on the payment method he choosed. Each of the payment method available in Paytool application is described in a separate section. Additionally, every chapter contains diagrams depicting the entire transaction process per payment method.
Tip: Check it now. Verestro Paytool demo application is available here.
Transaction initialization
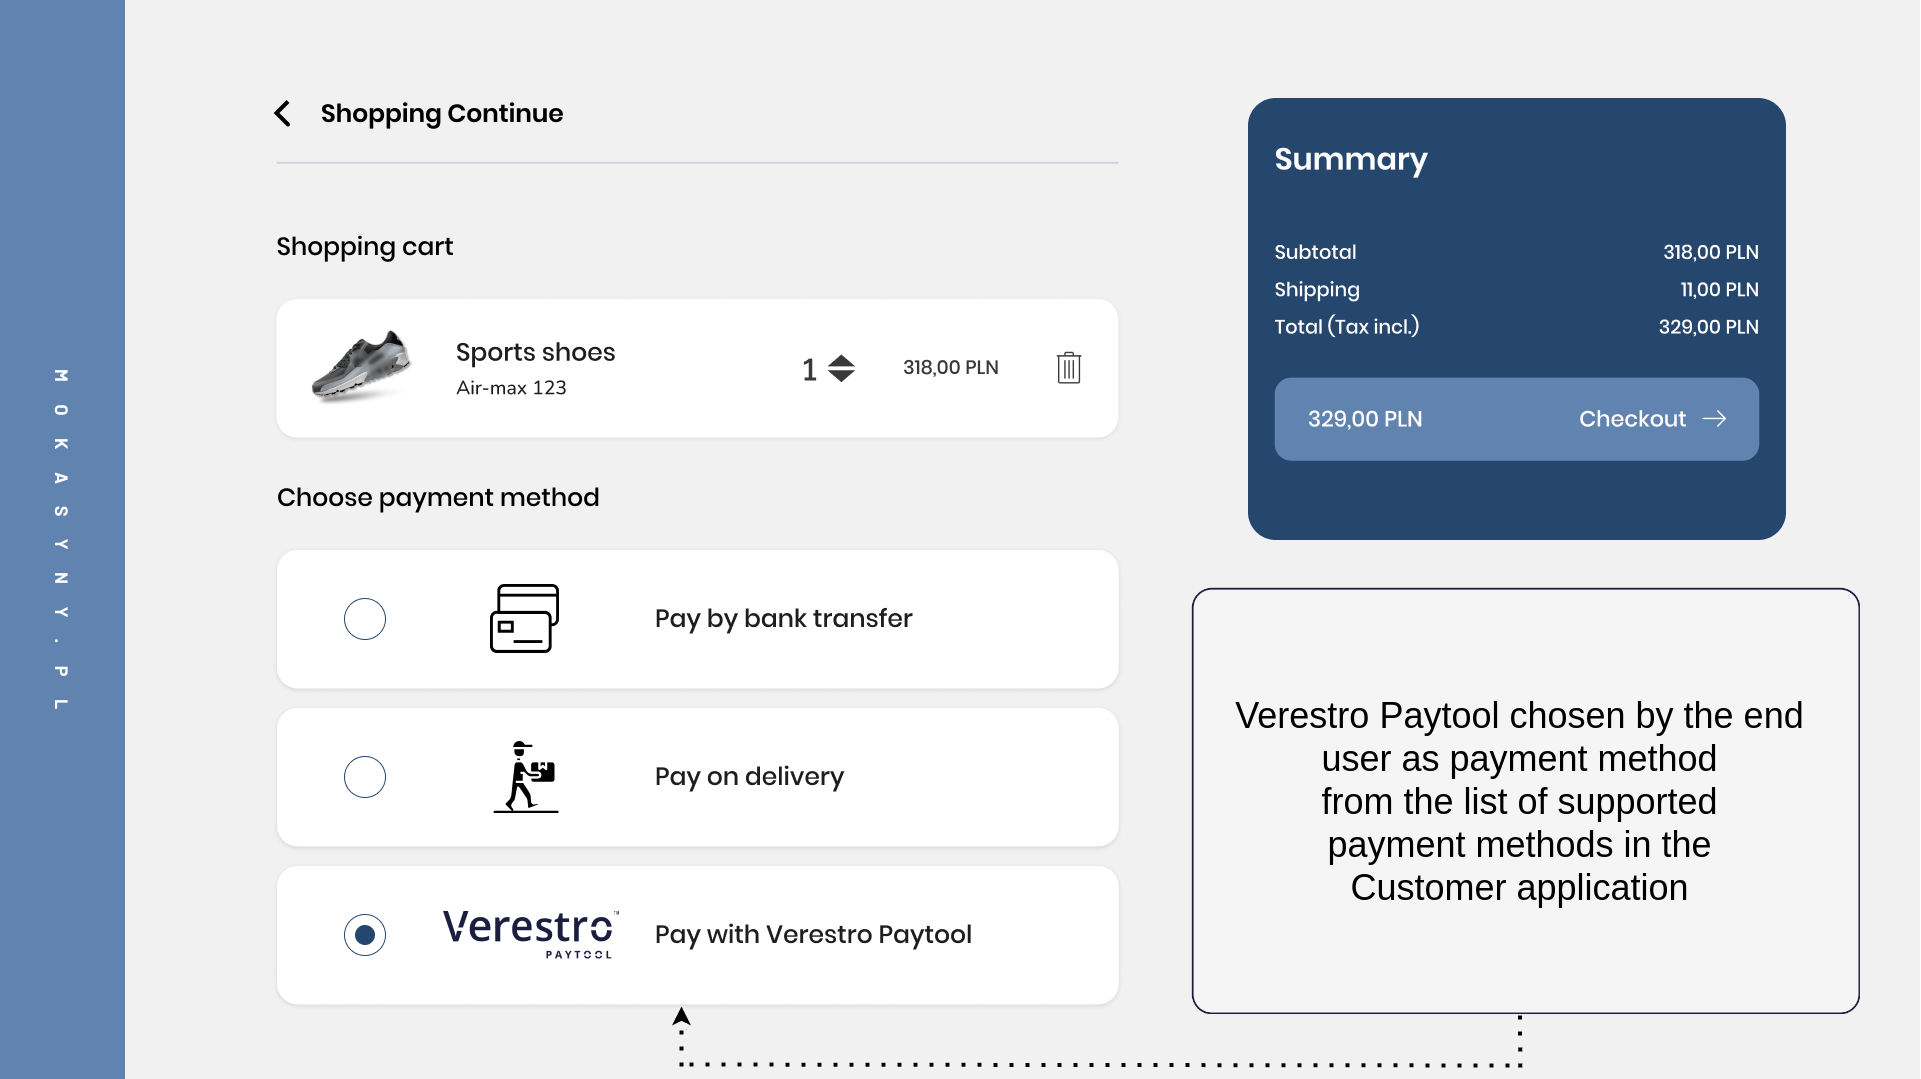
The first step of the each transaction always takes place in your application. Your application integrated with the Verestro Paytool solution should have exposed option allowing to pay using Paytool available in your application. Your backend should deliver the initial transaction data to the Paytool API to open new transaction session when your payer selects the Paytool as payment option.
Redirect
The first option of the integration is by redirecting the payer to our payment gateway, which lists all available payment options. When you request to create a payment session, the Paytool API responds with a transaction ID and a redirect URL. Simply redirect the user to this address to allow them to choose a payment method and finalize the transaction. The view of transaction initiatialization from the end user's perspective has been shown below. This view refers to the Redirect your payer integration path:
|
|
|

Tip: In this implementation model your application makes a request to the transactionInitialization method to create a payment session and then redirect your payer to the Paytool application. From this point on, are fully responsible for all other steps in the process such as execution of the transaction and threeDs authentication.
The sequence diagram below illustrates the transaction initialization process step by step
@startuml
skinparam ParticipantPadding 30
skinparam BoxPadding 30
skinparam noteFontColor #FFFFFF
skinparam noteBackgroundColor #1C1E3F
skinparam noteBorderColor #1C1E3F
skinparam noteBorderThickness 1
skinparam sequence {
ArrowColor #1C1E3F
ArrowFontColor #1C1E3F
ActorBorderColor #1C1E3F
ActorBackgroundColor #FFFFFF
ActorFontStyle bold
ParticipantBorderColor #1C1E3F
ParticipantBackgroundColor #1C1E3F
ParticipantFontColor #FFFFFF
ParticipantFontStyle bold
LifeLineBackgroundColor #1C1E3F
LifeLineBorderColor #1C1E3F
}
actor payer
participant "Customer front" as cfront
participant "Customer backend" as cback
participant "Paytool front" as pfront
participant "Paytool backend" as pback
payer->cfront: 1. Pay with Paytool
cfront->cback: 2. Payer choosed Paytool
cback->pback: 3. Customer authorization + transaction metadata
pback->pback: 4. Store transaction metadata + open payment session
cback<-pback: 5. OK + transaction id + redirect url
cfront<-cback: 6. OK + transaction id + redirect url
cfront->pfront: 7. Redirect payer to Paytool + transaction id
pfront->pback: 8. Get transaction data + merchant payment methods
pfront<-pback: 9. OK response
payer<-pfront: 10. Display transaction + payment methods
@enduml
- Payer being in the Customer's application has selected Paytool as the payment method.
- Customer's application accepts payer's decision on payment method.
- Customer's API communicates with Paytool API to initiate a payment session and transmitting data about that payment.
- Paytool API stores payment data and opens payment session for this transaction.
- Paytool API returns status of the payment session initialization to Customer's API. If the status is success then the transaction ID and the URL to which the payer should be redirected are returned (If integrating directly with our API without a frontend redirect, only the transaction ID will be returned).
- Customer's API passes received data to it's application to redirect payer.
- The Customer's application redirects the payer to the Paytool application.
- Paytool application gets transaction data stored by Paytool API in point 4.
- Paytool API returns all stored data to Paytool application.
- Paytool application shows to the payer every available payment method (Card, Google Pay, Apple Pay, BLIK) and all stored transaction data (Customer's name, amount of the transaction, currency, etc.).
Iframe
Important! This part of the documentation is work in progress...
Server to server
An alternative path to carry out a transaction is a Payment process via API integration path. Paytool Frontend does not appear in this path. You make all requests directly from your server to the Paytool API methods we described in technical integration guide. Paytool API responds with transaction ID and you should use this transaction ID to execute a proper payment method choosed by your payer.
The sequence diagram below illustrates the transaction initialization process step by step
@startuml
skinparam ParticipantPadding 30
skinparam BoxPadding 30
skinparam noteFontColor #FFFFFF
skinparam noteBackgroundColor #1C1E3F
skinparam noteBorderColor #1C1E3F
skinparam noteBorderThickness 1
skinparam sequence {
ArrowColor #1C1E3F
ArrowFontColor #1C1E3F
ActorBorderColor #1C1E3F
ActorBackgroundColor #FFFFFF
ActorFontStyle bold
ParticipantBorderColor #1C1E3F
ParticipantBackgroundColor #1C1E3F
ParticipantFontColor #FFFFFF
ParticipantFontStyle bold
LifeLineBackgroundColor #1C1E3F
LifeLineBorderColor #1C1E3F
}
actor payer
participant "Customer front" as cfront
participant "Customer backend" as cback
participant "Paytool backend" as pback
payer->cfront: 1. Pay with Paytool
cfront->cback: 2. Payer choosed Paytool
cback->pback: 3. Customer authorization + transaction metadata
pback->pback: 4. Store transaction metadata + open payment session
cback<-pback: 5. OK + transaction id
note right of cfront: At this point, the Customer decides how to present the transaction to the payer
cback->pback: 6. Request proper payment method / executing 3D Secure
cback<-pback: 7. Transaction result
note right of cfront: At this point, the Customer decides how to present the transaction result to the payer
@enduml
- Payer being in the Customer's application has selected Paytool as the payment method.
- Customer's application accepts payer's decision on payment method.
- Customer's API communicates with Paytool API to initiate a payment session and transmitting data about that payment.
- Paytool API stores payment data and opens payment session for this transaction.
- Paytool API returns status of the payment session initialization to Customer's API. If the status is success then the transaction ID along with a list of every available payment method.
- Customer's API executes proper Paytool API method (specified payment method or 3D Secure).
- Paytool API returns result of the executed payment method and/or 3D Secure.
Payment methods
Verestro as a PSP provides several different payment methods in Paytool solution. You decide which payment method should be available in Paytool payment form. You decide this during the onboarding process but it is editable whenever necessary. The end user, seeing the available payment methods, can choose the option that is most convenient for him. This chapter describes all payment methods supported by our application.
Note: Some of the payment methods available in the Paytool frontend may not be available with an API to API connection.
|
Payment methods in Paytool |
Redirect your payer (open Paytool in webview) |
Payment in iframe (open Paytool iframe embed in your app) |
Payment via API (call Paytool API methods) |
|
Google Pay™ |
Available |
To be implemented |
Available |
|
Apple Pay |
Available |
To be implemented |
To be implemented |
|
Blik |
Available |
Not available |
To be implemented |
|
Card & Card on file |
Available |
Available |
Available |
Note: It is required that you have created account in the Acquirer's system which will settle your transactions. Verestro Paytool solution has been implemented so that it is possible to process transactions with the participation of various Acquirers. If you require the settlement of the transaction by a new Acquirer – to which we are not yet integrated – there will be required new integration between Verestro and the new Acquirer. You should provide a specification of the Acquirer API.
Card
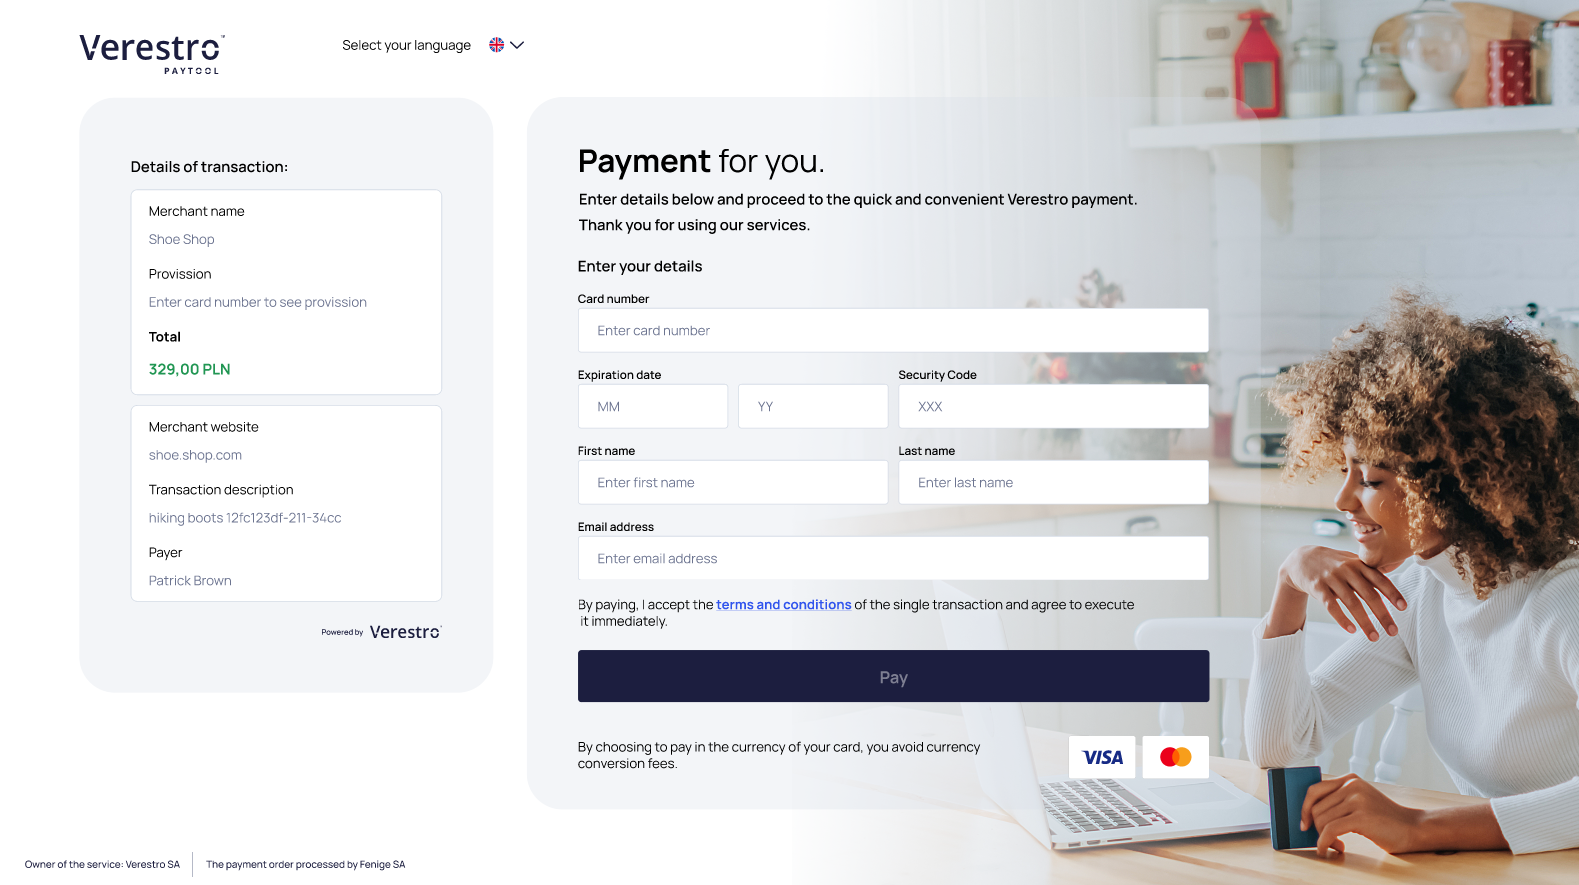
The most common payment method available in our application is payment using plain card details. This payment method consists in providing a payment form in which the end user can enter his payment card details. The option to pay with plain card details is available at the button shown below:

After clicking on the payment option using plain card details, the end user is redirected to the specially prepared payment form. Now he is able to provide the appropriate card details and clicks the Pay button at the bottom of the screen. At this point, the card details are encrypted and sent to the Paytool backend which requests Acquirer to process transaction. At this moment threeDs authentication process may be required. The payment process using plain card details from the end user's perpective has been shown below:
The sequence diagram below illustrates the transaction with plain card details process step by step
@startuml
skinparam ParticipantPadding 30
skinparam BoxPadding 30
skinparam noteFontColor #FFFFFF
skinparam noteBackgroundColor #1C1E3F
skinparam noteBorderColor #1C1E3F
skinparam noteBorderThickness 1
skinparam sequence {
ArrowColor #1C1E3F
ArrowFontColor #1C1E3F
ActorBorderColor #1C1E3F
ActorBackgroundColor #FFFFFF
ActorFontStyle bold
ParticipantBorderColor #1C1E3F
ParticipantBackgroundColor #1C1E3F
ParticipantFontColor #FFFFFF
ParticipantFontStyle bold
LifeLineBackgroundColor #1C1E3F
LifeLineBorderColor #1C1E3F
}
actor "End User" as user
participant "Paytool Frontend" as pfront
participant "Paytool Backend" as pback
participant "Customer Server" as custback
participant "Acquirer" as acq
user->pfront: User chooses payment by plain card details
user<-pfront: Redirect end user to the payment form
user->pfront: User filling data (CN, CVC, EXP)
pfront->pfront: Encrypt data
pfront->pback: Perform transaction providing encrypted payment request body
pback->pback: Decrypt encrypted payment request body
pback->acq: Order transaction
note left of acq: At this point 3D Secure process may occur
acq->pback: Response
pback->pfront: Transaction Result
pback-->pback: Store transaction result
pfront->pfront: Redirect end user (success/failure)
pback->custback: Send transaction postback to provided URL (optional - configurable)
note right of pback: Verestro can also send the notification after transaction to the end user(optional)
custback->pback: Get transaction status (optional)
pback->custback: Return transaction status
@enduml
Card on file
The Paytool application also provides the option to store card data in Verestro PCI DSS Storage. It works on the basis of a mobile wallet, allowing returning payers to select previously used cards without the need to re-enter card details for each subsequent transaction.
When using the card on file option, you must remember that you are responsible for authenticating the payer. When initializing the transaction, you must provide a specific identifier based on which we will either add a new cardholder to our database or, if the cardholder already exists in our system, return a list of their previously added cards and/or allowing him to add new card to his card list. The identifier and the technical process of this use case are described in the section of the technical documentation dedicated to the transactionInitialization method.
The card on file option is an extension of the plain card number payment method and it is optional feature. Once selected, the payer can follow one of three possible card selection paths. All of these paths are described in the table below:
|
Payer has no saved cards |
Payer has saved cards |
Payer has saved cards and provides new card |
|
In this scenario, the payer selects the card on file payment option without having any previously saved card. A form is immediately displayed, allowing them to enter the details of the card they wish to use.
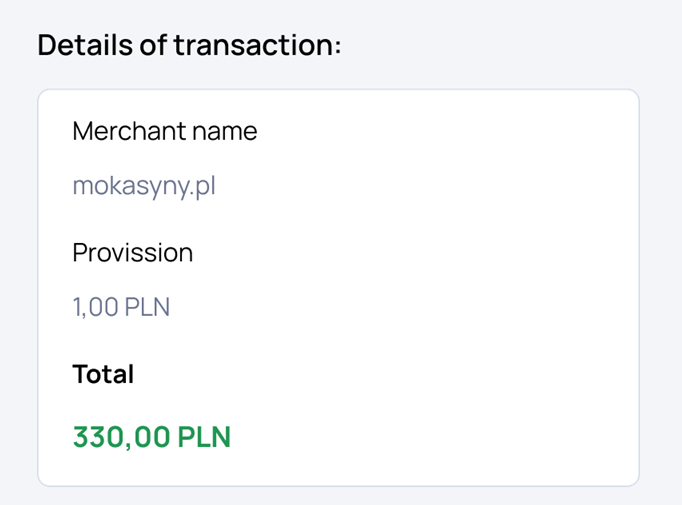
To see more details of the current transaction, the user can click "Expand" button.
|
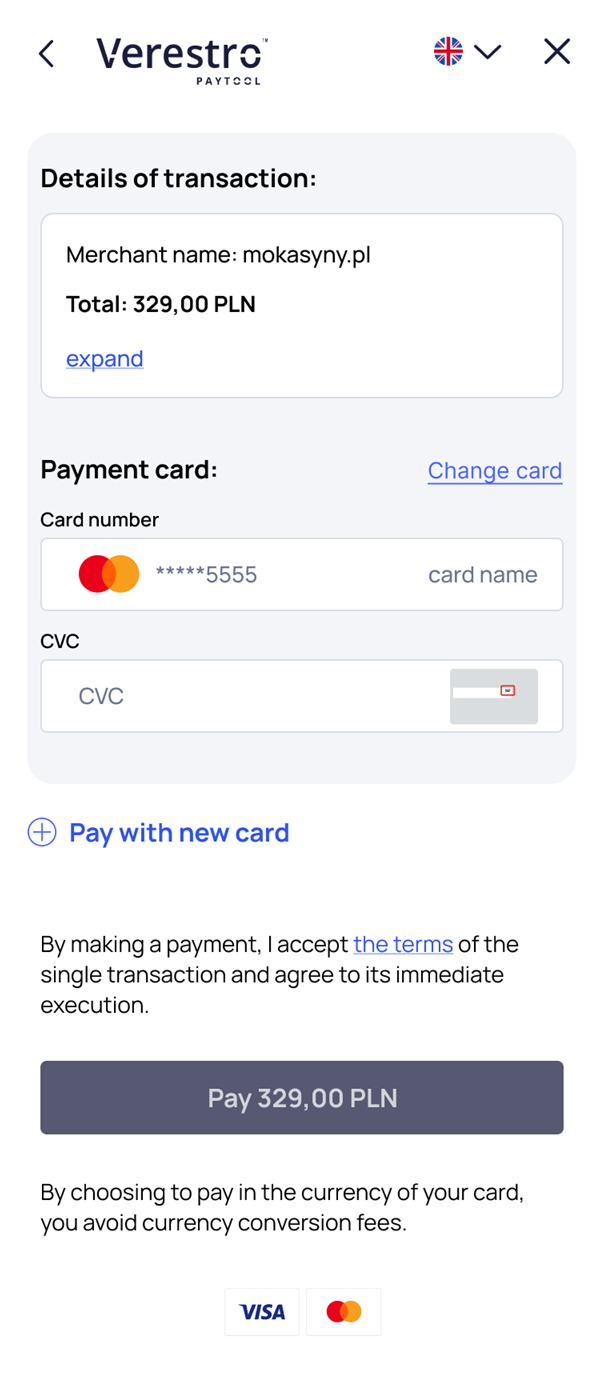
In this flow, the payer selects the card on file payment option while already having a previously saved card in our system. Two options are displayed: pay with the saved card or use a new card. When choosing to pay with the saved card, 3D Secure authentication will be skipped.
When selecting the option to use a new card (by clicking the "Pay with new card" button), a form for entering the new card details is displayed.
|
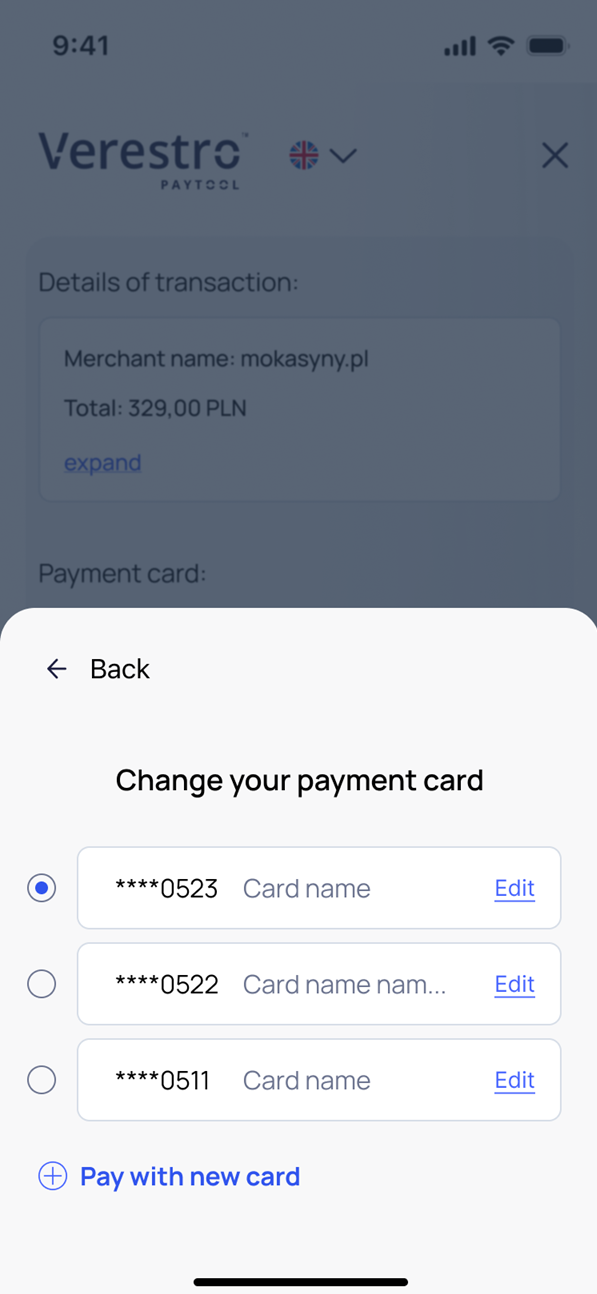
If the payer has more than one saved card, they can open the list of all their saved cards to choose a card other than the default one for the transaction. From the card selection view, it is also possible to:
In the edit mode, the user can:
It is not possible to edit sensitive data such as the card number or expiration date.
 |

The sequence diagram below illustrates the transaction with stored card process step by step
@startuml
@startuml
skinparam ParticipantPadding 30
skinparam BoxPadding 30
skinparam noteFontColor #FFFFFF
skinparam noteBackgroundColor #1C1E3F
skinparam noteBorderColor #1C1E3F
skinparam noteBorderThickness 1
skinparam sequence {
ArrowColor #1C1E3F
ArrowFontColor #1C1E3F
ActorBorderColor #1C1E3F
ActorBackgroundColor #FFFFFF
ActorFontStyle bold
ParticipantBorderColor #1C1E3F
ParticipantBackgroundColor #1C1E3F
ParticipantFontColor #FFFFFF
ParticipantFontStyle bold
LifeLineBackgroundColor #1C1E3F
LifeLineBorderColor #1C1E3F
}
actor "Sender" as sender
participant "Customer front" as cfront
participant "Customer backend" as cback
participant "Paytool front" as pfront
participant "Paytool backend" as pback
==Choose COF==
sender -> cfront: Choose paytool
cfront -> cback: Order payment
cback -> pback: /secure/transactions(transaction metadata, userReference)
pback --> cback: response(transactionId, redirect url)
cback --> cfront: response(transactionId, redirect url)
cfront -> pfront: Redirect payer
note right of pfront: Payer choose to pay with COF
note right of pfront: Cards will be mapped with user by userReference
==Order payment==
pfront -> pback: Get list of user's cards
pfront <- pback: Return card list
sender <- pfront: Display card list
sender -> pfront: Choose card and proceed
pfront -> pback: processPayment(transactionId, cardId)
pfront <- pback: response(result)
sender <- pfront: Display transaction result
note left of pfront: Redirect payer back to Customer
cback <-- pback: Transaction postback(result)
@enduml
Dynamic currency conversion
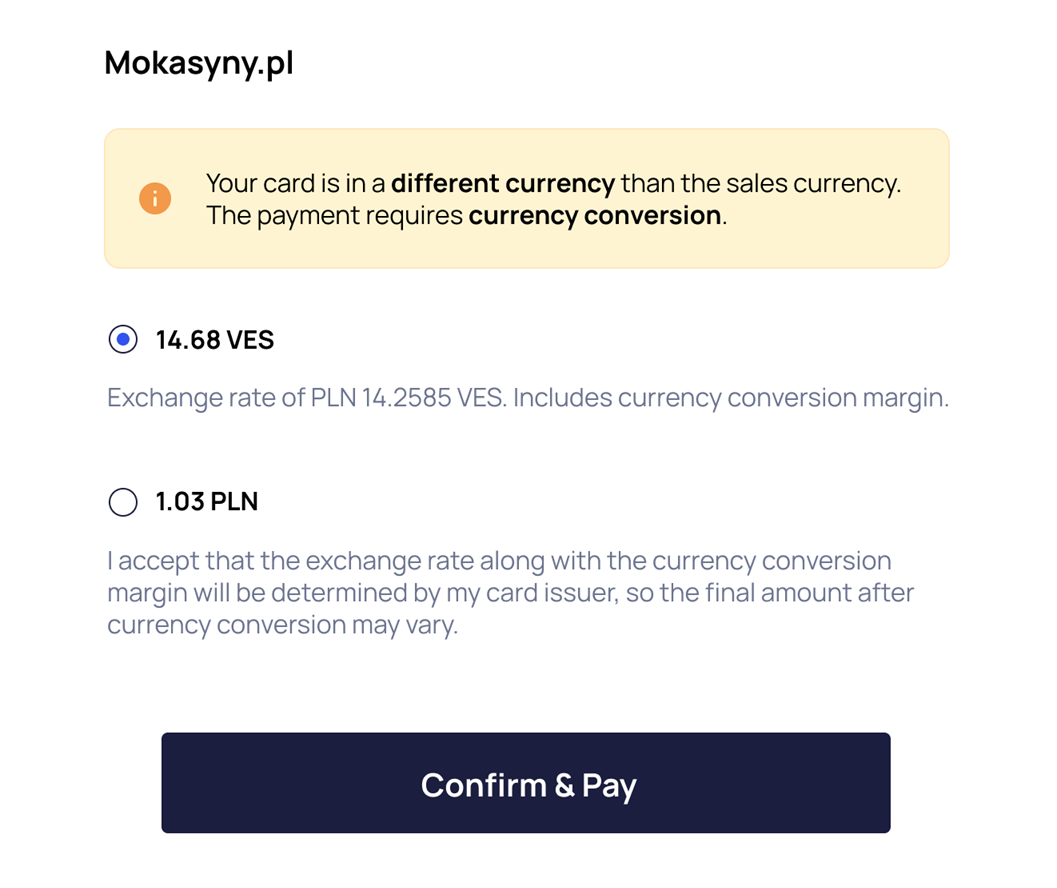
The DCC functionality is to determine the currency of the payer's card, compare it with the currency used by the merchant selling the goods, and provide the payer with the option of converting currency at our rate or ordering payment leaving the currency conversion to the bank that issued the card. The DCC mechanism is triggered when the currency of the payer's card is different from the sales currency then.
Note: Currently, DCC functionality is only available for transactions made with Fenige's terminal.
Fenige is our partner acquiring institution.
After entering the card data in the correct field, the currency of the card is determined. If the dynamic currency conversion has been triggered, the following popup will be displayed to the payer and the total amount in the transaction details will be updated:
|
|
 |
Google Pay
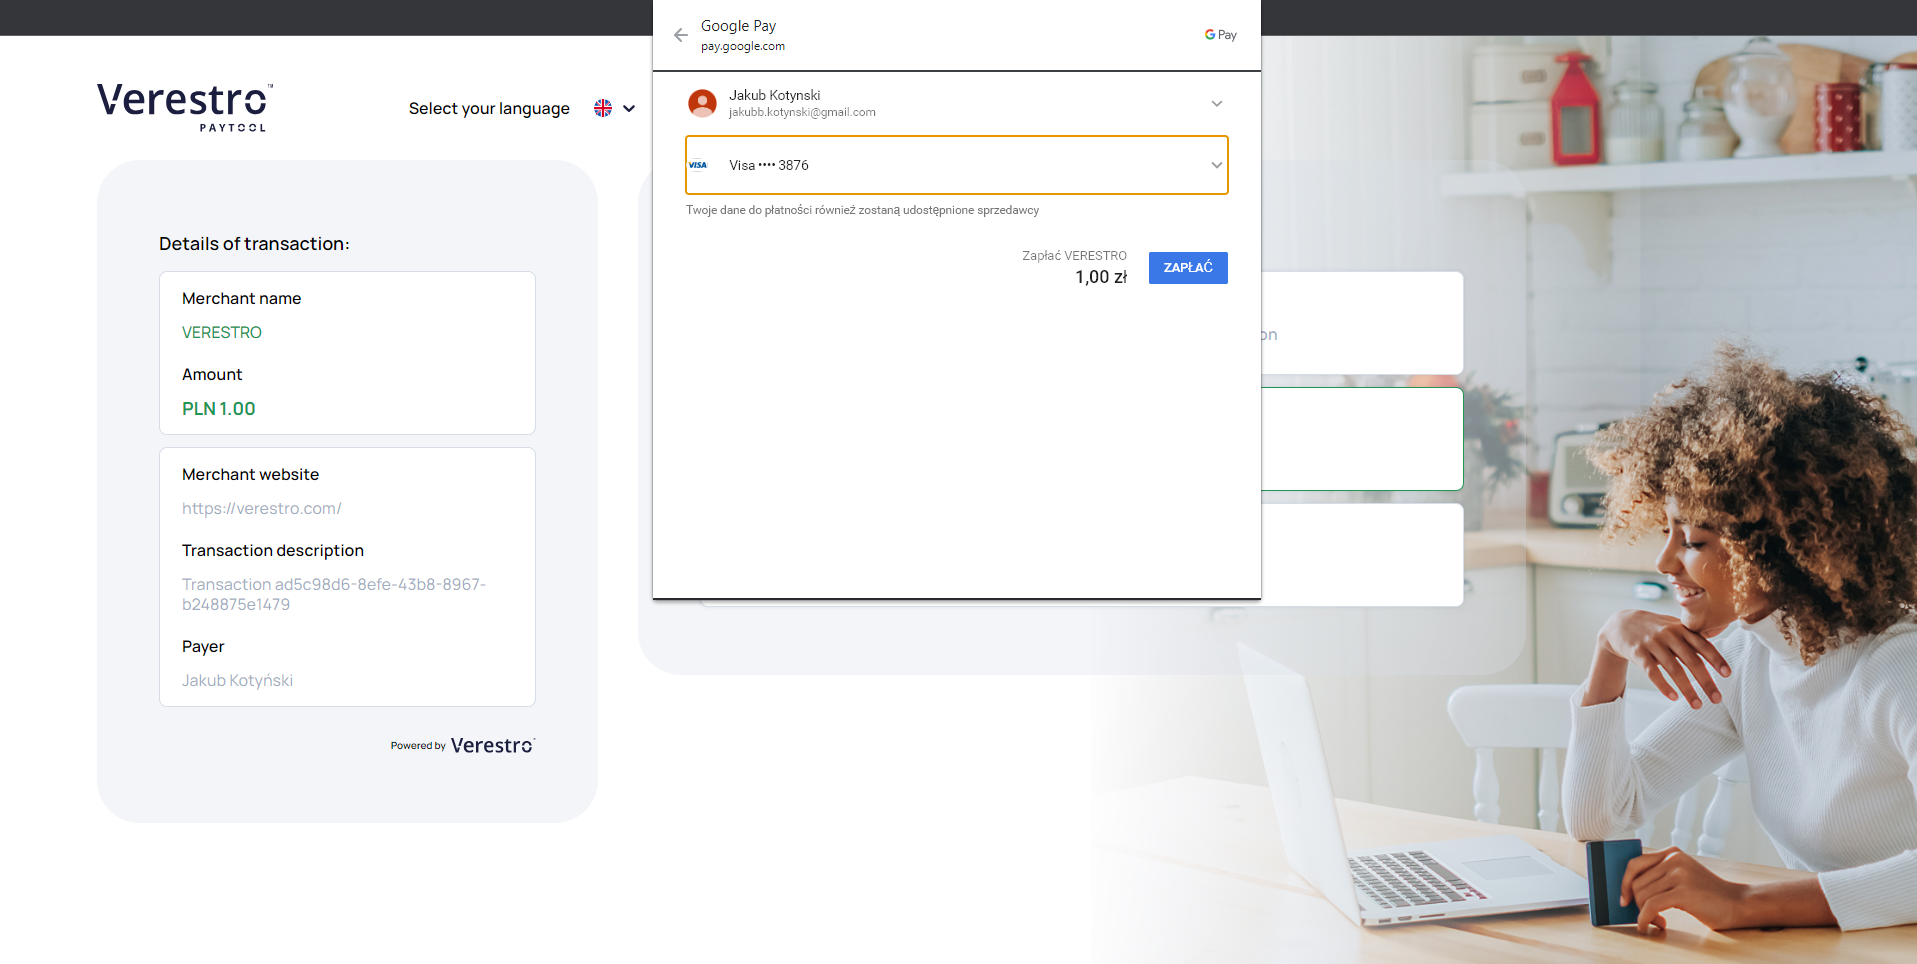
Paytool as a registered hosted checkout in the Google Pay™ allows to perform a payment with the card from the Google Pay™ Wallet. Using our application your payer can choose the Google Pay™ as the payment method from the Verestro Paytool payment methods list. The option to pay with Google Pay™ card token is available at the button shown below:

After clicking on the Google Pay™ payment option, the Google Pay™ Wallet popup is displayed. The payer should select the appropriate card from the Google Pay™ Wallet which is then encrypted on the Google Pay™ side and transferred to our application. We will decrypt obtained data and transfer them to the Acquirer in the transaction request. At this moment threeDs authentication process may be required but it will be handled on our side. The payment process using Google Pay™ card payment token from the end user's perpective has been shown below:
The sequence diagram below illustrates the payment process using Google Pay™ card payment token step by step
@startuml
skinparam ParticipantPadding 30
skinparam BoxPadding 30
skinparam noteFontColor #FFFFFF
skinparam noteBackgroundColor #1C1E3F
skinparam noteBorderColor #1C1E3F
skinparam noteBorderThickness 1
skinparam sequence {
ArrowColor #1C1E3F
ArrowFontColor #1C1E3F
ActorBorderColor #1C1E3F
ActorBackgroundColor #FFFFFF
ActorFontStyle bold
ParticipantBorderColor #1C1E3F
ParticipantBackgroundColor #1C1E3F
ParticipantFontColor #FFFFFF
ParticipantFontStyle bold
LifeLineBackgroundColor #1C1E3F
LifeLineBorderColor #1C1E3F
}
actor "End User" as user
participant "Paytool Frontend" as pfront
participant "Paytool Backend" as pback
participant "Google Pay" as gpay
participant "Customer Server" as custback
participant "Acquirer" as acq
user->pfront: End user chooses payment by Google Pay
pfront->gpay: Open end user Google Wallet
user<--gpay: Opens end user's Google Wallet
user-->gpay: Choose card from Google Wallet
gpay->gpay: Encrypt chosen card token data
pfront<-gpay: Provide encrypted card token data
pfront->pback: Order transaction
pfront-->pback: Provide encrypted card token data
pback->pback: Decrypt encrypted card token data
pback->acq: Order transaction
note left of acq: At this point 3D Secure process may occur
acq->pback: Response
pback->pfront: Transaction Result
pback-->pback: Store transaction result
pfront->pfront: Redirect end user (success/failure)
pback->custback: Send transaction postback to provided URL (optional - configurable)
note right of pback: Verestro can also send the notification after transaction to the end user (optional)
custback->pback: Get transaction status (optional)
pback->custback: Return transaction status
@enduml
Google Pay payment via API
Alternatively Verestro allows you to perform a payment with Google Pay card token by calling directly our API method. This is a backend to backend oriented solution. In this payment model you must be registered merchant in Google Pay™ to be able to get a card payment token from Google Pay™.
To use this option your API should be integrated with the googlePayTransaction method provided by Paytool API. By using this solution you need to display Google Pay™ Wallet in your application by your own. After selecting the Google Pay™ as the payment option a payer chooses proper card from Google Pay™ Wallet. After that action you get encrypted card payment token from Google Pay™. Card payment token is encrypted on the Google Pay™ side with Verestro's public key. You have to provide this encrypted token to Paytool API by using googlePayTransaction method. If you do this, we will handle transaction process on our side. At this moment 3D Secure process may be required and you need to handle it on your side using threeDs authentication methods provided by Paytool API.
The sequence diagram below illustrates the payment process using Google Pay™ card payment token API to API step by step
@startuml
skinparam ParticipantPadding 30
skinparam BoxPadding 30
skinparam noteFontColor #FFFFFF
skinparam noteBackgroundColor #1C1E3F
skinparam noteBorderColor #1C1E3F
skinparam noteBorderThickness 1
skinparam sequence {
ArrowColor #1C1E3F
ArrowFontColor #1C1E3F
ActorBorderColor #1C1E3F
ActorBackgroundColor #FFFFFF
ActorFontStyle bold
ParticipantBorderColor #1C1E3F
ParticipantBackgroundColor #1C1E3F
ParticipantFontColor #FFFFFF
ParticipantFontStyle bold
LifeLineBackgroundColor #1C1E3F
LifeLineBorderColor #1C1E3F
}
participant "End user" as user
participant "Customer Application" as app
participant "Google Pay" as gp
participant "Paytool Backend" as tps
participant "Acquirer" as acq
note right of user: User wants to pay with Google Pay
user->app: Pay with Google Pay and choose card
app->gp: Requests for card token
gp->gp: Encrypts card token with Verestro pub key
app<-gp: Returns encrypted card token
app->tps: Requests token payment
tps->tps: Decrypts card token
tps->acq: Orders transaction
tps<-acq: Transaction status
note left of acq: At this point 3D Secure process may occur
app<-tps: Transaction status
user<-app: Transaction status
user<--tps: Sends email notification - optional
@enduml
Important: If you use Paytool with Payment process via API integration path, make sure you are a registered merchant in the Google Pay™ system. This does not apply to Customers using the Redirect your payer route.
Note: Google Pay™ provides a Google Pay Web integration checklist that will help you with the integration step by step. The documentation is available after whitelisting in Google Pay™ system. The whitelisting process is performed by Google Pay™ during the Customer's merchant account registration process.
Note: Google Pay™ provides Google Pay Web Brand Guidelines that presents branding requirements for web merchants registered in Google Pay™. You must meet these requirements so that you can allow his payers to pay via the Google Pay™ solution.
Apple Pay
Verestro as a PSP registered in the Apple Pay™ allows to perform a payment with card token generated by Apple. Using our application your payer can choose the Apple Pay™ as the payment method from the Paytool payment methods list.
Tip: Please note that as a third-party iOS application, you are allowed to use Apple Pay only for the sale of physical goods. The sale of digital goods with external payment system providers such as Paytool is prohibited by Apple. To enable the sale of digital goods using Apple Pay, you must follow Apple requirements listed here.
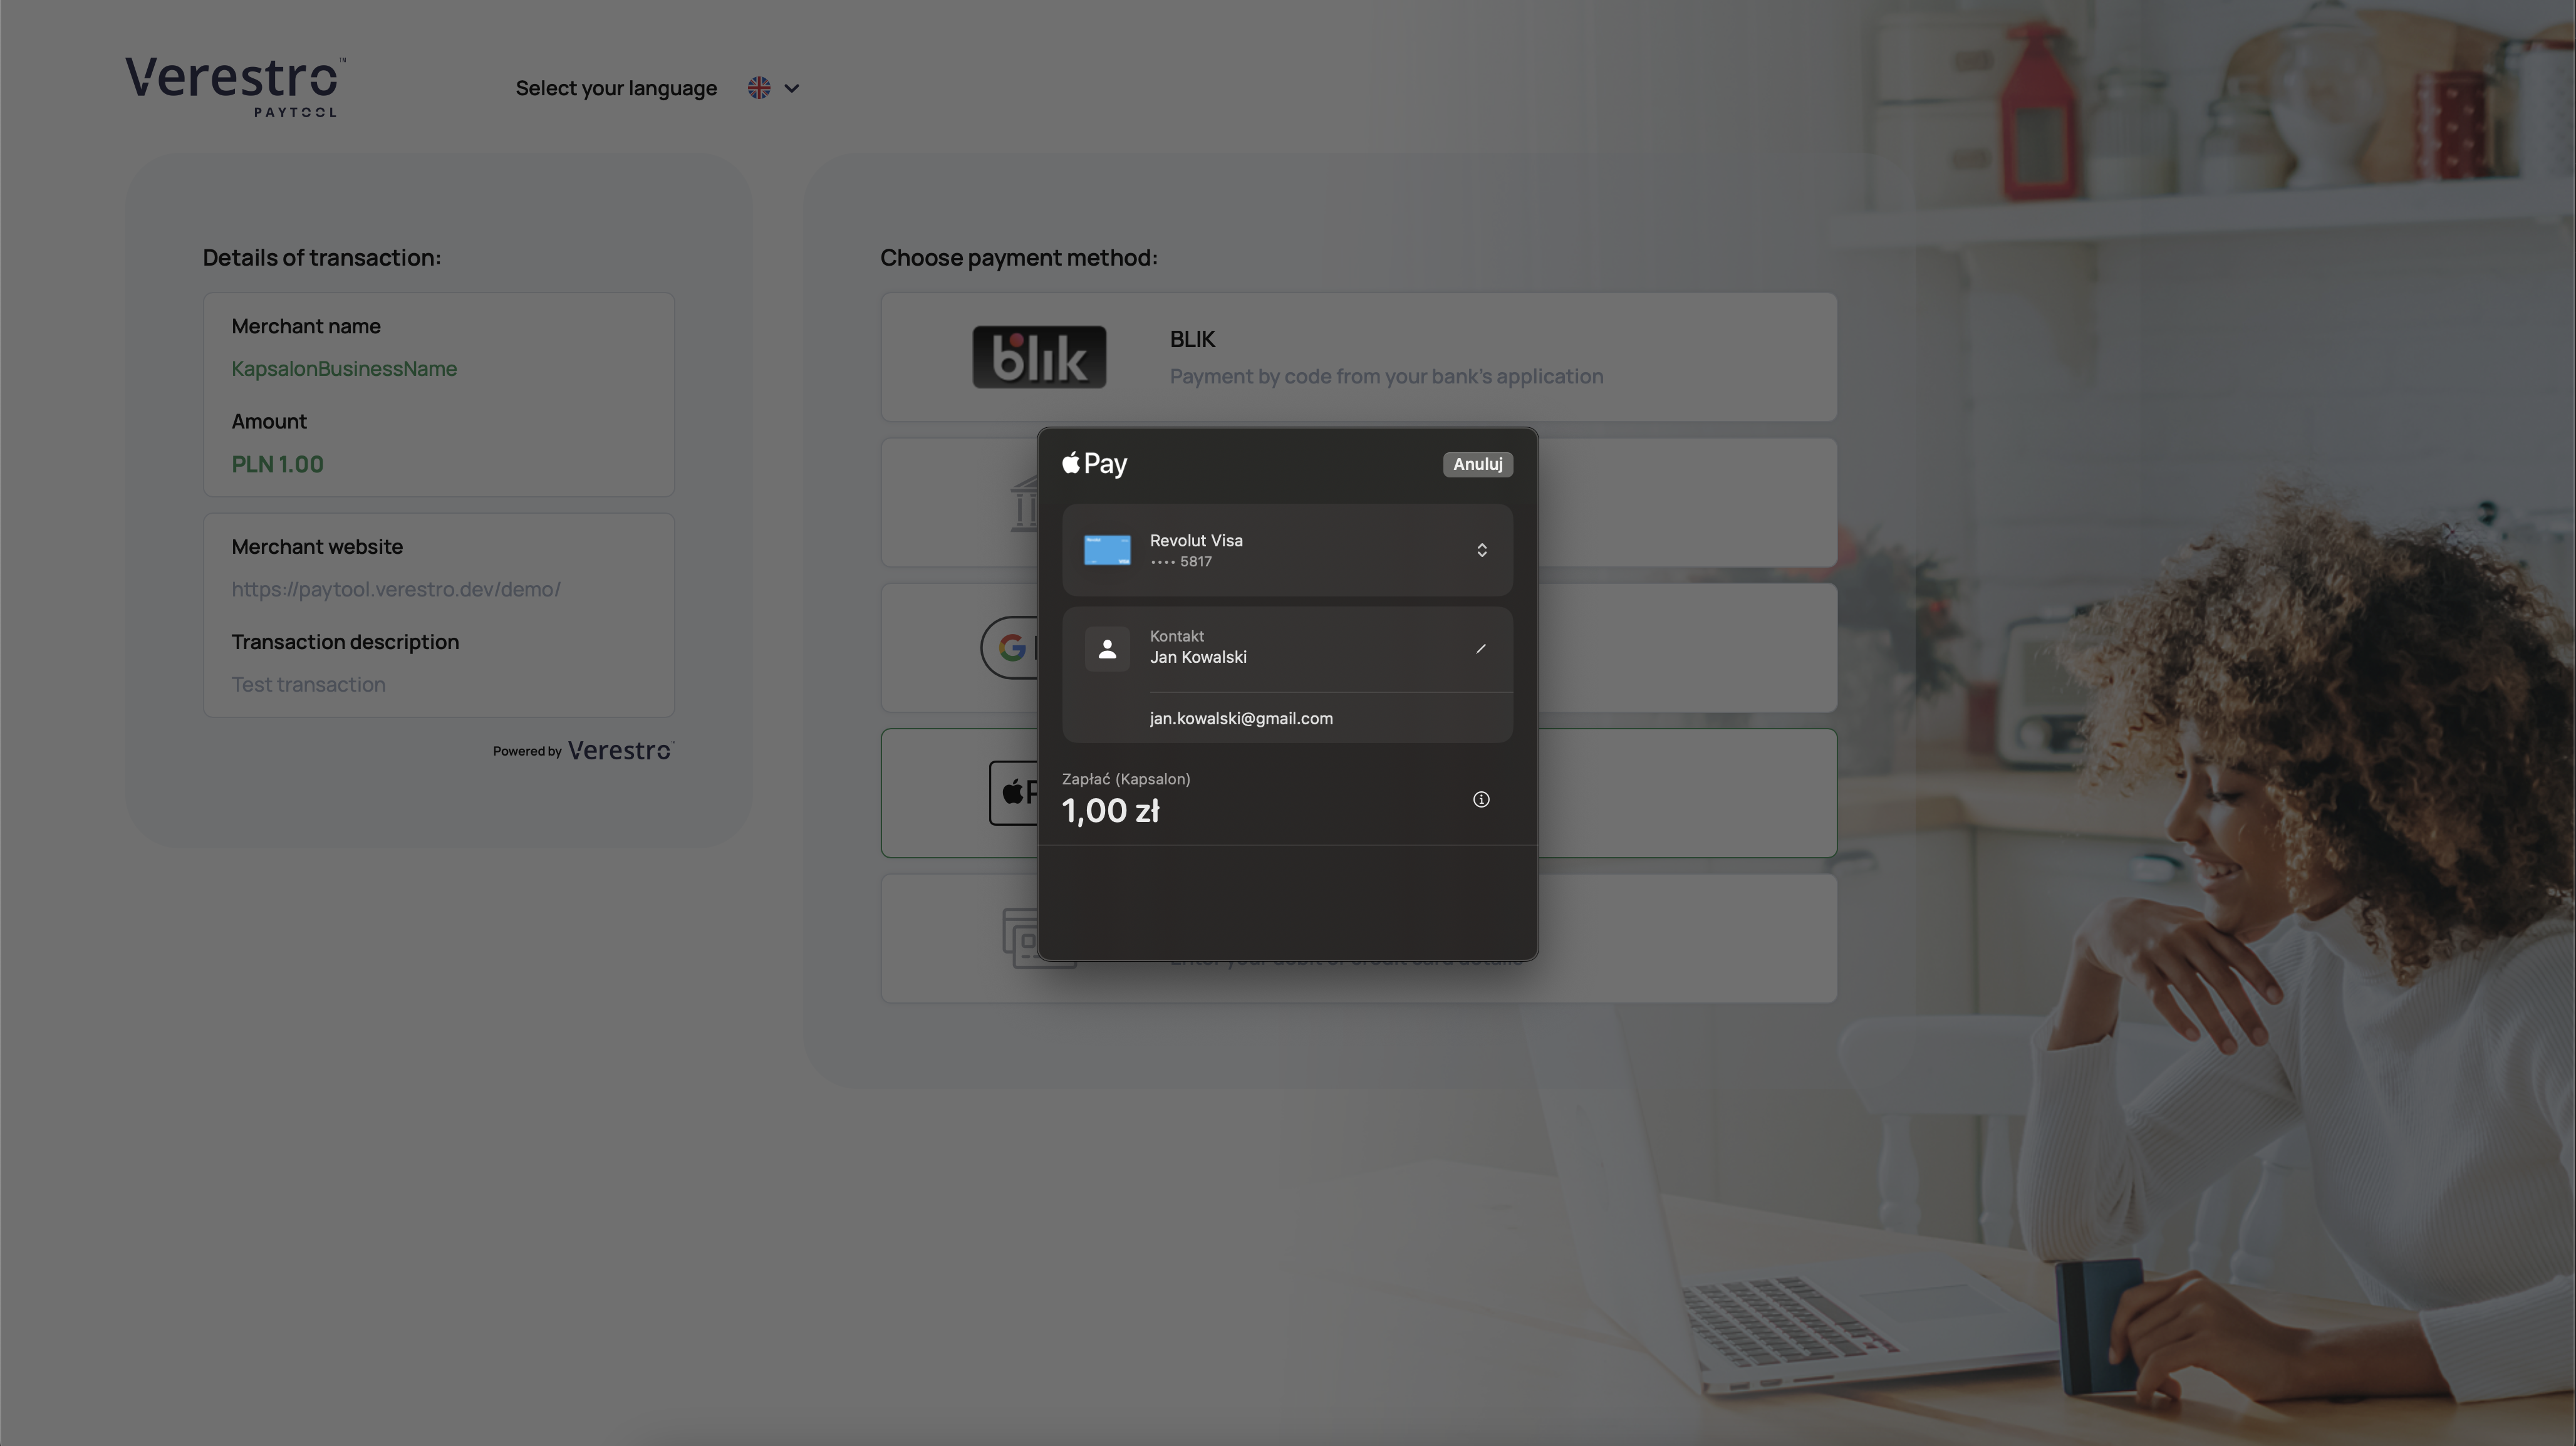
The option to pay with Apple Pay™ card token is available at the button shown below:

Warning! Apple Pay payment method is available in Safari web browser only.
After clicking on the Apple Pay™ payment option, the Apple Pay™ Wallet popup is displayed. End user should select the appropriate card from the Apple Pay™ Wallet popup which is then encrypted on the Apple Pay™ side and transferred to our application. We decrypt obtained data and transfer them to the Acquirer in the transaction request. At this moment threeDs authentication process may be required. The payment process using Apple Pay™ card payment token from the end user's perpective has been shown below:
The sequence diagram below illustrates the payment process using Apple Pay™ card payment token step by step
@startuml
skinparam ParticipantPadding 30
skinparam BoxPadding 30
skinparam noteFontColor #FFFFFF
skinparam noteBackgroundColor #1C1E3F
skinparam noteBorderColor #1C1E3F
skinparam noteBorderThickness 1
skinparam sequence {
ArrowColor #1C1E3F
ArrowFontColor #1C1E3F
ActorBorderColor #1C1E3F
ActorBackgroundColor #FFFFFF
ActorFontStyle bold
ParticipantBorderColor #1C1E3F
ParticipantBackgroundColor #1C1E3F
ParticipantFontColor #FFFFFF
ParticipantFontStyle bold
LifeLineBackgroundColor #1C1E3F
LifeLineBorderColor #1C1E3F
}
actor "End User" as user
participant "Paytool Frontend" as pfront
participant "Paytool Backend" as pback
participant "Apple Pay" as gpay
participant "Customer Server" as custback
participant "Acquirer" as acq
user->pfront: End user chooses payment by Apple Pay
pfront->gpay: Open end user's Apple Pay Wallet
user<--gpay: Opens end user's Apple Pay Wallet
user-->gpay: Choose card from Apple Pay Wallet
note right of user: At this point Apple Pay may require user authorization
gpay->gpay: Encrypt chosen card token data
pfront<-gpay: Provide encrypted card token data
pfront->pback: Order transaction
pfront-->pback: Provide encrypted card token data
pback->pback: Decrypt encrypted card token data
pback->acq: Order transaction
note left of acq: At this point 3D Secure process may occur
acq->pback: Response
pback->pfront: Transaction Result
pback-->pback: Store transaction result
pfront->pfront: Redirect end user (success/failure)
pback->custback: Send transaction postback to provided URL (optional - configurable)
note right of pback: Verestro can also send the notification after transaction to the end user (optional)
custback->pback: Get transaction status (optional)
pback->custback: Return transaction status
@enduml
Note: At this moment Apple Pay biometric authorization may be required.
Note: Payment using the Apple Pay Wallet is only possible if the payer uses MacOS.
Apple Pay payment via API
Warning! Implementation of Apple Pay backend to backend oriented is work in progress...
Alternatively Verestro allows you to perform a payment with Apple Pay card token by calling directly our API method. This is a backend to backend oriented solution. In this payment model you must be registered merchant in Apple Pay™ to be able to get a card payment token from Apple Pay™.
Important: If you use Paytool with Payment process via API integration path, make sure you are a registered merchant in the Apple Pay™ system. This does not apply to Customers using the Redirect your payer route.
Note: Apple Pay provides a complete integration guide that outlines all the steps required to register as a merchant in its system. This registration enables the merchant to launch the Apple Pay wallet directly within your own application. To do so check Apple Pay Merchant Registration Guide.
Blik
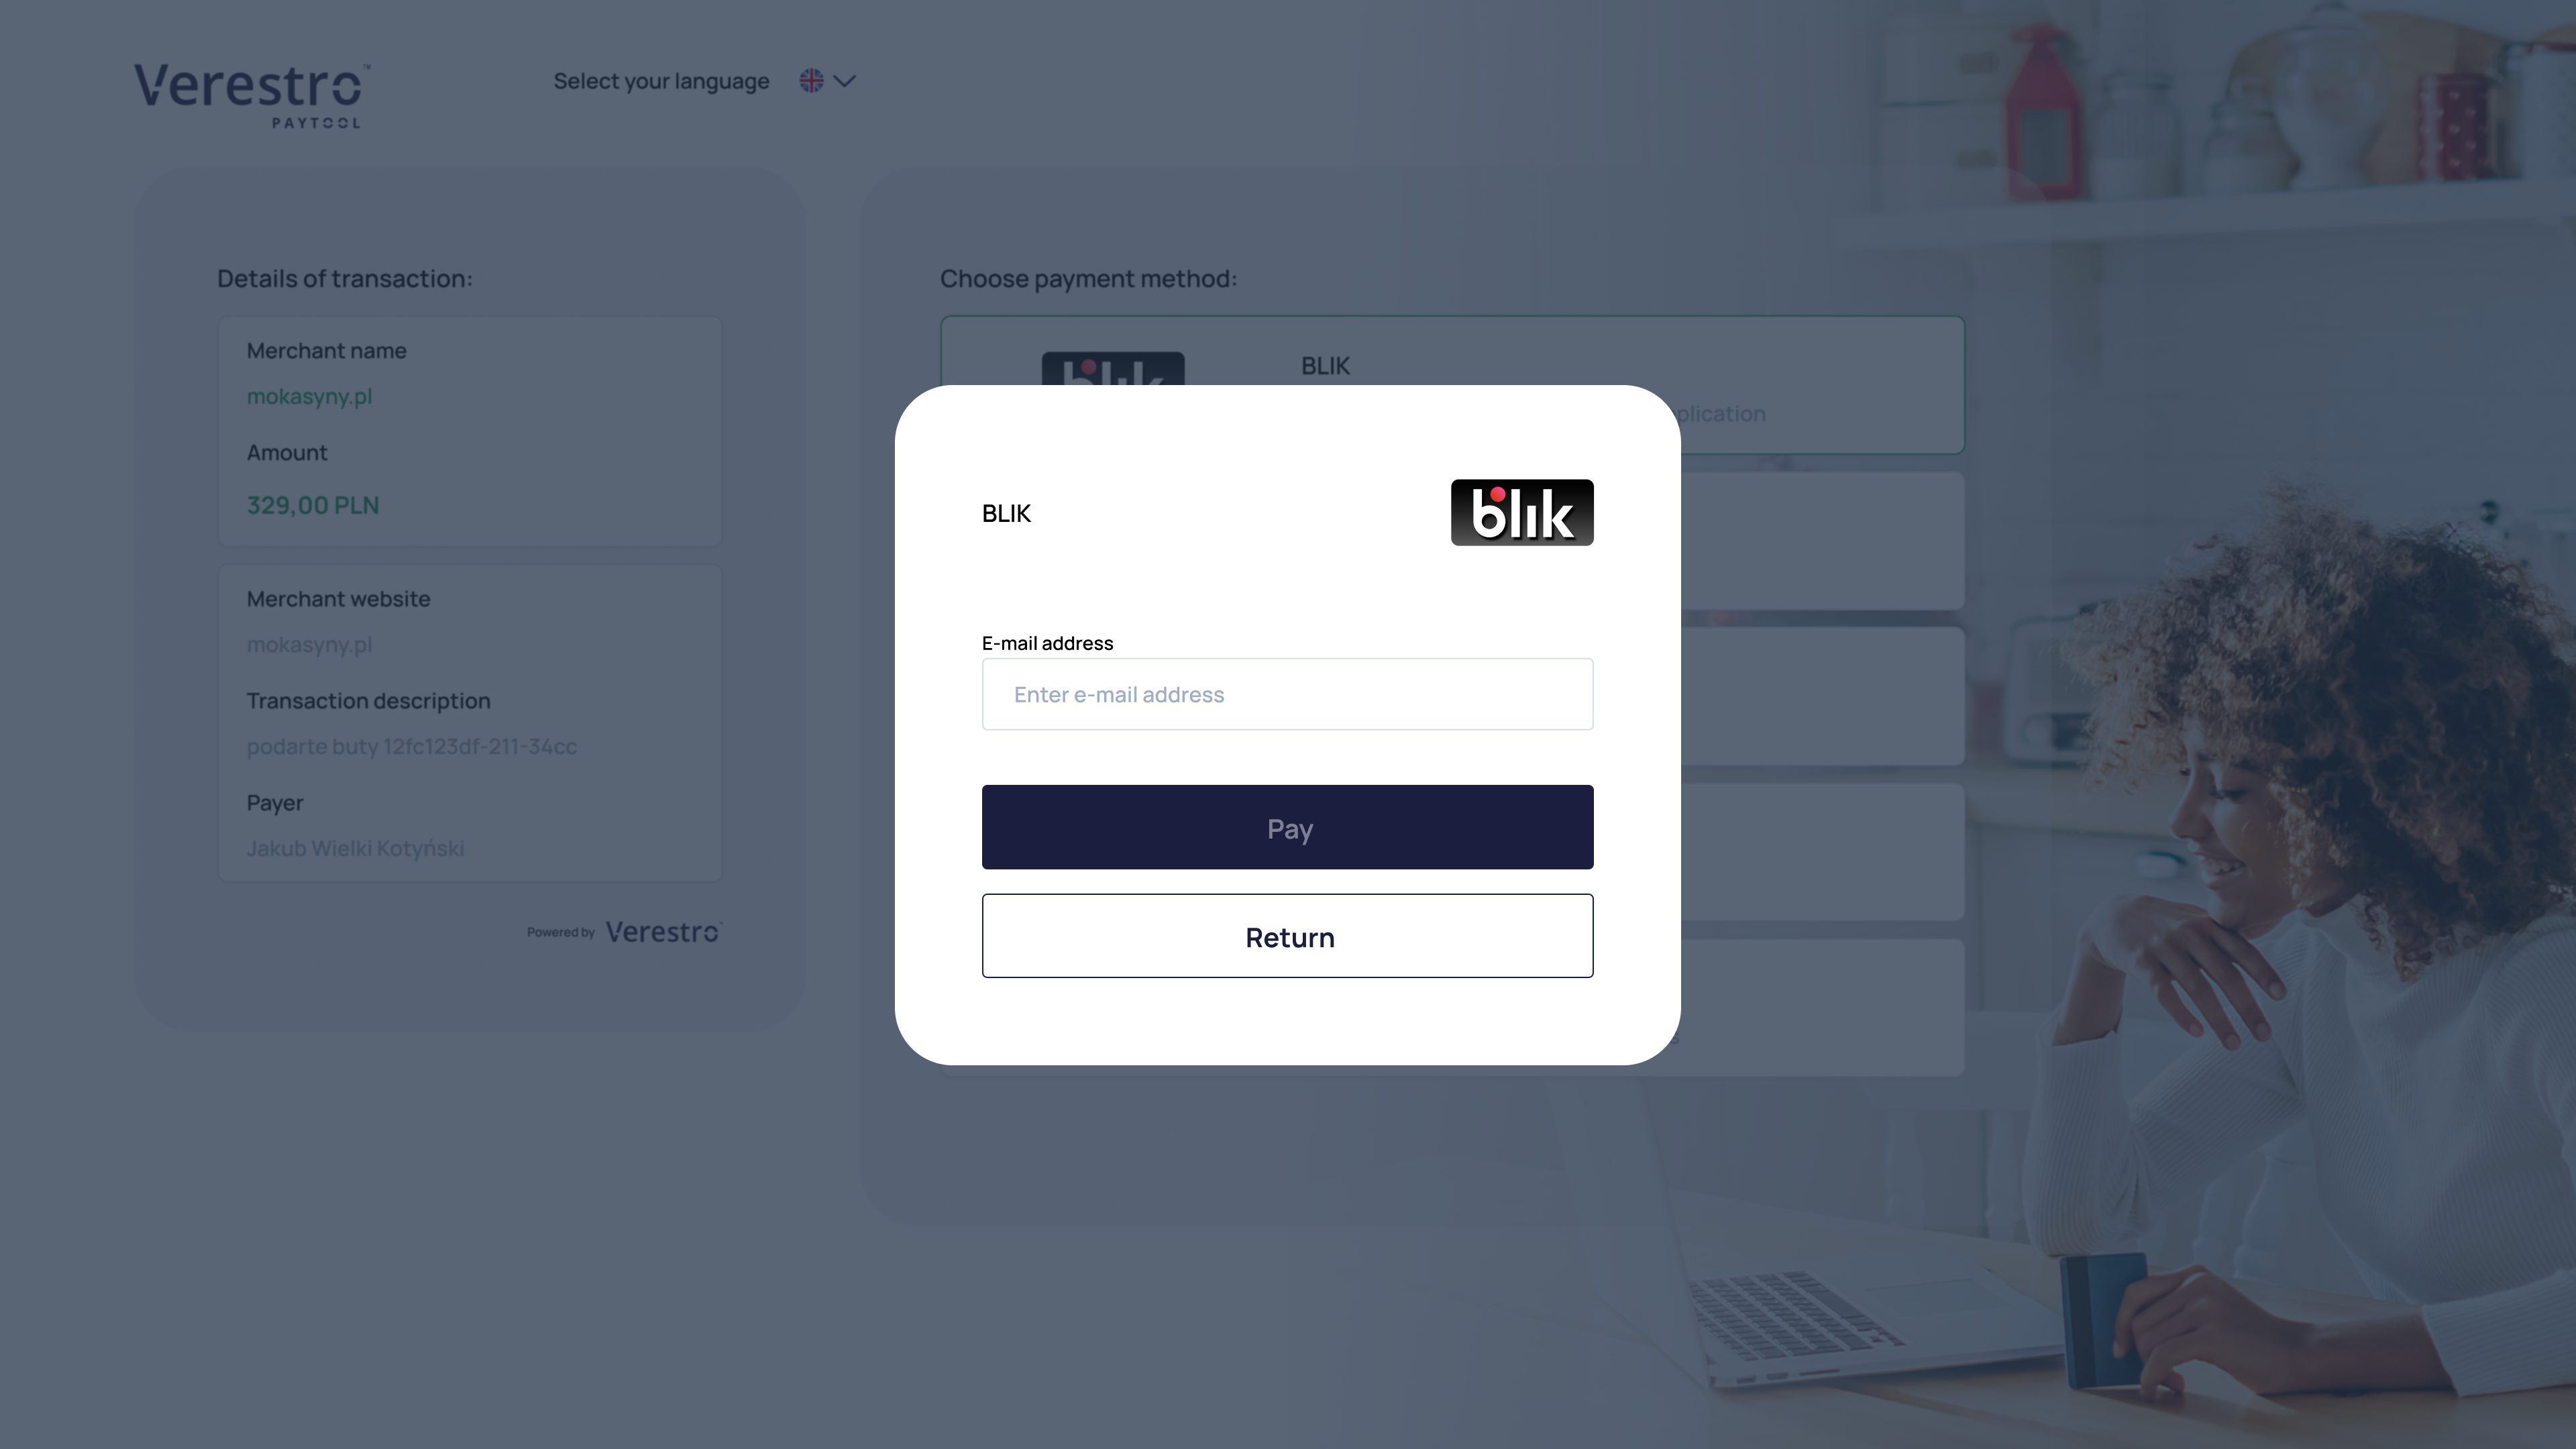
Our solution supports cardless payments using the Blik code. The end user can choose the Blik as the payment method from the Verestro Paytool payment methods list. The option to pay with Blik code is available at the button shown below:
 After selecting this payment method, the end user must provide his e-mail address in the proper field in displayed popup and then confirm the willingness to make the transaction. Blik as an external service, in response opens a view that allows end user to enter the 6 digits code. This step of the process takes place outside the Verestro. The 6 digits Blik code is generated in the end user's bank application. The payment process using Blik code from the end user's perpective has been shown below:
|
|
|

The sequence diagram below illustrates the payment process using Blik step by step
@startuml
skinparam ParticipantPadding 30
skinparam BoxPadding 30
skinparam noteFontColor #FFFFFF
skinparam noteBackgroundColor #1C1E3F
skinparam noteBorderColor #1C1E3F
skinparam noteBorderThickness 1
skinparam sequence {
ArrowColor #1C1E3F
ArrowFontColor #1C1E3F
ActorBorderColor #1C1E3F
ActorBackgroundColor #FFFFFF
ActorFontStyle bold
ParticipantBorderColor #1C1E3F
ParticipantBackgroundColor #1C1E3F
ParticipantFontColor #FFFFFF
ParticipantFontStyle bold
LifeLineBackgroundColor #1C1E3F
LifeLineBorderColor #1C1E3F
}
actor "End User" as user
participant "Paytool Frontend" as pfront
participant "Paytool Backend" as pback
participant "Acquirer" as acq
participant "Blik" as blik
participant "Customer Server" as custback
user->pfront: End user chooses payment by Blik (1)
pfront->pback: Requests for payment by Blik (2)
pback->acq: Orders Blik transaction (3)
acq->blik: Internal request to Blik system (4)
acq<-blik: Response from Blik system with HTML payment Base64 encoded form (5)
pback<-acq: Provides Blik's response (5.1)
pfront<-pback: Provides Blik's response (5.2)
pfront->pfront: Decode Blik HTML form (6)
user<-pfront: Displays Blik HTML form (7)
user->user: Enters Blik's 6 digits code (8)
user-->blik: After form submitting request to Blik system is triggered (9)
pfront<--blik: Redirects to Paytool Frontend (10)
user<--pfront: Shows progress bar because the user has to wait for transaction status (11)
acq<--blik: Webhook with information about Blik's transaction status (12)
pback<--acq: Webhook with information about Blik's transaction status (12.1)
pfront->pback: Get status of the Blik transaction (13)
pfront<-pback: Provides Blik transaction status (14)
user<-pfront: Displays transaction status (15)
custback<--pback: Send transaction postback to provided URL (16) (optional - configurable)
@enduml
ThreeDs authentication
Transactions using payment cards usually require additional authentication of the end user (card holder). In accordance with the Europenian Union directive PSD2, the Paytool solution uses the threeDs protocol version 2.0 for the authentication process. The threeDs process consists in asking the card issuer whether additional authentication of the card holder is necessary or not. It depends on the bank's response whether the threeDs process will be necessary to perform. This is determined by one of two statuses that the bank returns during the transaction process: FRICTIONLESS or CHALLENGE. The meaning of each status is described in the section ThreeDs modes. We take responsibility for performing the threeDs authentication process. The sequence diagrams below illustrates the threeDs authentication process step by step separatly for both cases: FRICTIONLESS or CHALLENGE.
Note: ThreeDs authentication is required for card payments. This authentication method does not apply to BLIK transactions.
The sequence diagram below illustrates the 3D Secure authentication process step by step
@startuml
skinparam ParticipantPadding 30
skinparam BoxPadding 30
skinparam noteFontColor #FFFFFF
skinparam noteBackgroundColor #1C1E3F
skinparam noteBorderColor #1C1E3F
skinparam noteBorderThickness 1
skinparam sequence {
ArrowColor #1C1E3F
ArrowFontColor #1C1E3F
ActorBorderColor #1C1E3F
ActorBackgroundColor #FFFFFF
ActorFontStyle bold
ParticipantBorderColor #1C1E3F
ParticipantBackgroundColor #1C1E3F
ParticipantFontColor #FFFFFF
ParticipantFontStyle bold
LifeLineBackgroundColor #1C1E3F
LifeLineBorderColor #1C1E3F
}
actor "End User" as user
participant "Customer App" as custback
participant "Paytool Frontend" as pfront
participant "Paytool Backend" as pback
participant "Acquirer" as acq
participant "Access Control Server" as ACS
user->pfront: Confirm payment order
pfront->pback: Execute transaction with 3DS
pback->acq: Order transaction with 3DS
== FRICITONLESS ==
acq->pback: Response with 3DS mode FRICTIONLESS
pback->pfront: Return status success
pfront->user: Display status success
pback-->custback: Transaction result
== 3DS mode = CHALLENGE ==
acq->pback: Response with 3DS mode CHALLENGE + ACS auth template
pback->pfront: Return status + ACS auth template
pfront->user: Redirect to ACS auth template
user->ACS: Authenticate
ACS->user: Display authentication status
ACS->user: Redirect to Paytool Frontend
ACS-->pback: Authentication result
pfront->pback: Get transaction status
pback->pfront: Return transaction status
pfront->user: Display transaction status
pback-->custback: Transaction result
@enduml
ThreeDs modes
|
ThreeDs mode |
Description |
|
|
The response containing the |
|
|
The response containing this mode denotes that the card holder must be additionally authenticated. Along with the |
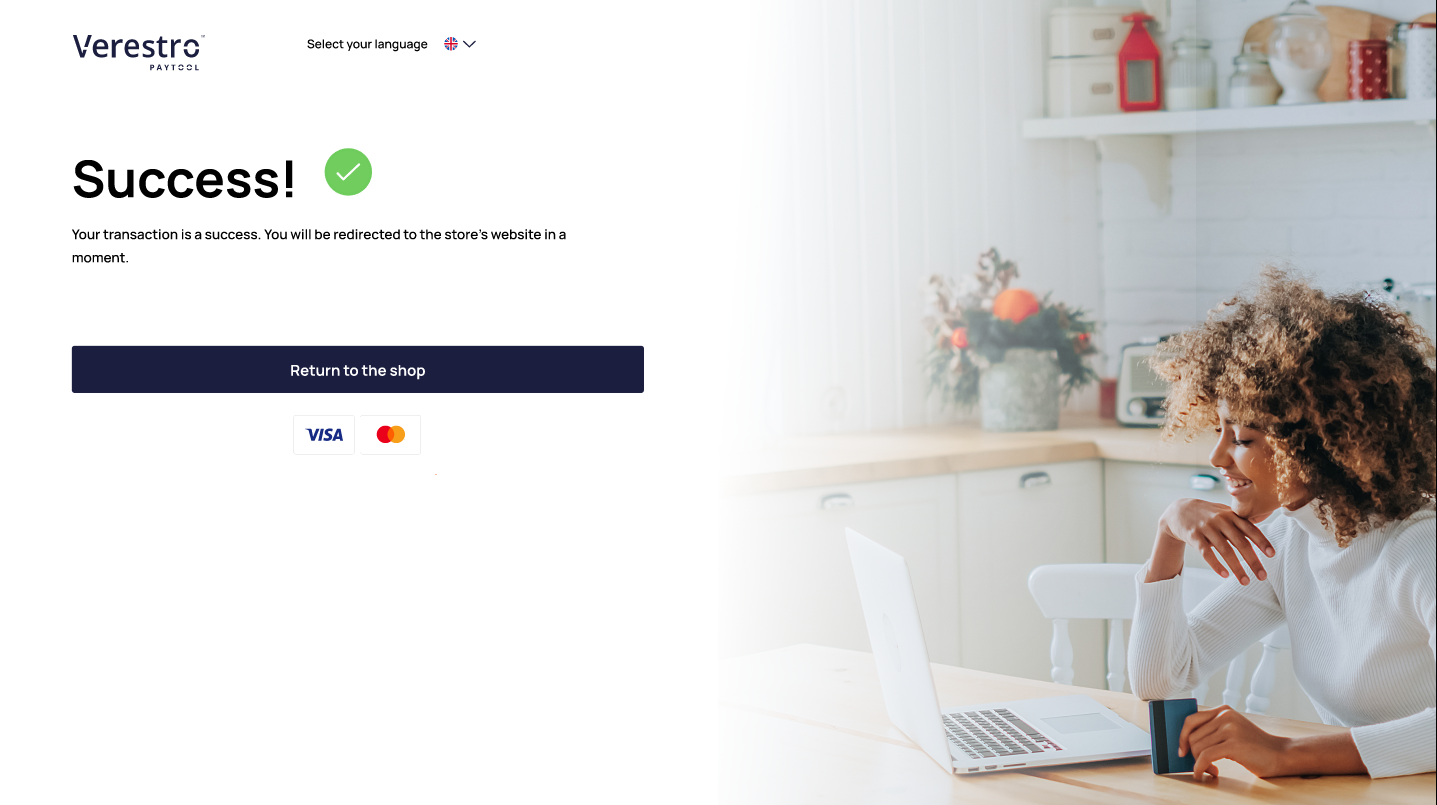
Transaction result
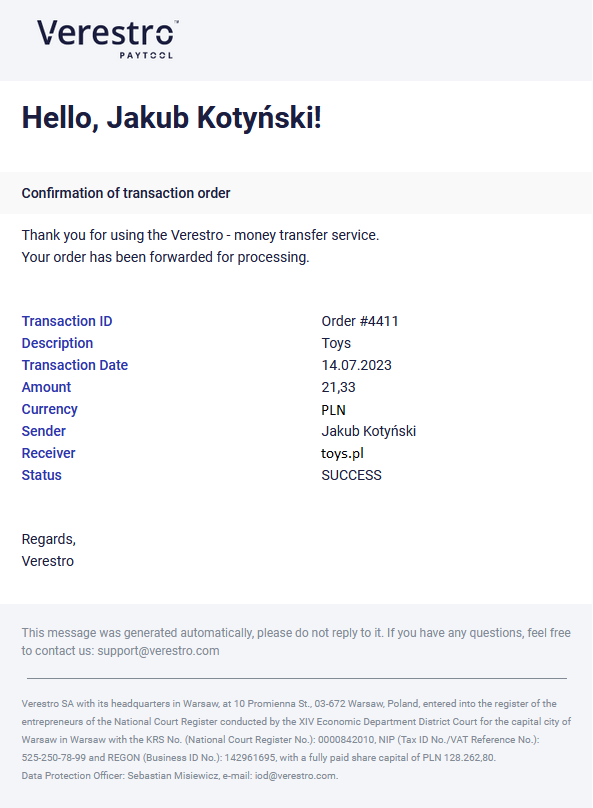
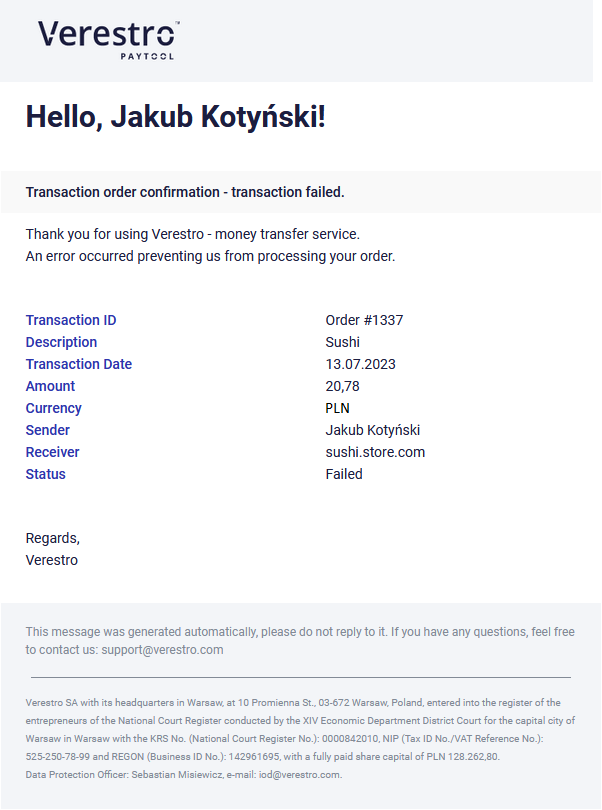
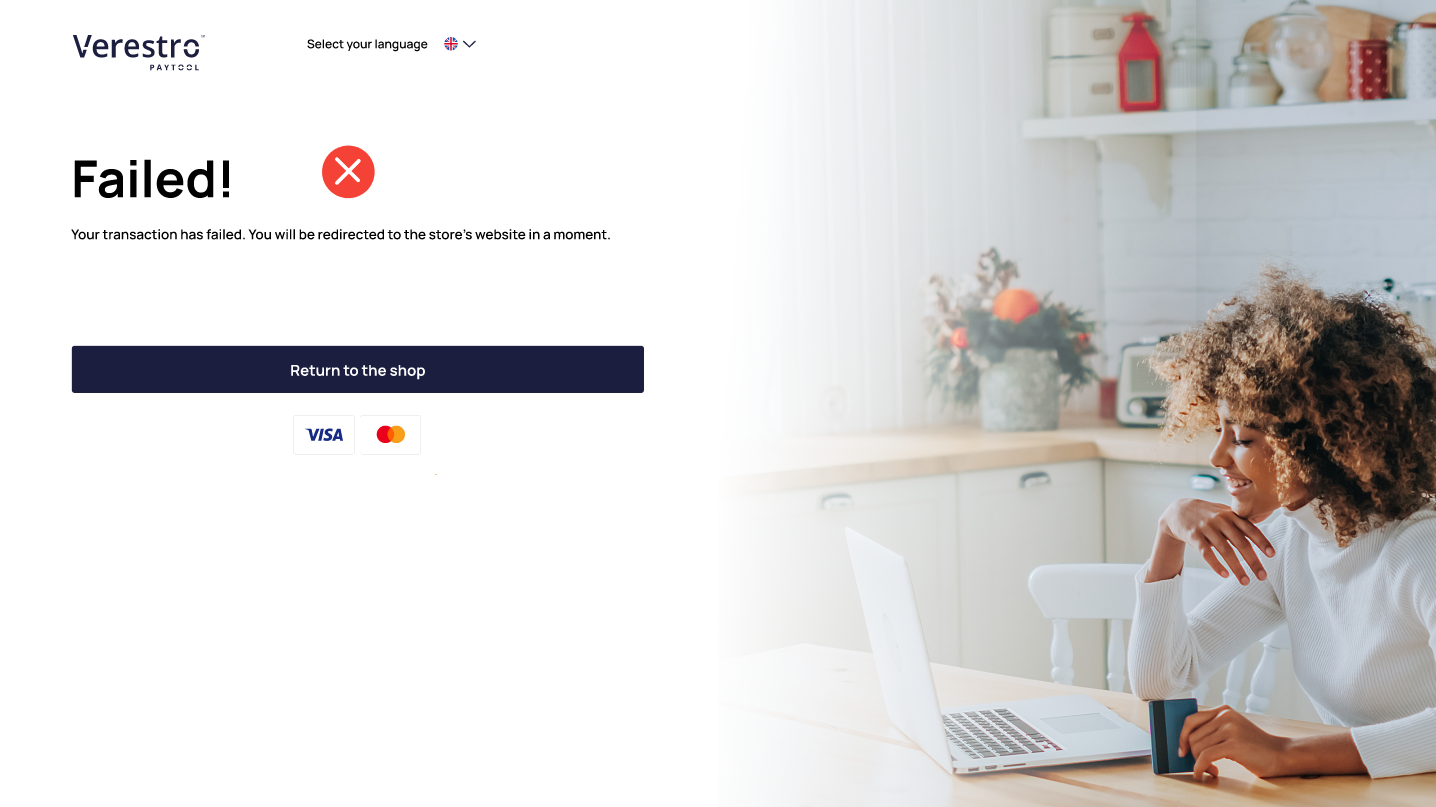
Depending on whether the transaction was successful or not, the end user will see the appropriate status on the screen. From the status screen, he is able to return to the store's website manually - by clicking the Return to the shop button or wait for an automatic redirection. At the same time, we will send you post-transaction notification containing the status and details of the transaction. Depending on the configuration of your merchant account, an e-mail notification may be sent to the end user. Transaction status views from the end user's perspective are presented below:
 |
 |
Notification after transaction
As mentioned in the Transaction result chapter, Paytool solution supports the sending of post-transaction notifications informing you about the status of a given transaction made in your context. This functionality is optional and it is up to you to decide whether you want to receive post-transaction notifications. This decision is made during the onboarding process and always can be edited. We recommend using this functionality, as this allow you to receive information on each of the transactions made using Verestro Paytool.
Important: In order for you to receive notification after transaction, you must define your own endpoint. You can provide us your notification URL address during the onboarding process or later. We will use this notification URL address to send you post-transaction notifications.
Post-transaction notification example sent by Verestro Paytool to the Customer
{
  "transactionId": "string",
  "orderNumber": "9afds032dad",
  "transactionState": "FAILED",
  "amount": 0,
  "message": "string",
  "currency": "string",
  "externalTransactionId": "string",
  "transactionType": "ONE_TIME_PAYMENT",
  "cardDetails": {
    "cardProvider": "MASTERCARD",
    "cardNumber": "512485******4875"
  },
  "failedDetails": {
    "code": "SYSTEM_ERROR",
    "message": "E0200: Transaction rejected, card is blocked"
  }
}
End user notifications
As mentioned in the Transaction result chapter, Paytool solution supports an e-mail notification sending. Such notification contains the status and details of the transaction. This message is purely informative so that the payer knows that a transaction has been made in the context of his chosen payment instrument. This functionality is optional and it is up to you to decide whether you us to send end users notifications after the transaction. This decision is made during the onboarding process and always can be edited.
Note: The appearance of the e-mail notification is configurable.
|
Example e-mail notification after successful transaction |
Example e-mail notification after failed transaction |
|
|
|