Payout to xPay
The Payout via Google Pay and Apple Pay Card product allows you to generate a payment link and then send this link to the potential recipient of your transfer.
The recipient selects the payment card to which he wants to receive the transfer. He can either enter the card number manually or choose it from the cards added to his Apple Pay or Google Pay wallets. The xPay wallet the recipient can use is determined based on the operative system he is using – Apple Pay for iOS and Google Pay for Android.
Article
You can find more knowledge about products on this site.
Payout to xPay
What is it about?
We often find ourselves in situations where we need to transfer money to someone else. We also want the funds to reach the recipient as quickly as possible and for the transfer fee to be as low as possible. Additionally, different countries offer specific transfer methods that may not be available elsewhere—for example, BLIK in Poland.
In such cases, many people consider a standard SEPA/SWIFT transfer. While this is a solution, such transfers usually take until the next day to arrive. Moreover, we don’t always have the recipient’s account number or IBAN which is obligatory in this case.
The best option is to initiate a transfer without needing to enter any of the recipient’s payment instrument details such as card number or account number (besides, in many cases we will not be able to get such data). It is enough for your recipient to have any messaging app so that you can notify them that you are sending funds, which he or she can then collect onto his or her card from the xPay wallet such as Apple Pay or Google Pay wallet.
In this article, I will try to explain how xPay card tokens work, how you can easily send funds as a sender without knowing the recipient’s account number, card number, etc., and how to receive such a transfer using xPay wallets as a recipient.
xPay wallet - what is it?
Let’s start this chapter by explaining what xPay wallets are. These are digital wallets that store cards online and enable fast and secure payments without the need for a physical card. They work on smartphones, smartwatches, and other mobile devices. The two most popular xPay wallets are, of course, Apple Pay and Google Pay. Both of these wallets are available in almost all parts of the world.


How does it work?
Let's describe the basic xPay wallet flow step by step:
- Adding a card – The user adds his payment card to the wallet (Apple Wallet for Apple Pay, Google Wallet for Google Pay). This can be done manually or through a banking app.
- Tokenization – Card details are not stored or shared during transactions. Instead, the system generates a unique "token" (an encrypted card identifier), which enhances security. We will talk more about this step later.
- Contactless payments – To pay in a physical store, simply hold a phone or smartwatch near a payment terminal and authenticate the transaction using Face ID, Touch ID, or a PIN code.
- Online and in-app payments – Users can also pay in online stores and apps without entering their card details—just select Apple Pay or Google Pay as the payment method.
- Security – Apple Pay and Google Pay do not share actual card details with merchants, minimizing the risk of fraud.
Both systems (either Apple Pay and Google Pay) are available in many countries and are compatible with most banks and payment cards.
What is an xPay card token?
An xPay card token is a unique, encrypted identifier generated for a user’s payment card when it is added to the xPay wallet. Instead of storing or transmitting the actual card details during transactions, xPay uses this token to complete the payment process. This tokenization process enhances security by protecting sensitive card information and minimizing the risk of fraud.
In simpler terms, the token acts as a reference for your card number, allowing you to make secure payments without exposing your real card data. This token has the structure of a standard PAN (Primary Account Number).
How does Payout to xPay work?
As mentioned earlier, xPay card tokens are generated and encrypted references linked to a real card stored in a user’s Apple Pay or Google Pay wallet. We also know that these tokens are used for making payments. But if they can be used for payments, can’t they also be used to receive money? The answer is yes - they can be, and this is exactly how the Payout to xPay solution by Verestro works.
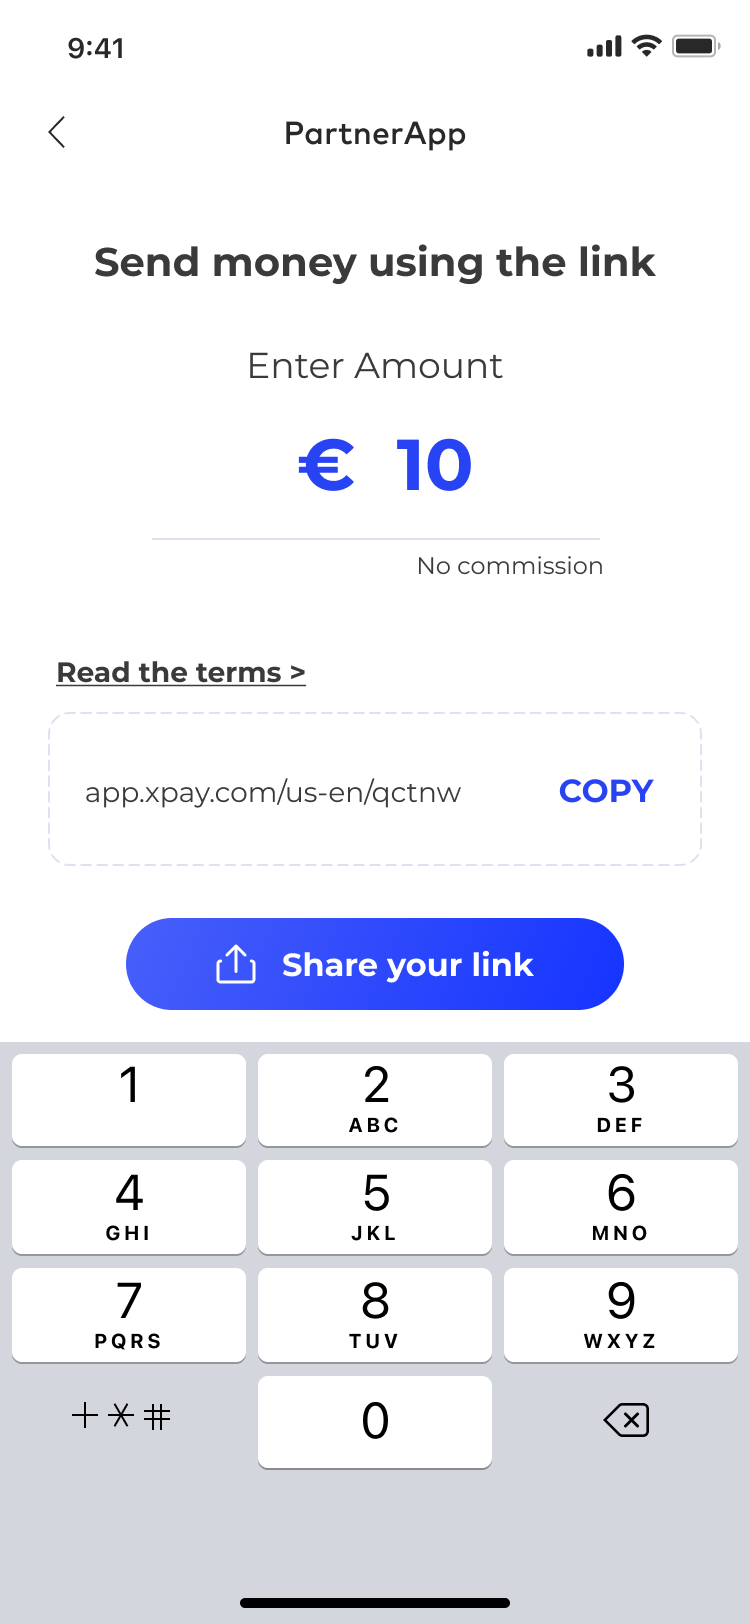
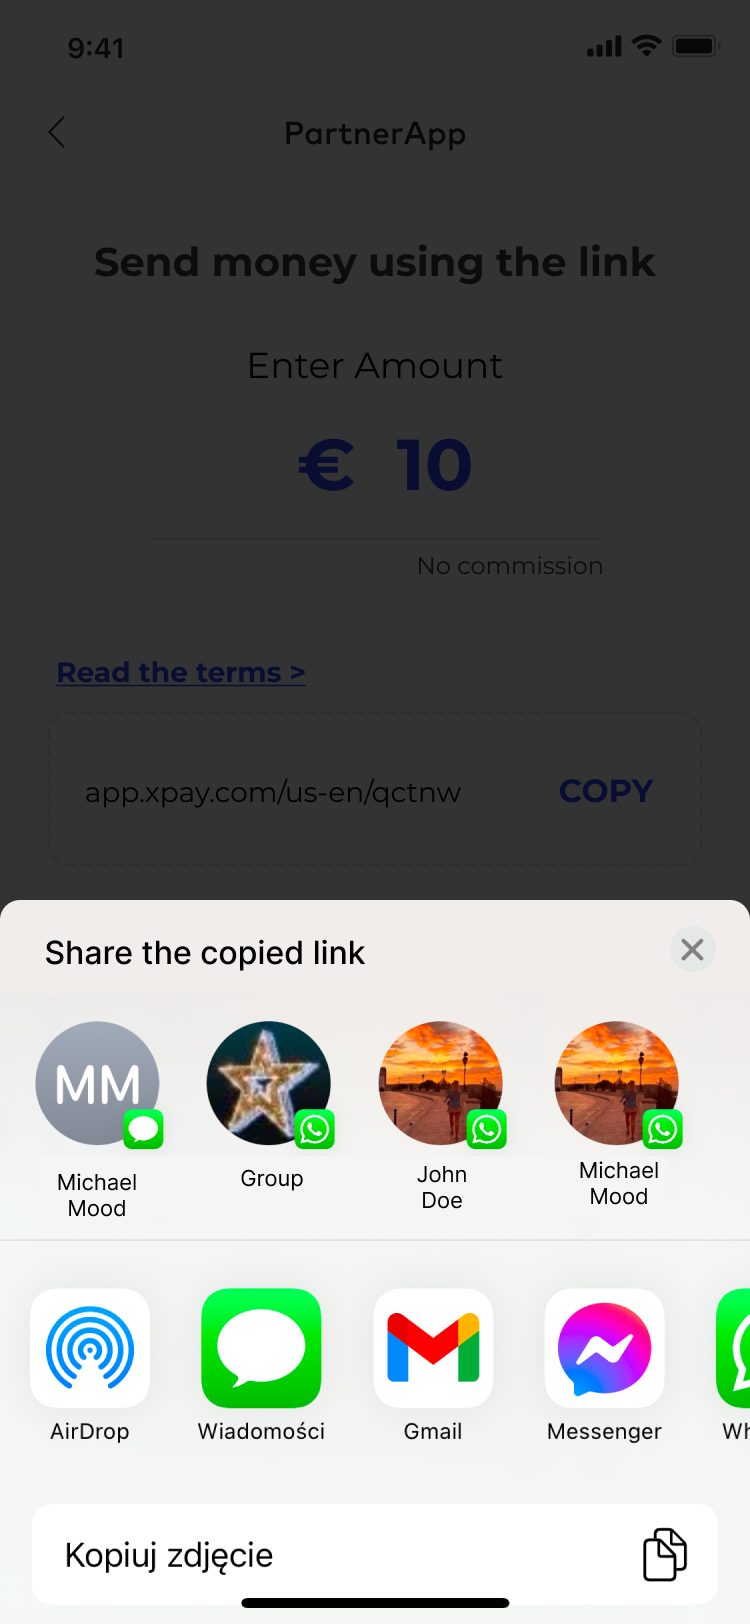
For example, let’s consider the following scenario: the sender does not know the recipient’s account number or card number. However, he has the recipient saved in his contact list in the Messenger app (or any other messaging app). The sender opens the Payout to xPay application, enters the amount and currency in which he or she wants to order the transfer. The app then generates a payment link, which the sender can share with the recipient via Messenger app (or any other messaging app). At this point, the sender’s role in the process is complete.
|
Sender's view |
|
|
|
|
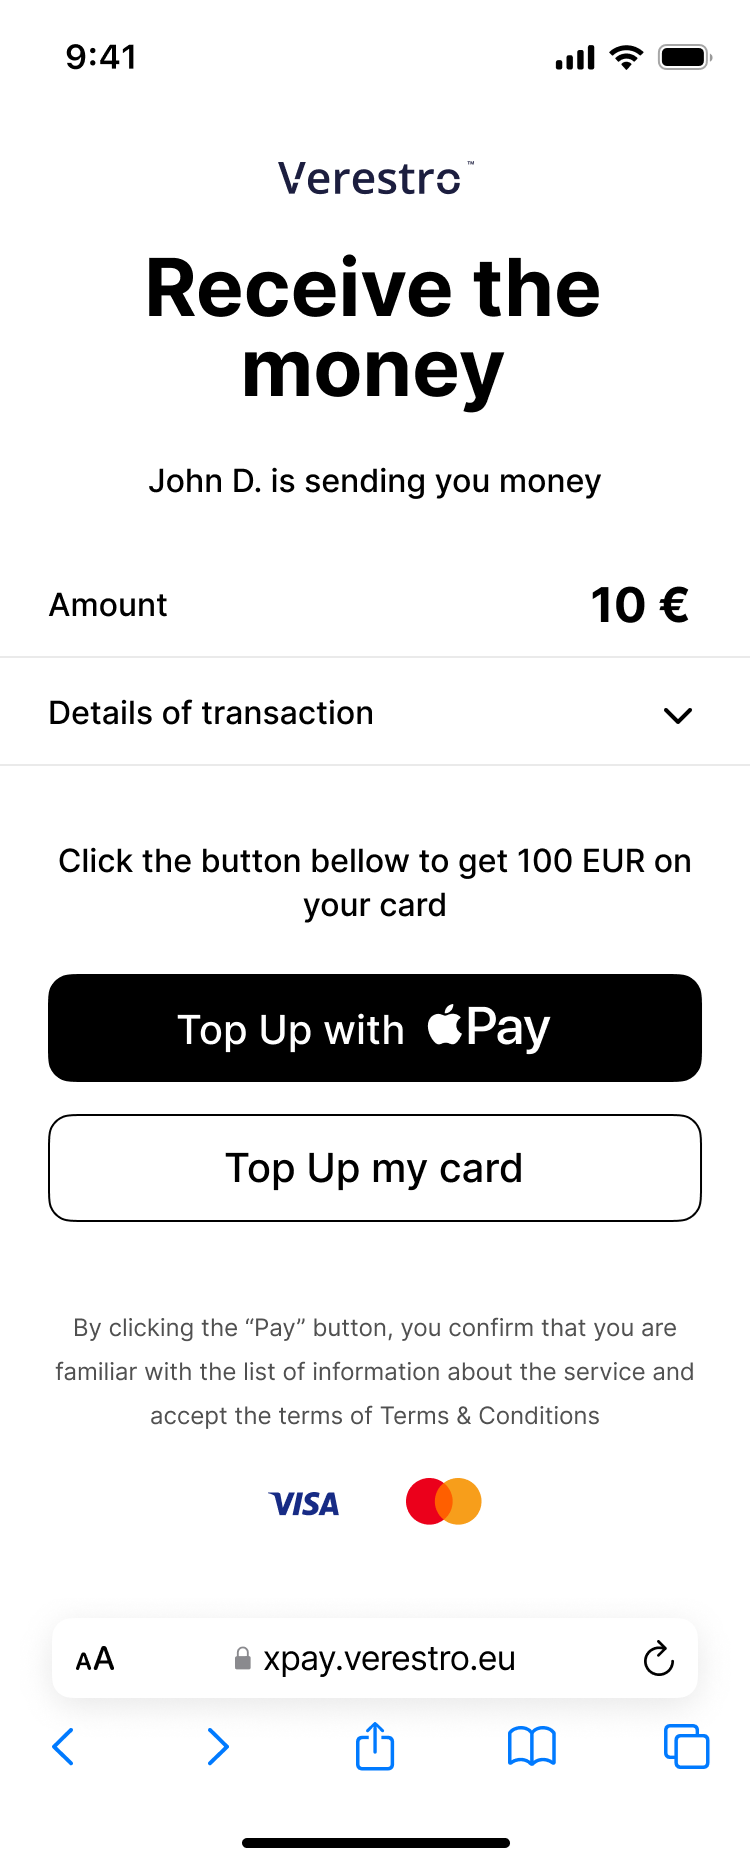
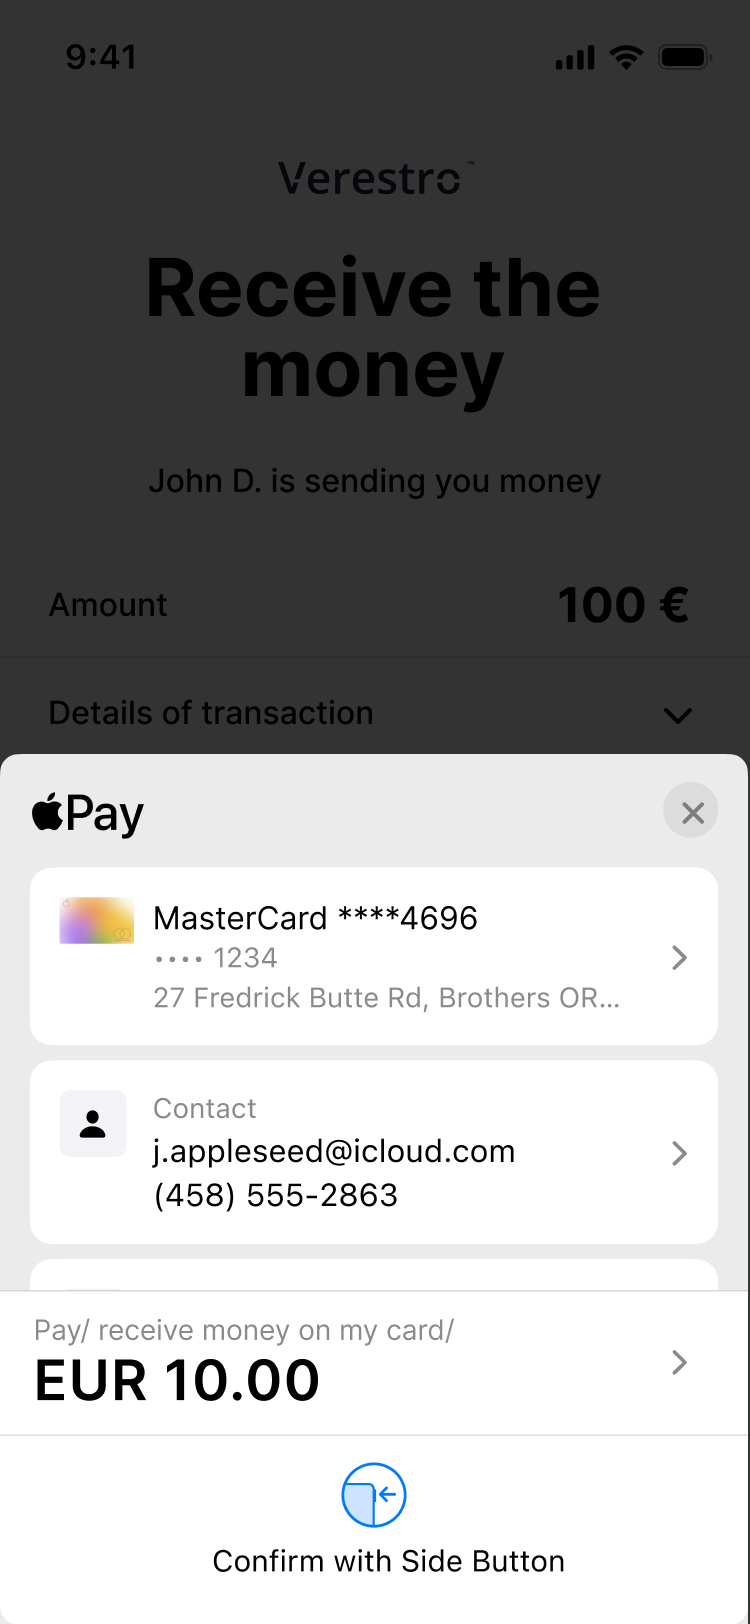
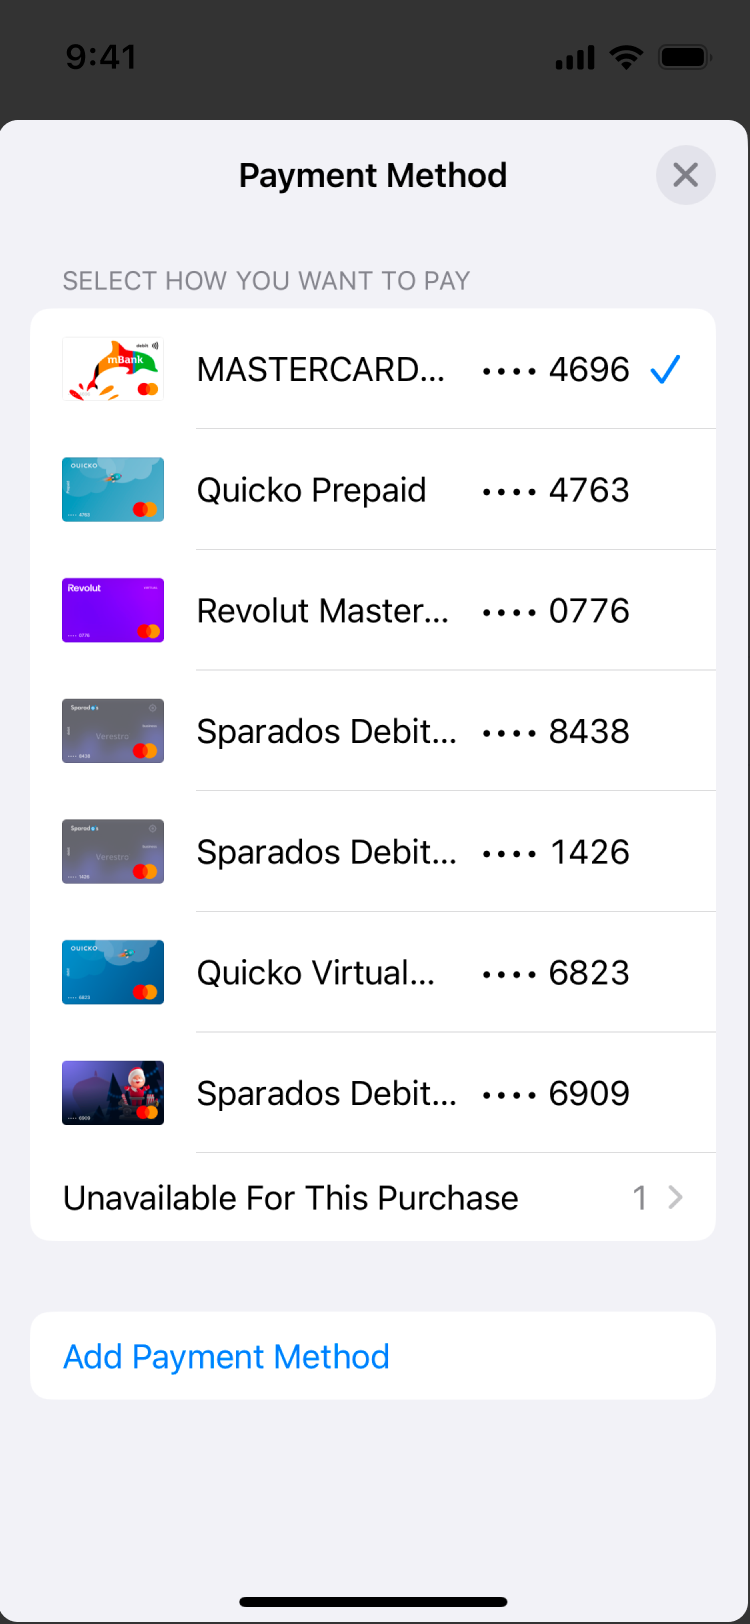
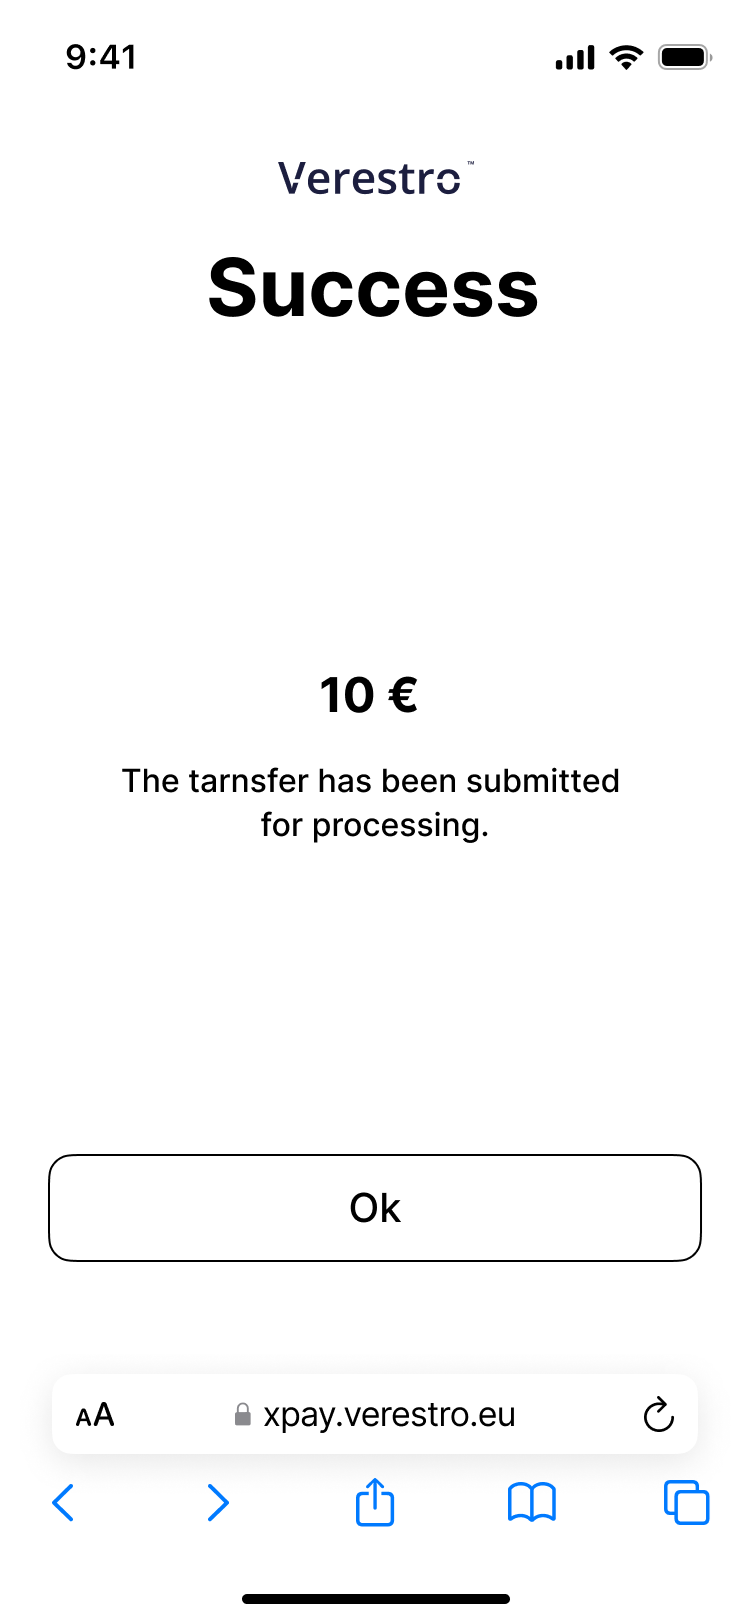
The recipient receives a message from the sender about the initiated transfer along with the payment link previously generated by the sender. By opening this link, the recipient is redirected to a view with the details of the transfer that was initiated for him. In this view, there is also an Apple Pay button (iPhone or other iOS device) or Google Pay button (Android, Windows or other non-iOS device). After opening the xPay wallet, the recipient selects the card to which he or she wishes to receive the funds. The xPay server returns a card token generated for the selected card to our application (The token is encrypted with Verestro's public key, so no one else has access to it), and our application initiates the transfer of the amount and currency sent by the sender to the chosen recipient's card.
| Recipient's view | ||||
 |
 |
 |
 |
 |
Introduction
The Payout to card and xPay product was created to allow you and your users to send funds from existing balance to the chosen recipient in the form of payment link. The sender does not need to know the recipient's card data. After initiating the transfer, sender will receive a payment link that can be sent to the recipient via any messenger, such as WhatsApp or Telegram, or via a regular SMS.
The recipient who receives the link will be informed about the possibility of claiming the funds. Upon opening the link, the Payout to card and xPay application will display the view with information the sender is transferring money to him. Our solution allows the recipient to select a card from xPay wallet or provide card number manually. The recipient clicks the Apple Pay/Google Pay button or plain card number button available in our app's interface. Depending on the recipient choice we display a list of cards added to the wallet or open proper input for card number. After choosing source of the card, the funds will be transferred to the chosen card.
The possibility to order payout will be created by our system after your company pass the KYB process. Thus you will be able to create a balances for your company and your users. Additionally, you will be able to manage and track your payouts history using Admin Panel we provide to our Customers.
Tip: Check the DEMO version of the application here.
How to connect with us?
Integration with Payout to xPay can be divided into two parts. The first stage is business onboarding, where the terms of the contract are defined and all documents are confirmed (including KYB verification).
The second stage is technical integration. At this stage your company instance will be created in our system. Once we complete these steps, you can integrate your application with our API following Technical documentation.
Note: It is required that you have an account in Acquirer's system which will settle your transactions. For more informations please contact our Sale Department. We are suggesting to use Fenige - our partner acquiring institution.
Overview
The chapter focuses on the description of each of the components involved in the payout process and what each component is responsible for. All mentioned components and their responsibilities are made and managed by Verestro.
Terminology
|
Name |
Description |
|
Customer/Merchant |
Institution which uses and integrates with Verestro products. |
| xPay | An external institution that holds cards in a mobile wallet - Apple Pay and Google Pay wallet. |
| Acquirer | An external institution that communicates with the card issuer, protects against fraud and taking responsible for executing the transaction and checking the correctness of 3D Secure authentication. |
| Balance | The current balance of funds for a given user stored in the Antaca service. |
| Card | A payment instrument issued by the issuer to a given user. You can send and receive funds using the card. |
|
Issuer |
The Bank/card issuer. It determines whether a given transaction can be performed and whether 3D Secure authentication is needed. |
|
Payout |
A method that allows you to order a transfer from your balance to provided payment card. |
|
User |
An end user, e.g. the entity to which the card was issued. |
|
Component |
An application service that is a part of the entire technical solution, for example Payout API. |
Application components
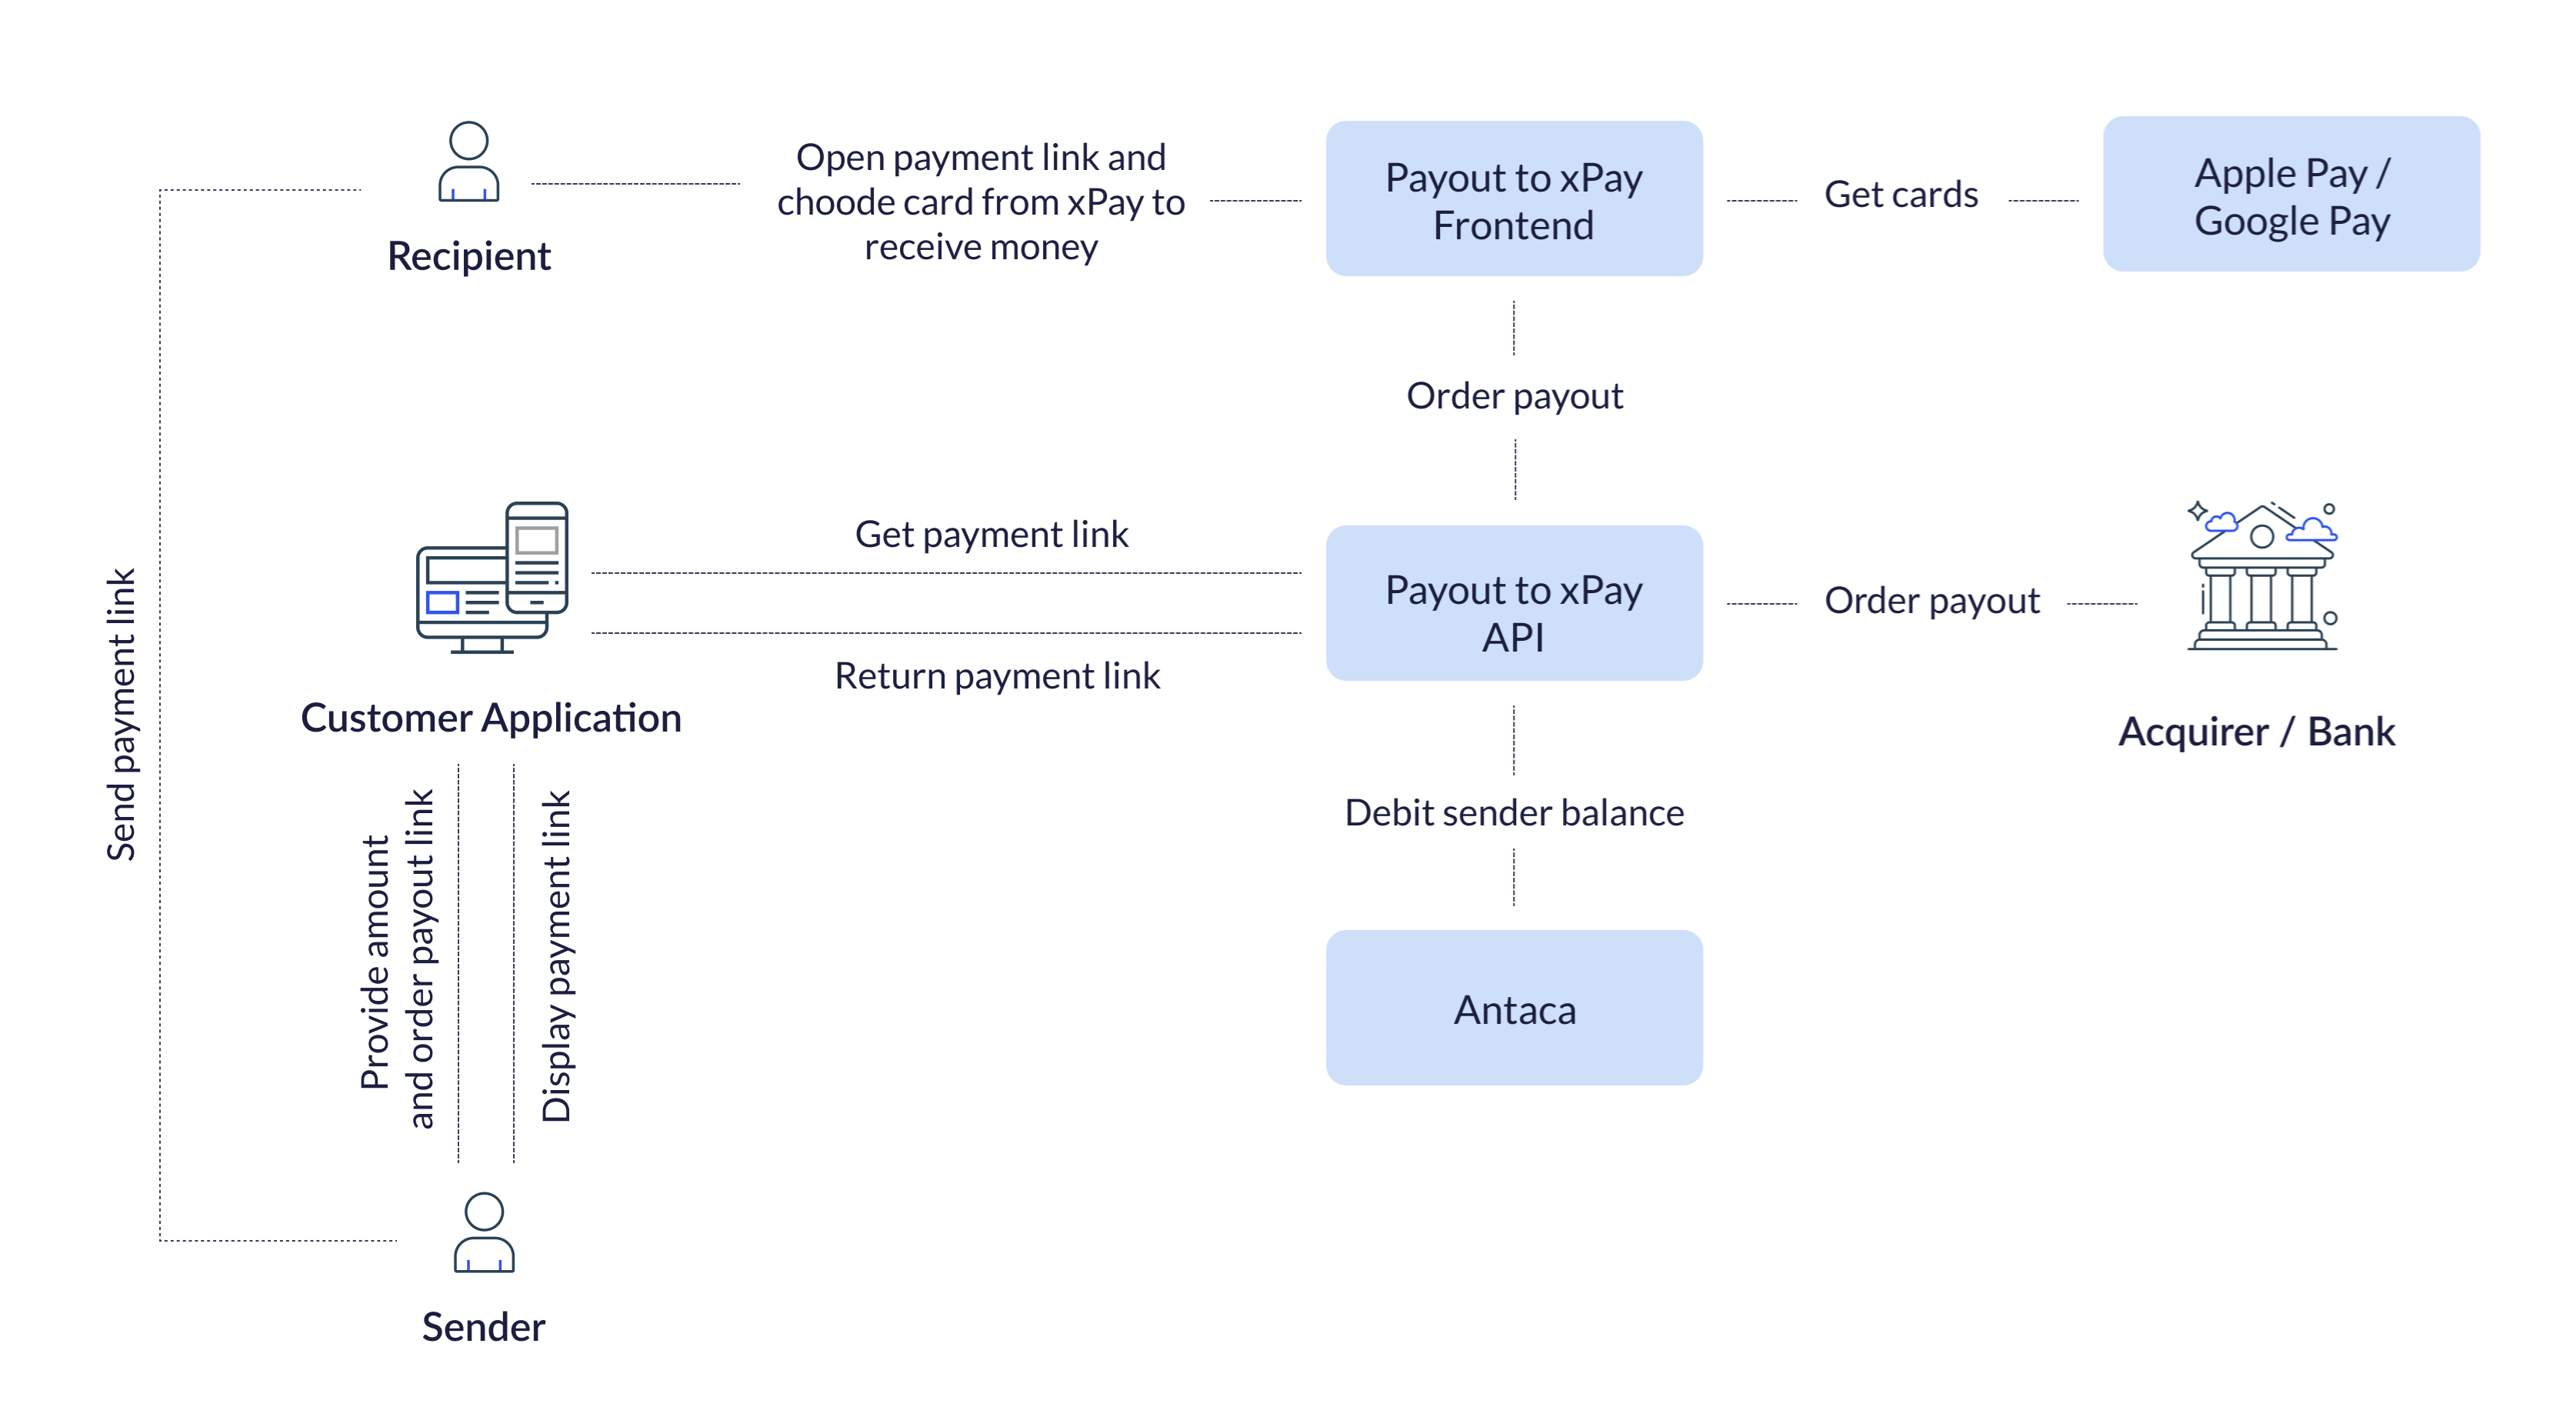
This chapter is describing all components involved in the processes included in the Payout to card and xPay product. Each of the sections below describes each of the components. Internal services are the key elements of the solution implemented on the Verestro side. Each of them has a separate responsibility in the entire Payout to card and xPay process. Below table describes every internal components in our Payout to card and xPay application. Payout to card and xPay is our internal service integrated with Google Pay and Apple Pay, thus enabling getting the card tokens from these wallets, generating pay me link allowing to order payouts and connecting with acquirer to perform ordered transfer and handling 3D Secure process.
|
Component |
Description |
|
The backend component of the Payout to card and xPay application. It is responsible for opening a payment session, generating a payment link and ordering the transaction to an acquiring institution. |
|
|
The frontend component of the Payout to card and xPay application. It contains a frontend view to which the recipient of the payment link is redirected. In addition, it gets recipient's card from xPay Wallet and passes it to the Payout to card and xPay API. |
|
|
Backend component which manages balances and allows certain operations related to them. Such operations include creating a new balance, debiting and crediting a balance or deactivating a balance. This component is not part of the Payout to card and xPay application, but it is crucial to this service as the funds of the payout sender are taken from his balance in Antaca. |
@startuml
skinparam ParticipantPadding 30
skinparam BoxPadding 30
skinparam noteFontColor #FFFFFF
skinparam noteBackgroundColor #1C1E3F
skinparam noteBorderColor #1C1E3F
skinparam noteBorderThickness 1
skinparam sequence {
ArrowColor #1C1E3F
ArrowFontColor #1C1E3F
ActorBorderColor #1C1E3F
ActorBackgroundColor #FFFFFF
ActorFontStyle bold
ParticipantBorderColor #1C1E3F
ParticipantBackgroundColor #1C1E3F
ParticipantFontColor #FFFFFF
ParticipantFontStyle bold
LifeLineBackgroundColor #1C1E3F
LifeLineBorderColor #1C1E3F
}
actor "Money Sender" as sender
participant "Customer App" as customer
participant "Payout App" as verestrobackend
participant "Google/Apple Pay" as xpay
actor "Money Recipient" as user
== Customer's part of the process ==
sender->customer: Order payout (trx data)
customer->verestrobackend: Create payment link(trxData, balanceId)
verestrobackend->verestrobackend: Check if the user has sufficient funds
customer<-verestrobackend: Return payment link
sender<-customer: Display payment link to Sender
====
sender-->user: Send payment link
note left of user: Recipient clicks on the link
== Verestro's part of the process ==
user->verestrobackend: Redirect recipient to payment link webview
note right of verestrobackend: Recipient sees that he can claim money from sender
note right of verestrobackend: Recipient choosed xPay
verestrobackend->xpay: Open recipient xPay wallet
note left of xpay: Recipient chooses card
verestrobackend<-xpay: Return card
verestrobackend<-verestrobackend: Make payout to recipient card
customer<-verestrobackend: Notify customer about payout status
user<--verestrobackend: Top up card if status success
====
@enduml
Payout to card and xPay
A component that supports all key Payout to card and xPay processes. Each of the processes will be described below, maintaining the sequence of steps that take place from the initiation of the payout by the sender to the recipient of the payment using the xPay card token. The Payout to card and xPay component is responsible for the following actions:
| 1. Initialization of the payment shipment, i.e. the moment when the option to order a transfer to a given recipient was selected and completion of transfer information such as amount or currency was provided by money sender. Payout to card and xPay API checks whether the sender has sufficient funds in the balance. |
| 2. Payment link creation and thus opening a payment session in our system (storing information about the planned transaction, such as amount and currency). The generated payment link is returned to the sender so that the sender can send it to the potential recipient as a SMS message or via other communicators. |
| 3. Opening Payout to card and xPay frontend view. This is the view to which the recipient is directed after clicking on the link received from the sender. This view shows what amount the sender is sending and how the recipient can receive the money being sent (select the card from xPay wallet or provide card number manually to receive the money). |
| 4. Communicating with xPay server (if xPay wallet has been chosen as the source of the card). Once the xPay wallet is selected, we communicate with Apple Pay or Google Pay so that the recipient can select the appropriate card from the wallet. The selected recipient's card is returned in the form of an encrypted token to which the declared amount should be transferred. |
| 5. Processing payment. Payout to card and xPay API will perform the order to top up the recipient's card by contacting the acquiring institution and debiting the sender's balance in Antaca. |
Antaca
This is the initial component in the payout process. Antaca is responsible for creating balances for you company and it's users, or allowing to credit/debit your balance depending on the direction of the funds. Antaca also monitors the balance of each entity, ensuring that the requested action on the balance is performed after meeting specific conditions, for example, it is not possible to debit the balance for more funds than are currently in the balance (you cannot send 100 EUR if you have only 99 EUR on your balance). It is also not possible to top up a balance that has been deactivated. The table below shows Antaca's methods for creating, crediting and debiting a balance.
Tip: In the Payout to card and xPay product, Verestro is responsible for appropriately calling the Antaca methods that credit or debit the balance. You, as a Customer, only need to send us information on which balance and of what amount we should call a given operation.
Use cases
This chapter describes the business functions that can be performed by having a company balance in the Verestro system and using Payout via xPay card token. We also present end user default views presented during using the application.
Know your business
The first step to starting integration is to complete the KYB process. This process is required to identify and verify business clients. Automatic registration process ensures that all the information and documents provided by the clients gone properly through AML verification. Business client registration process may take around 10-15 minutes. At this link you can find out what exactly the KYB process is and what it looks like. KYB in Verestro is performed with the help of an external verification provider - Mobiltek.
Note: AML (Anti-Money Laundering) is a set of policies, procedures, and technologies that prevents money laundering.
Customer balance management
Description of methods in Antaca service to create and manage the balance.
| Method |
Description |
|
Method that allows you to create a balance for your company. |
|
|
Method that allows you to top up the created balance. |
|
|
Method that allows you to debit the created balance. |
Note: The balance for your corporation is created during its registration in our system.
You can create end-user balances from the Administration Panel created for your corporation or use the Create balance method mentioned above.
Initialize payment link
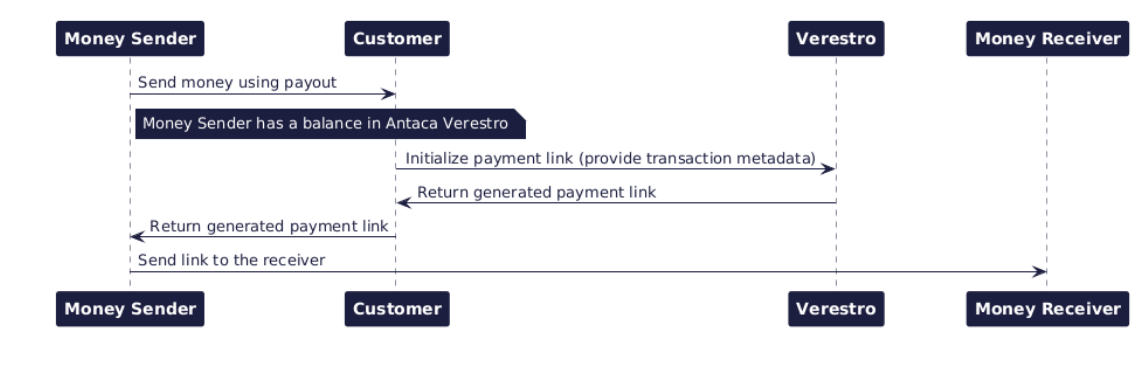
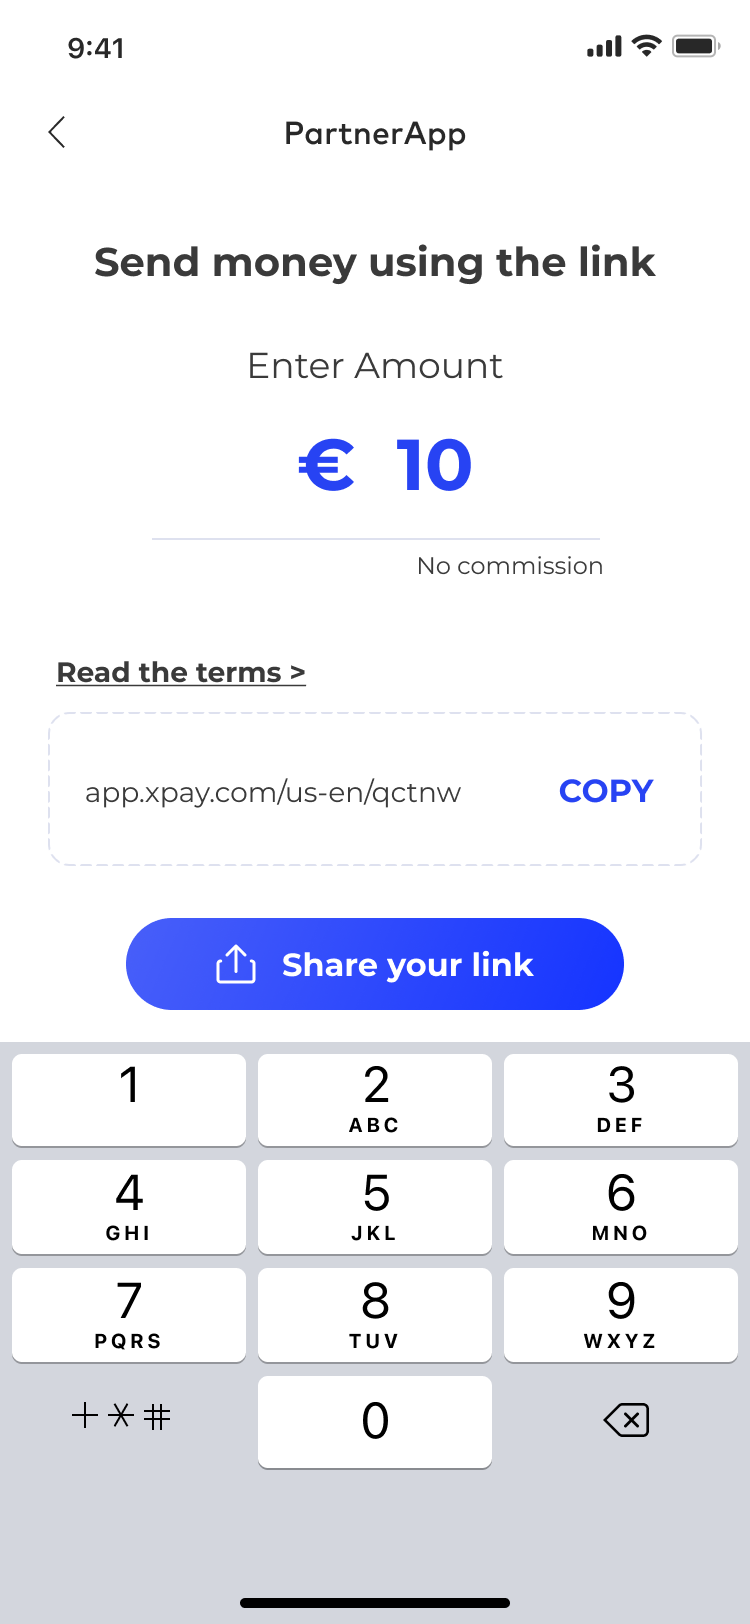
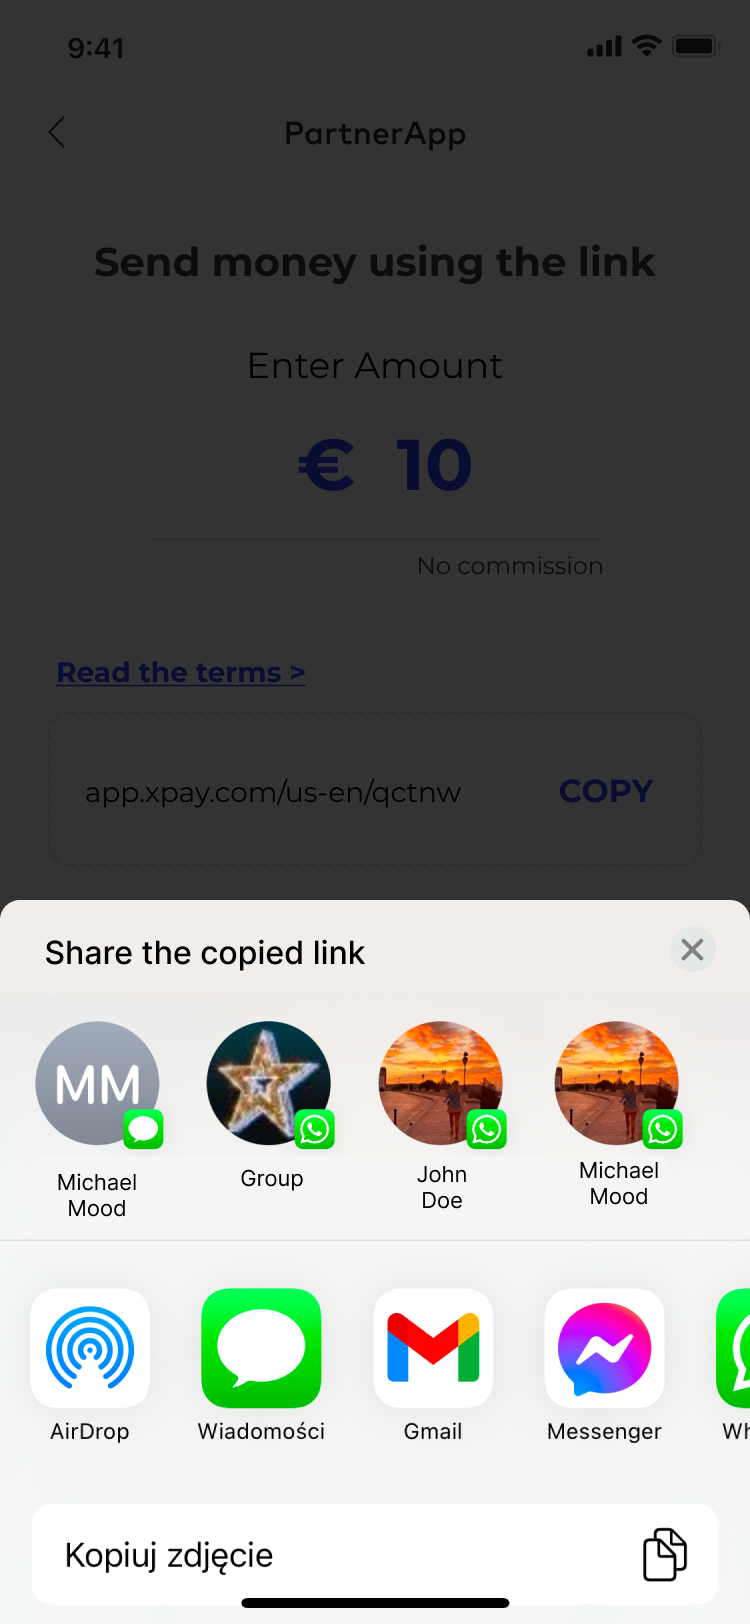
The card top-up process begins when the payment link is initialized. As a customer, you must provide transaction metadata such as the amount and currency in which the payout will be made. After confirming the entered data, a link is generated that you can send to the recipient.
Important! The first screen below (PartnerApp view) imitates the view from your application and you will be responsible for implementing this view.
UML presenting initialize payment link step by step
@startuml
skinparam ParticipantPadding 30
skinparam BoxPadding 30
skinparam noteFontColor #FFFFFF
skinparam noteBackgroundColor #1C1E3F
skinparam noteBorderColor #1C1E3F
skinparam noteBorderThickness 1
skinparam sequence {
ArrowColor #1C1E3F
ArrowFontColor #1C1E3F
ActorBorderColor #1C1E3F
ActorBackgroundColor #FFFFFF
ActorFontStyle bold
ParticipantBorderColor #1C1E3F
ParticipantBackgroundColor #1C1E3F
ParticipantFontColor #FFFFFF
ParticipantFontStyle bold
LifeLineBackgroundColor #1C1E3F
LifeLineBorderColor #1C1E3F
}
participant "Sender" as sender
participant "Customer" as cust
participant "Verestro" as oro
participant "Recipient" as user
sender->cust: Send money using payout
note right of sender: Money Sender has a balance in Antaca Verestro
cust->oro: Initialize payment link (provide transaction metadata)
oro->cust: Return generated payment link
cust->sender: Return generated payment link
sender->user: Send link to the receiver
@enduml
|
|
|
| 1. Sender provides transaction metadata and order payment link (this step takes place in Customer's application). | 2. Sender gets payment link and sends it to the recipient. |
Receiving funds
The recipient receives the link you sent. It is valid for a specified period of time - you can choose the link's lifetime yourself and provide us this information during the onboarding process. After opening the link, a payment template with transaction data is displayed to the recipient. Basicly, the recipient will see how much money he will receive and in what currency. However, to receive the money, the recipient must select the card to which the funds should to be transferred. Our application provides three sources of the card: Google Pay and Apple Pay wallet or providing card manually.
|
|
|
| 3. Recipient gets message with payment link from the Sender. Recipient clicks that link. | 4. Recipient is redirected to Payout to card and xPay view (this step takes place in Verestro Payout to card and xPay application). |
Top-up card by xPay card token
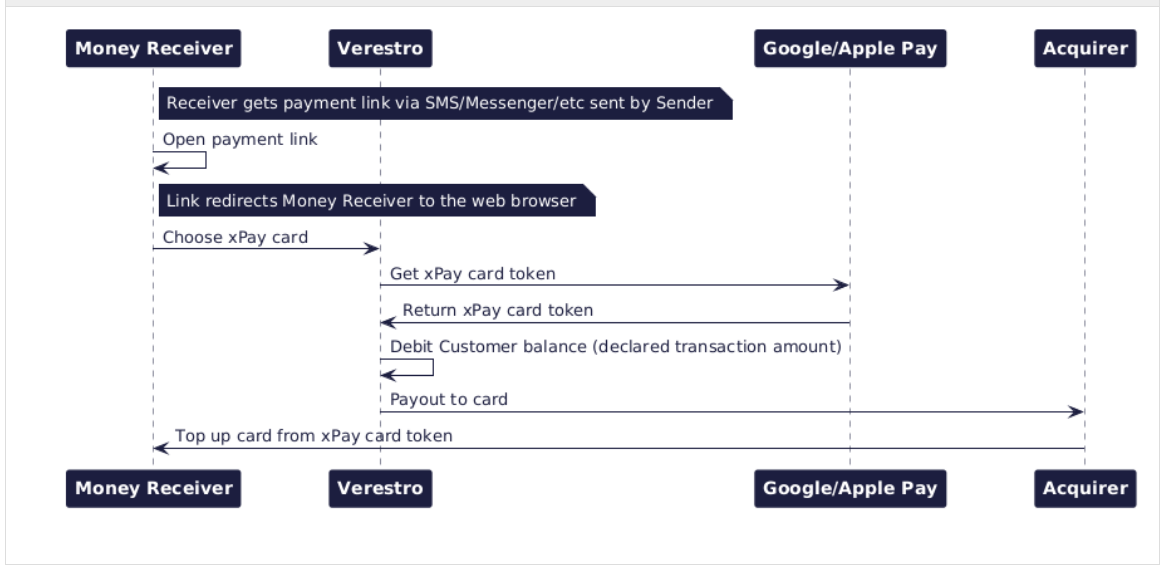
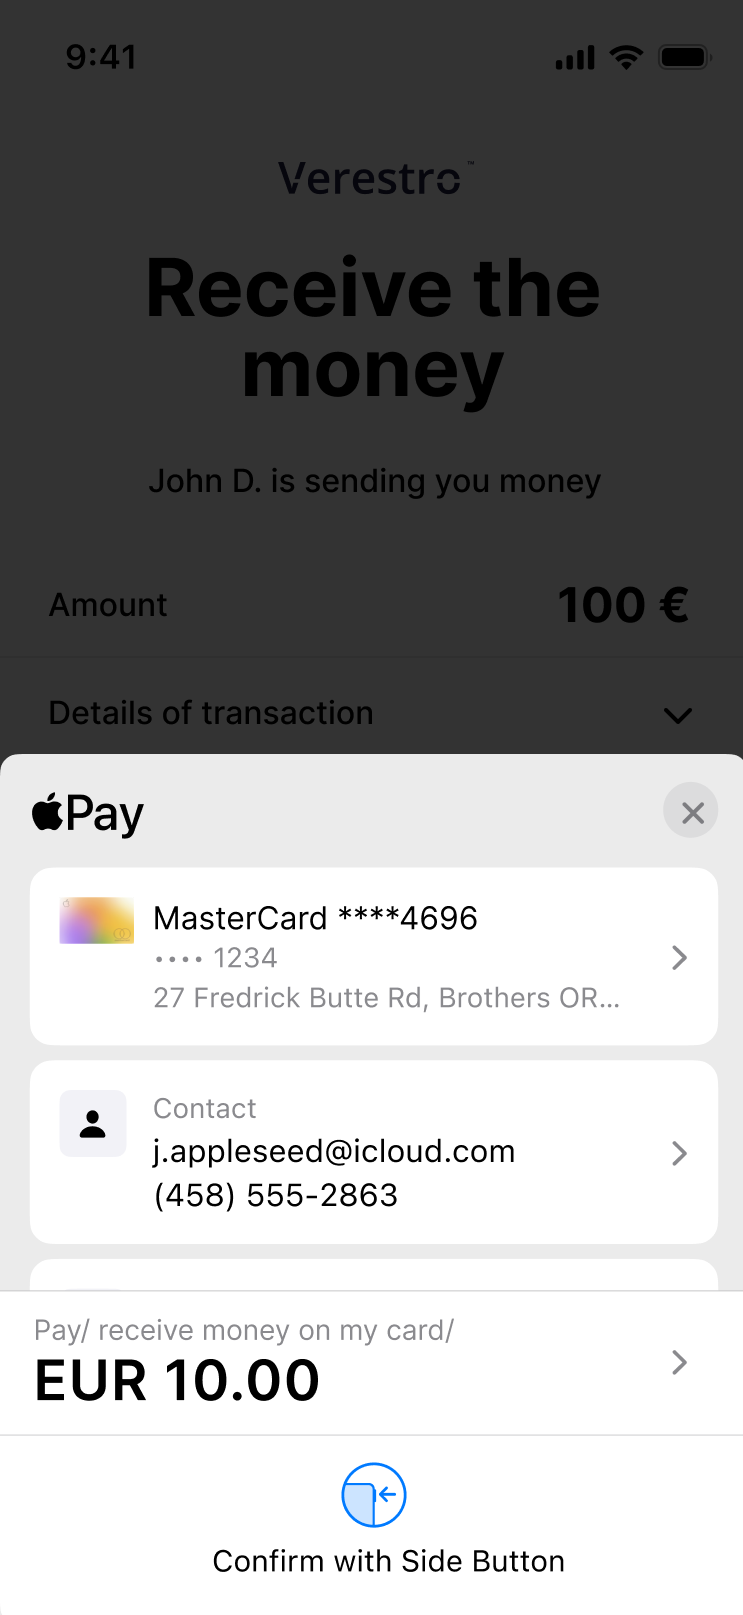
Depending on the browser the recipient uses, the template will display the option to use the Google Pay wallet (for most browsers) or the Apple Pay wallet (for the Safari browser). From the mentioned xPay wallet, the selected card will be topped up with the funds you declared step before. After making a Payout to the selected card from the xPay wallet, your company's balance is debited for this amount.
UML presenting top up card from xPay step by step
@startuml
skinparam ParticipantPadding 30
skinparam BoxPadding 30
skinparam noteFontColor #FFFFFF
skinparam noteBackgroundColor #1C1E3F
skinparam noteBorderColor #1C1E3F
skinparam noteBorderThickness 1
skinparam sequence {
ArrowColor #1C1E3F
ArrowFontColor #1C1E3F
ActorBorderColor #1C1E3F
ActorBackgroundColor #FFFFFF
ActorFontStyle bold
ParticipantBorderColor #1C1E3F
ParticipantBackgroundColor #1C1E3F
ParticipantFontColor #FFFFFF
ParticipantFontStyle bold
LifeLineBackgroundColor #1C1E3F
LifeLineBorderColor #1C1E3F
}
participant "Money Receiver" as user
participant "Verestro" as payt
participant "Google/Apple Pay" as xpay
participant "Acquirer" as acq
note right of user: Money Receiver gets payment link via SMS/Messenger/etc sent by Sender
user->user: Open payment link
note right of user: Link redirects Money Receiver to the web browser
user->payt: Choose xPay card
payt->xpay: Get xPay card token
xpay->payt: Return xPay card token
payt->payt: Debit Money Sender's balance (declared transaction amount)
payt->acq: Payout to card
acq->user: Top up card from xPay card token
@enduml
Get xPay card token
The xPay card token is returned automatically from xPay wallet after the recipient selects Top Up with xPay button and choose proper card. Verestro is a registered Payment Service Provider in Google Pay and Apple Pay, which frees you from the need to integrate with these entities. We call one of the xPays asking for a card token of the card that recipient choosed.
|
|
|
|
| 5. Recipient chooses to get money on card from xPay wallet (at this step Verestro Payout to card and xPay opens xPay wallet). | 6. Recipient chooses proper card from xPay wallet (at this step xPay wallet returns card token to Verestro Payout to card and xPay). | 7. Payout to card and xPay application tops up Receiver's card (this step takes place in Verestro Payout to card and xPay application). |
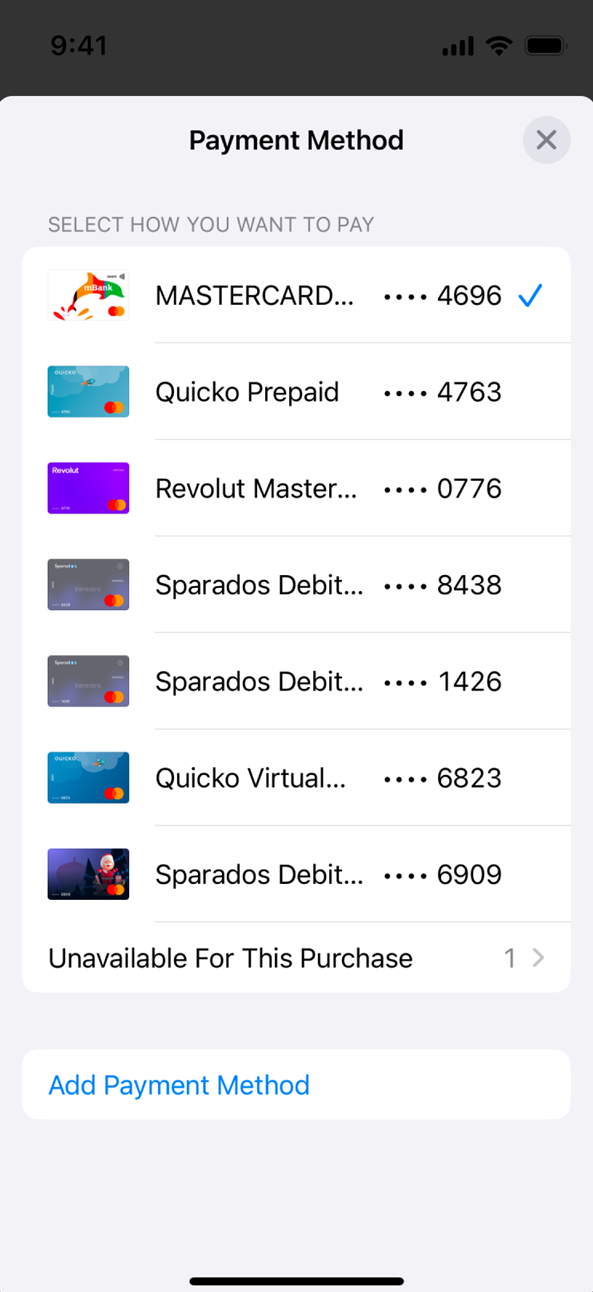
Tip: After the transaction is completed, a notification will be sent to you informing you of the completion of the transaction and whether it was a success or failure.
Top-up card by providing it's number manually
The recipient may also enter the card PAN manually into the designated input field provided on this page if he/she prefers not to select a card from their xPay wallet. The recipient then confirms hir/her intention to accept the transfer by clicking the “Confirm” button. Once confirmed, the funds are credited to his/her balance immediately. Detailed description of this feature is described here.

UML presenting top up card provided manually
@startuml
skinparam ParticipantPadding 30
skinparam BoxPadding 30
skinparam noteFontColor #FFFFFF
skinparam noteBackgroundColor #1C1E3F
skinparam noteBorderColor #1C1E3F
skinparam noteBorderThickness 1
skinparam sequence {
ArrowColor #1C1E3F
ArrowFontColor #1C1E3F
ActorBorderColor #1C1E3F
ActorBackgroundColor #FFFFFF
ActorFontStyle bold
ParticipantBorderColor #1C1E3F
ParticipantBackgroundColor #1C1E3F
ParticipantFontColor #FFFFFF
ParticipantFontStyle bold
LifeLineBackgroundColor #1C1E3F
LifeLineBorderColor #1C1E3F
}
participant "Money Receiver" as user
participant "Verestro" as payt
participant "Acquirer" as acq
note right of user: Money Receiver gets payment link via SMS/Messenger/etc sent by Sender
user->user: Open payment link
note right of user: Link redirects Money Receiver to the web browser
user->payt: Provide PAN manually into the input then confirm
payt->payt: Debit Money Sender's balance (declared transaction amount)
payt->acq: Payout to card
acq->user: Top up provided card
@enduml
Tip: After the transaction is completed, a notification will be sent to you informing you of the completion of the transaction and whether it was a success or failure.
Onboarding
This chapter is intended to present you the requirements that will allow you to use the Payout to xPay solution in your Company. We have presented here what information is necessary to provide so that you can join the Payout to xPay program and so that we can properly create the required corporate balance account for you thus allowing you to funds management and card issuing.
Business onboarding
|
To start using Money Transfers via Card you need to go through a few on-boarding steps: |
|
1. Please contact our sales - salesteam@verestro.com |
|
2. Please respond to some introduction question that will let us prepare proposal for you. |
|
3. You will receive offer for card issuing and payouts processes. |
|
4. If you accept the offer you will be asked to provide some company documents required for the AML verification process. |
|
5. You need to perform KYB process to pass verification of your company. |
|
6. And finally you will enable you your own balance in Verestro Payout to xPay program. |
Technical onboarding
Tip: Please remember to inform us on which environment you want us to configure an account for you. Verestro Payout to xPay offers two environments: TEST and PROD.
Important! Implementation of the solution is work in progress...
Technical documentation
This chapter provides technical information about the methods created for External application.
Info: The authentication in our system is handled through the mTLS. To get a certificate please visit Connecting to server-t... | Verestro Developer Zone