AML Transaction Monitoring - Administration Panel Overview
The AML Transaction Monitoring module enables operators to configure transaction-monitoring rulesets, maintain reusable value sets and action definitions, and manage blacklists and greylists. Rulesets can be viewed and edited using a visual editor or YAML, saved as drafts, and tested against historical transactions.
Interface reviewed on 17 September 2026. This overview describes the AML screens available in the reviewed Administration Panel environment. Available operations depend on the deployed version and the operator’s permissions.
Purpose & scope
Open AML in the side menu. The module has two navigation entries: Rulesets and Watchlists.
| Area | Purpose |
|---|---|
| Rulesets → Rulesets | Create, view, edit, enable or disable, clone, archive and test rulesets. |
| Rulesets → Draft rules | Find and continue draft definitions, including drafts linked to existing rulesets. |
| Rulesets → Value sets | Maintain named collections of values for use in rule definitions. |
| Rulesets → Actions | Define actions, their groups and their configurable properties. |
| Watchlists → Blacklist / Greylist | Search, inspect, add and remove watchlist entries. |
Terminology
| Term | Description |
|---|---|
| Operator | A user working in the Administration Panel. |
| Ruleset | A definition of conditions and a trigger used during transaction verification. |
| Trigger | The outcome configured in a ruleset, including its decision and any applicable actions. |
| Draft | A saved work-in-progress definition. A draft may be linked to an existing ruleset or may represent a new ruleset. |
| Version | The version number displayed next to a ruleset name and in its details. |
| Action | An action returned by AML for the integrating product to process. Its definition specifies a name, a group and any properties. |
| Value set | A named collection of values, such as country codes, referenced by rule logic. |
| Watchlist | A collection of identifying information used by rules that check blacklist or greylist membership. |
Rulesets
Ruleset list and filters
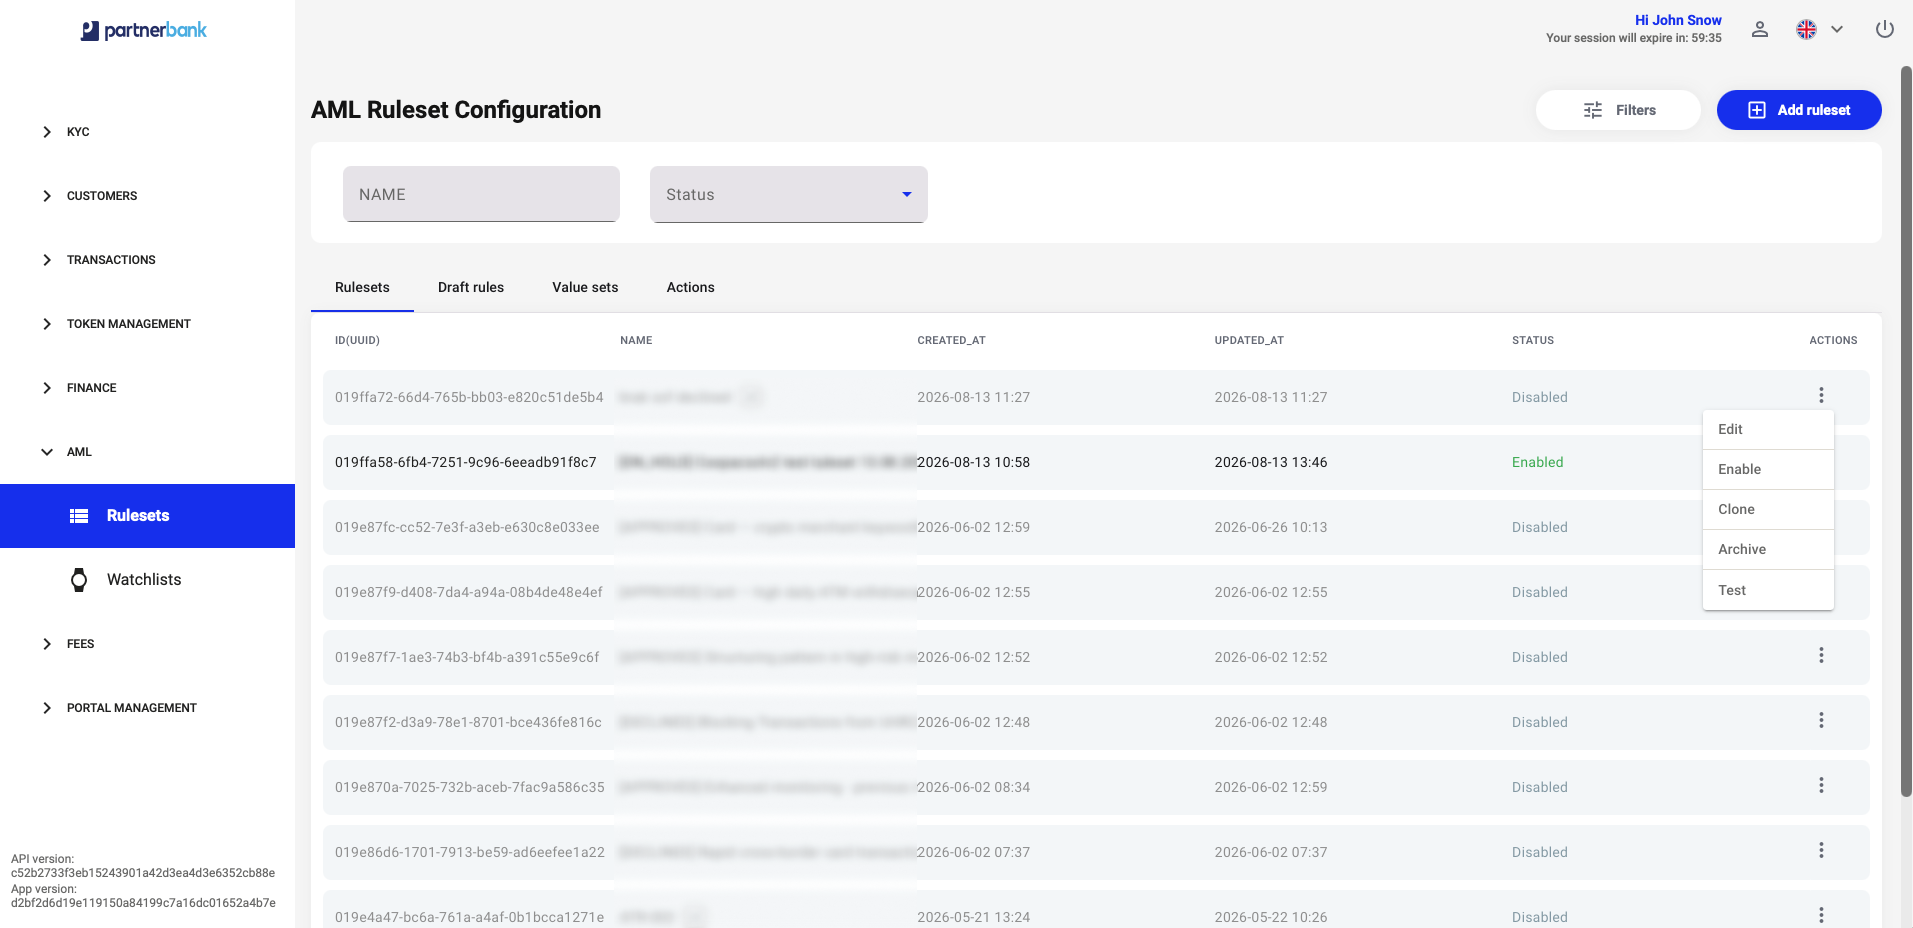
Open AML → Rulesets → Rulesets. Use Filters to show or hide the filtering area. The list can be filtered by NAME and Status; the status choices are Any, Disabled and Enabled. Pagination controls appear below the table.
| Column | Description |
|---|---|
| ID(UUID) | Unique ruleset identifier. |
| NAME | Ruleset name with its version badge, for example v0. |
| CREATED_AT / UPDATED_AT | Creation and most recent update timestamps. |
| Status | The current Enabled or Disabled status. |
| ACTIONS | A three-dot menu with operations for the selected ruleset. |
Double-click a ruleset row to open its details. The action menu includes Edit, Enable or Disable, Clone, Archive and Test, as applicable to the ruleset’s state.
Creating a ruleset
- Open the Rulesets tab and select Add ruleset.
- Enter the required NAME.
- Choose Visual Editor or YAML Editor to prepare the definition.
- Configure the conditions and trigger, and review the resulting YAML.
- Select Save when the definition is ready.
New rulesets are saved as disabled. Saving a new ruleset does not enable it for transaction processing. Enable it separately from the list or details page when it is ready to be applied.
Visual Editor and YAML Editor
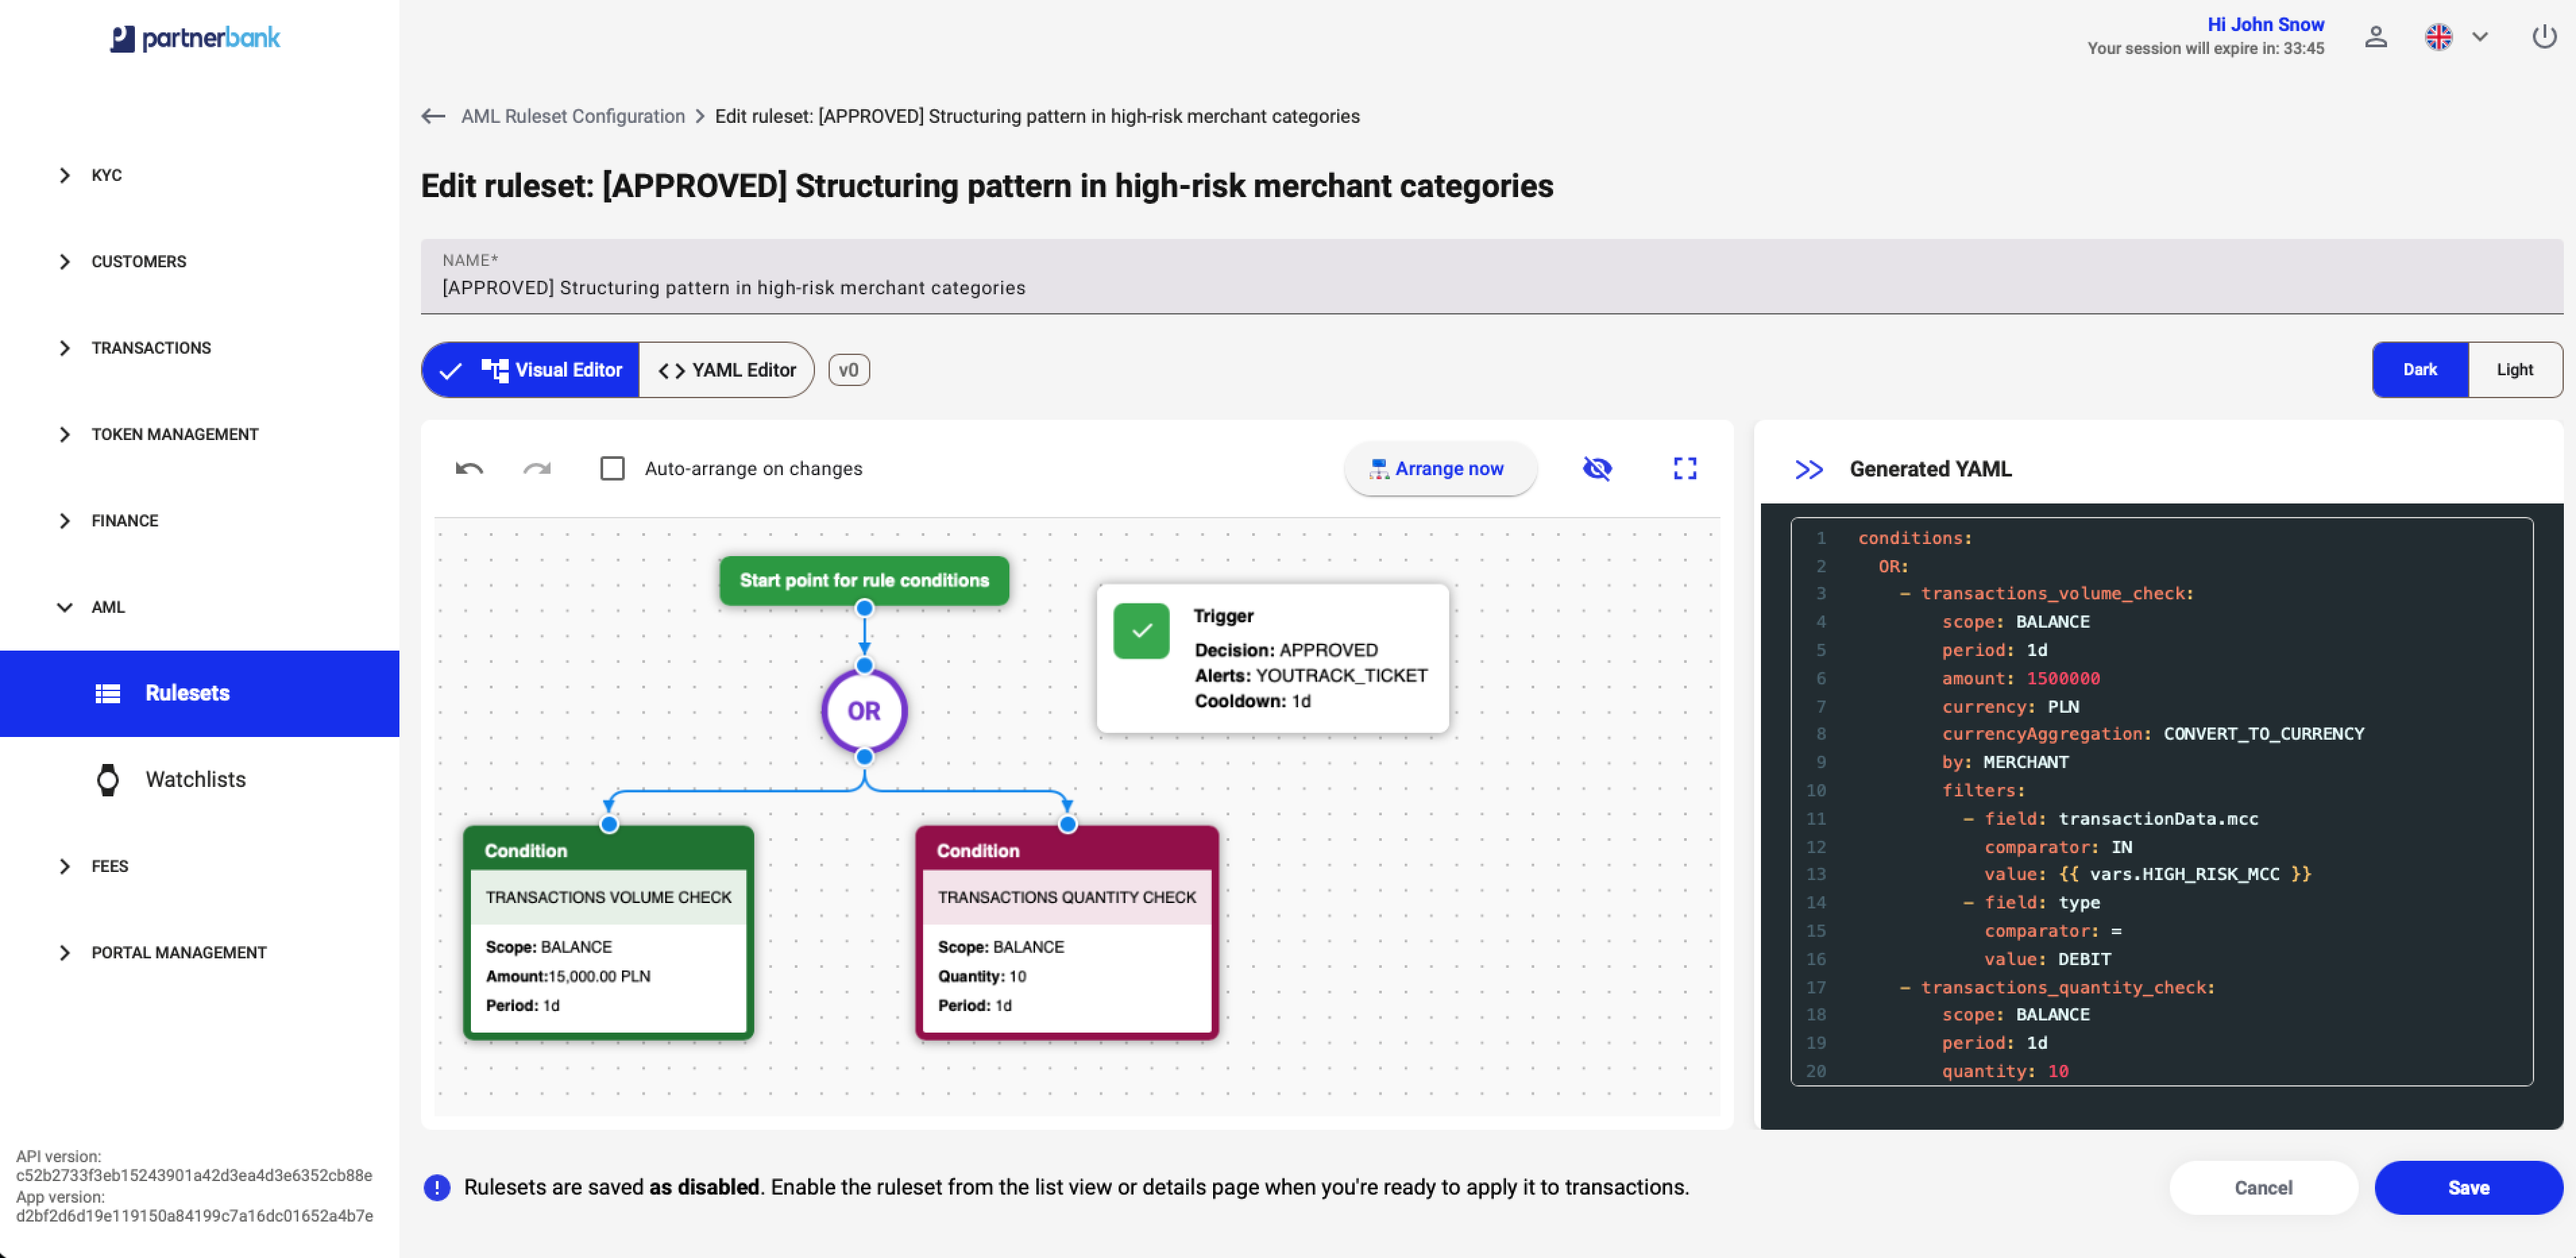
Visual Editor presents rule conditions and the trigger as a diagram alongside a Generated YAML pane. Its controls include undo and redo, Auto-arrange on changes, Arrange now, a YAML-pane visibility control and full-screen mode. The interface also provides Dark and Light display options.
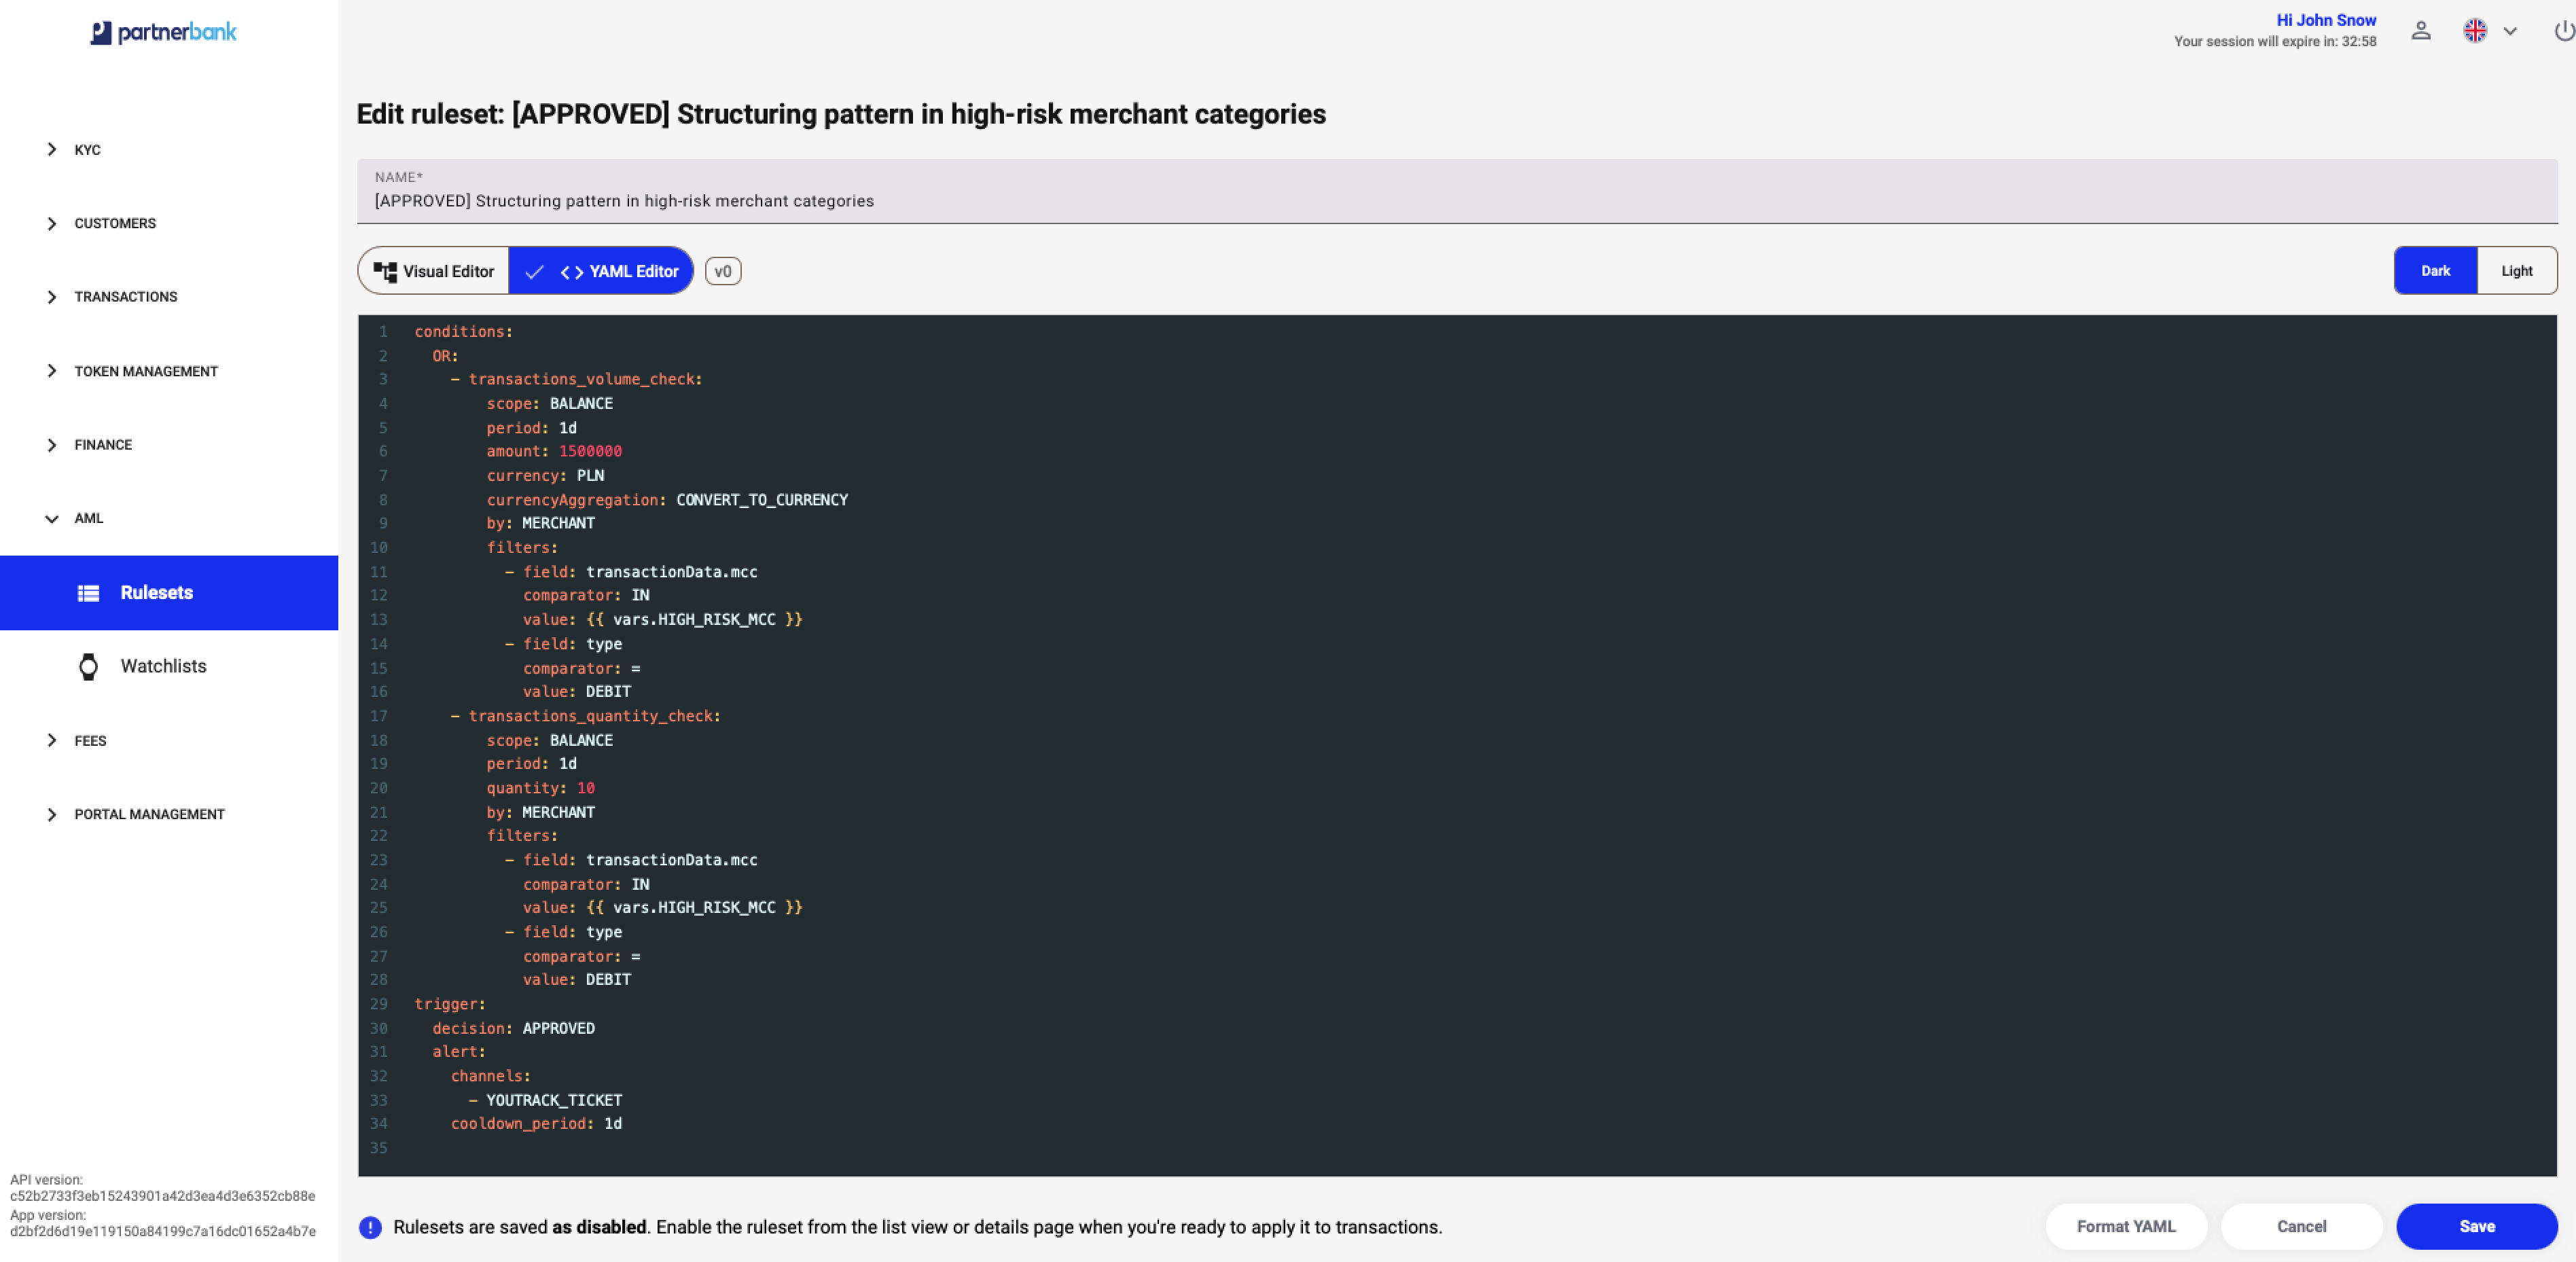
YAML Editor provides direct access to the definition text. Use Format YAML to format the definition. Review the conditions, decision and action configuration before saving; formatting alone is not a test of the rule’s intended behaviour.
Ruleset details & management
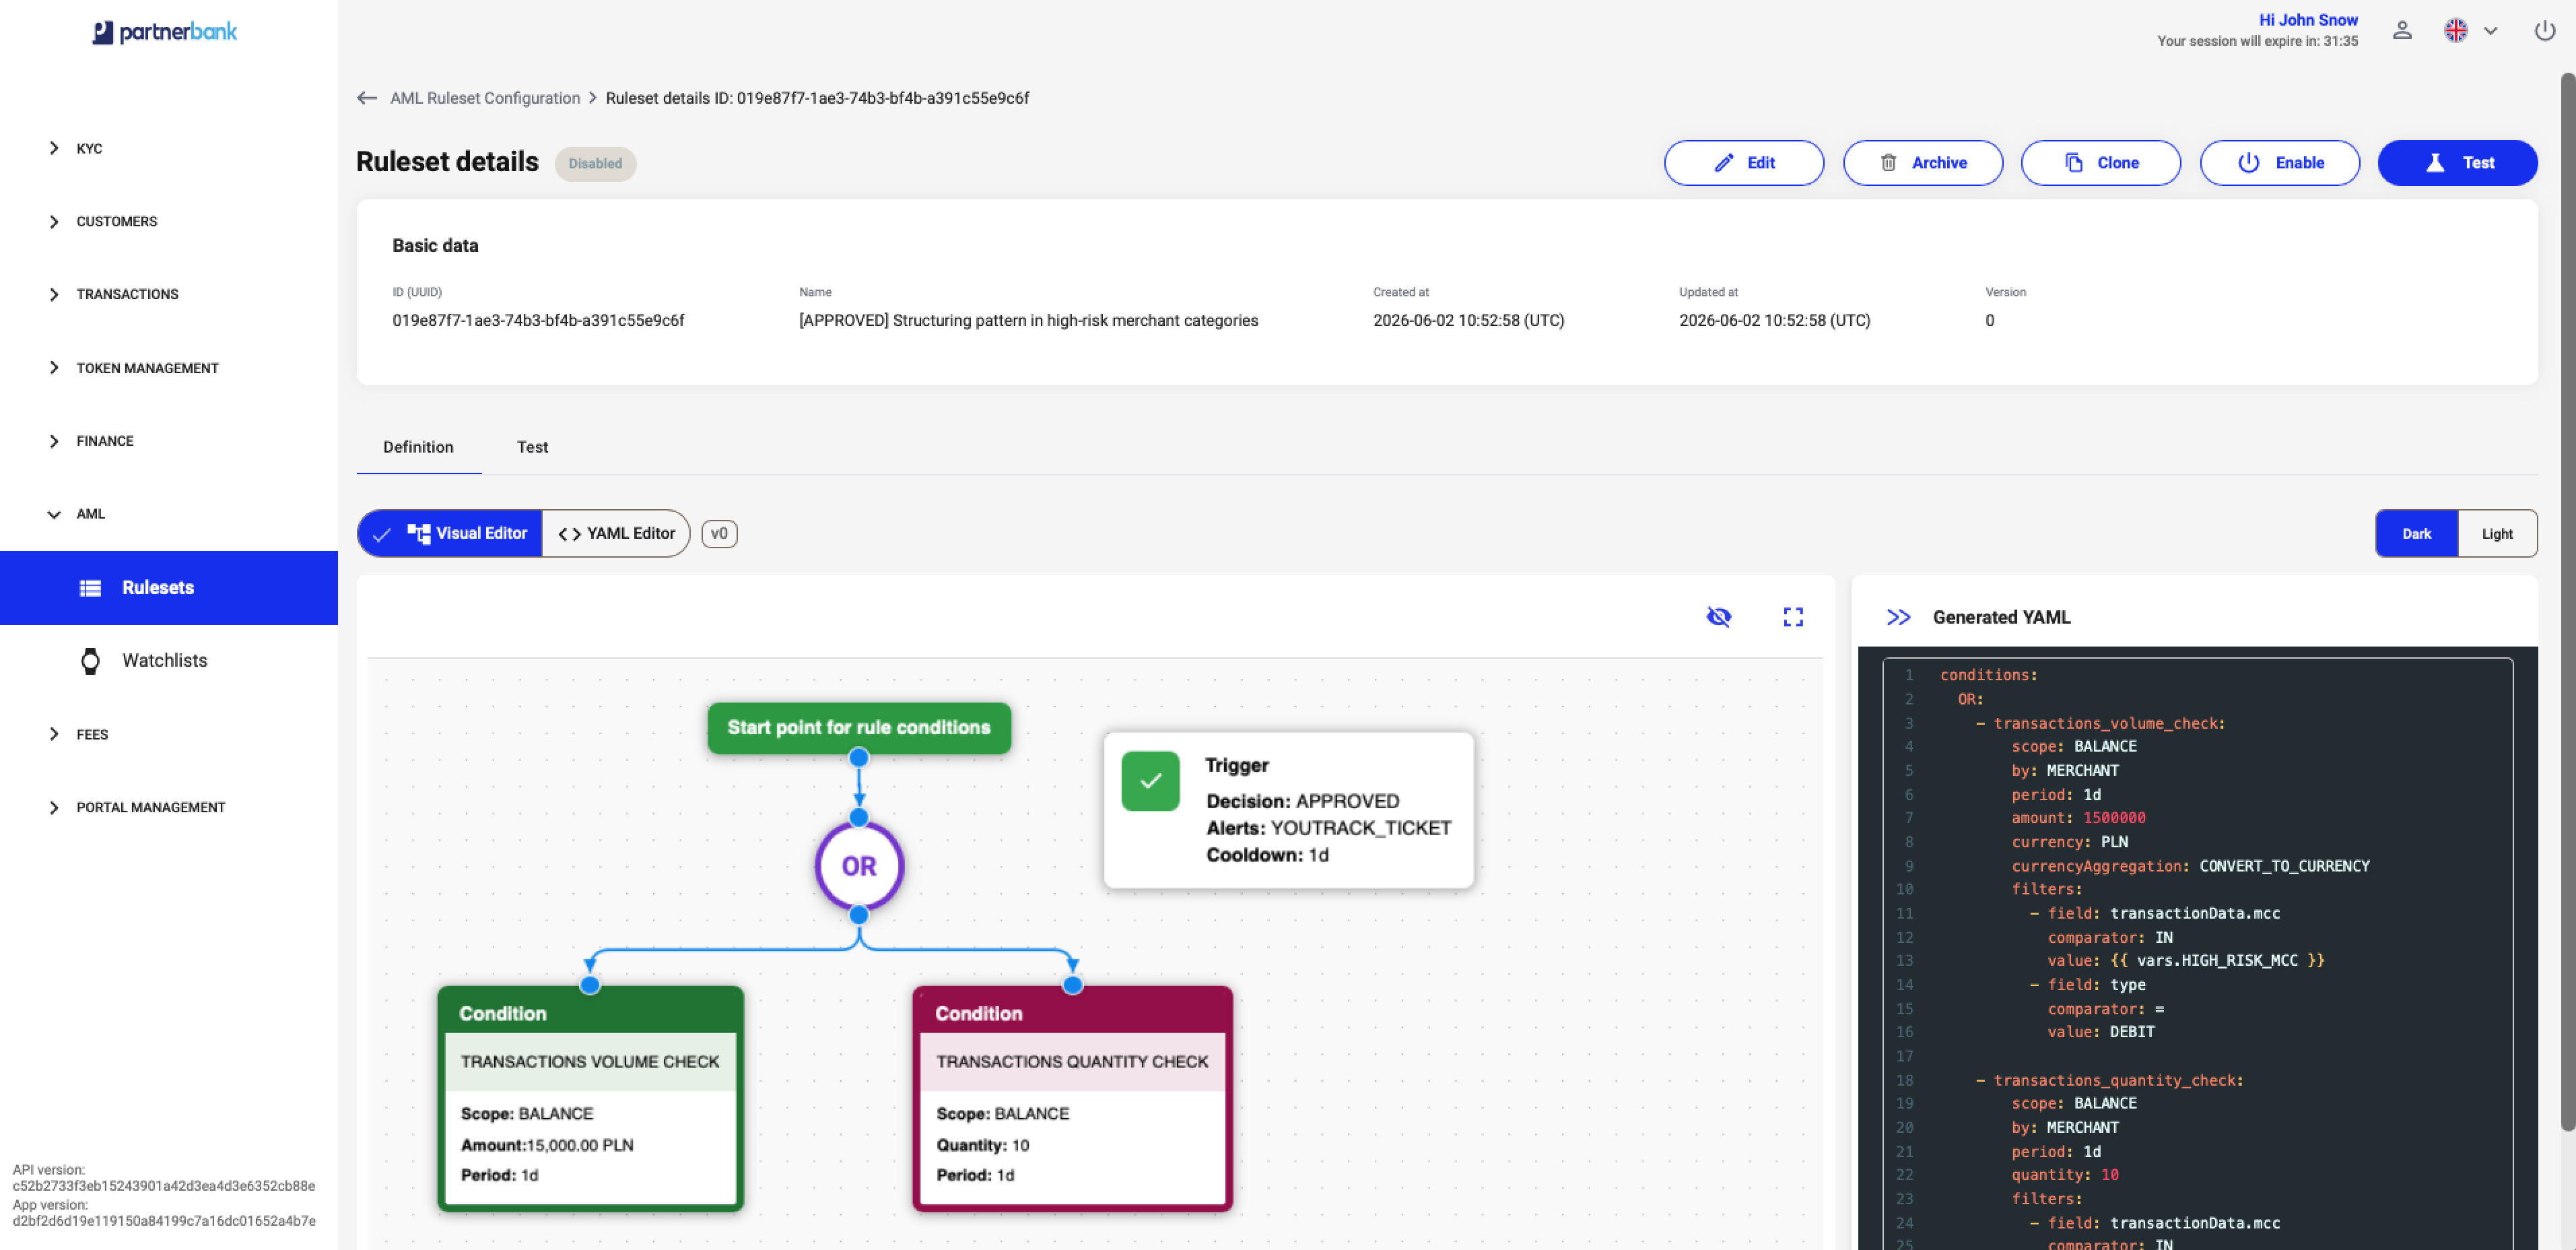
The details header shows the ruleset’s status and its available operations. Basic data contains the ID, name, creation timestamp, update timestamp and version. Timestamps in this panel are explicitly labelled UTC.
The Definition tab displays the saved definition in Visual Editor or YAML Editor mode. The Test tab displays test information and results.
Use Enable for a disabled ruleset or Disable for an enabled ruleset. These operations are available from the list menu or details page. Review any confirmation shown by the panel and check the resulting status after the operation.
Clone is available for creating a copy of a ruleset. Archive is the operation provided for archiving it. Check the selected ruleset and any confirmation before applying either operation.
Ruleset editing
- Open the ruleset’s details or its action menu and select Edit.
- If an Unsaved draft found dialog appears, use Preview draft to inspect it, Continue with draft to resume it, Start fresh to start again, or Cancel to leave the dialog.
- Review and update the definition, then save it when ready.
Draft rules
The editor supports automatic draft saving and displays Changes saved after saving a draft. Draft saving is separate from saving a ruleset and from enabling it. Returning with Cancel does not necessarily remove an automatically saved draft.
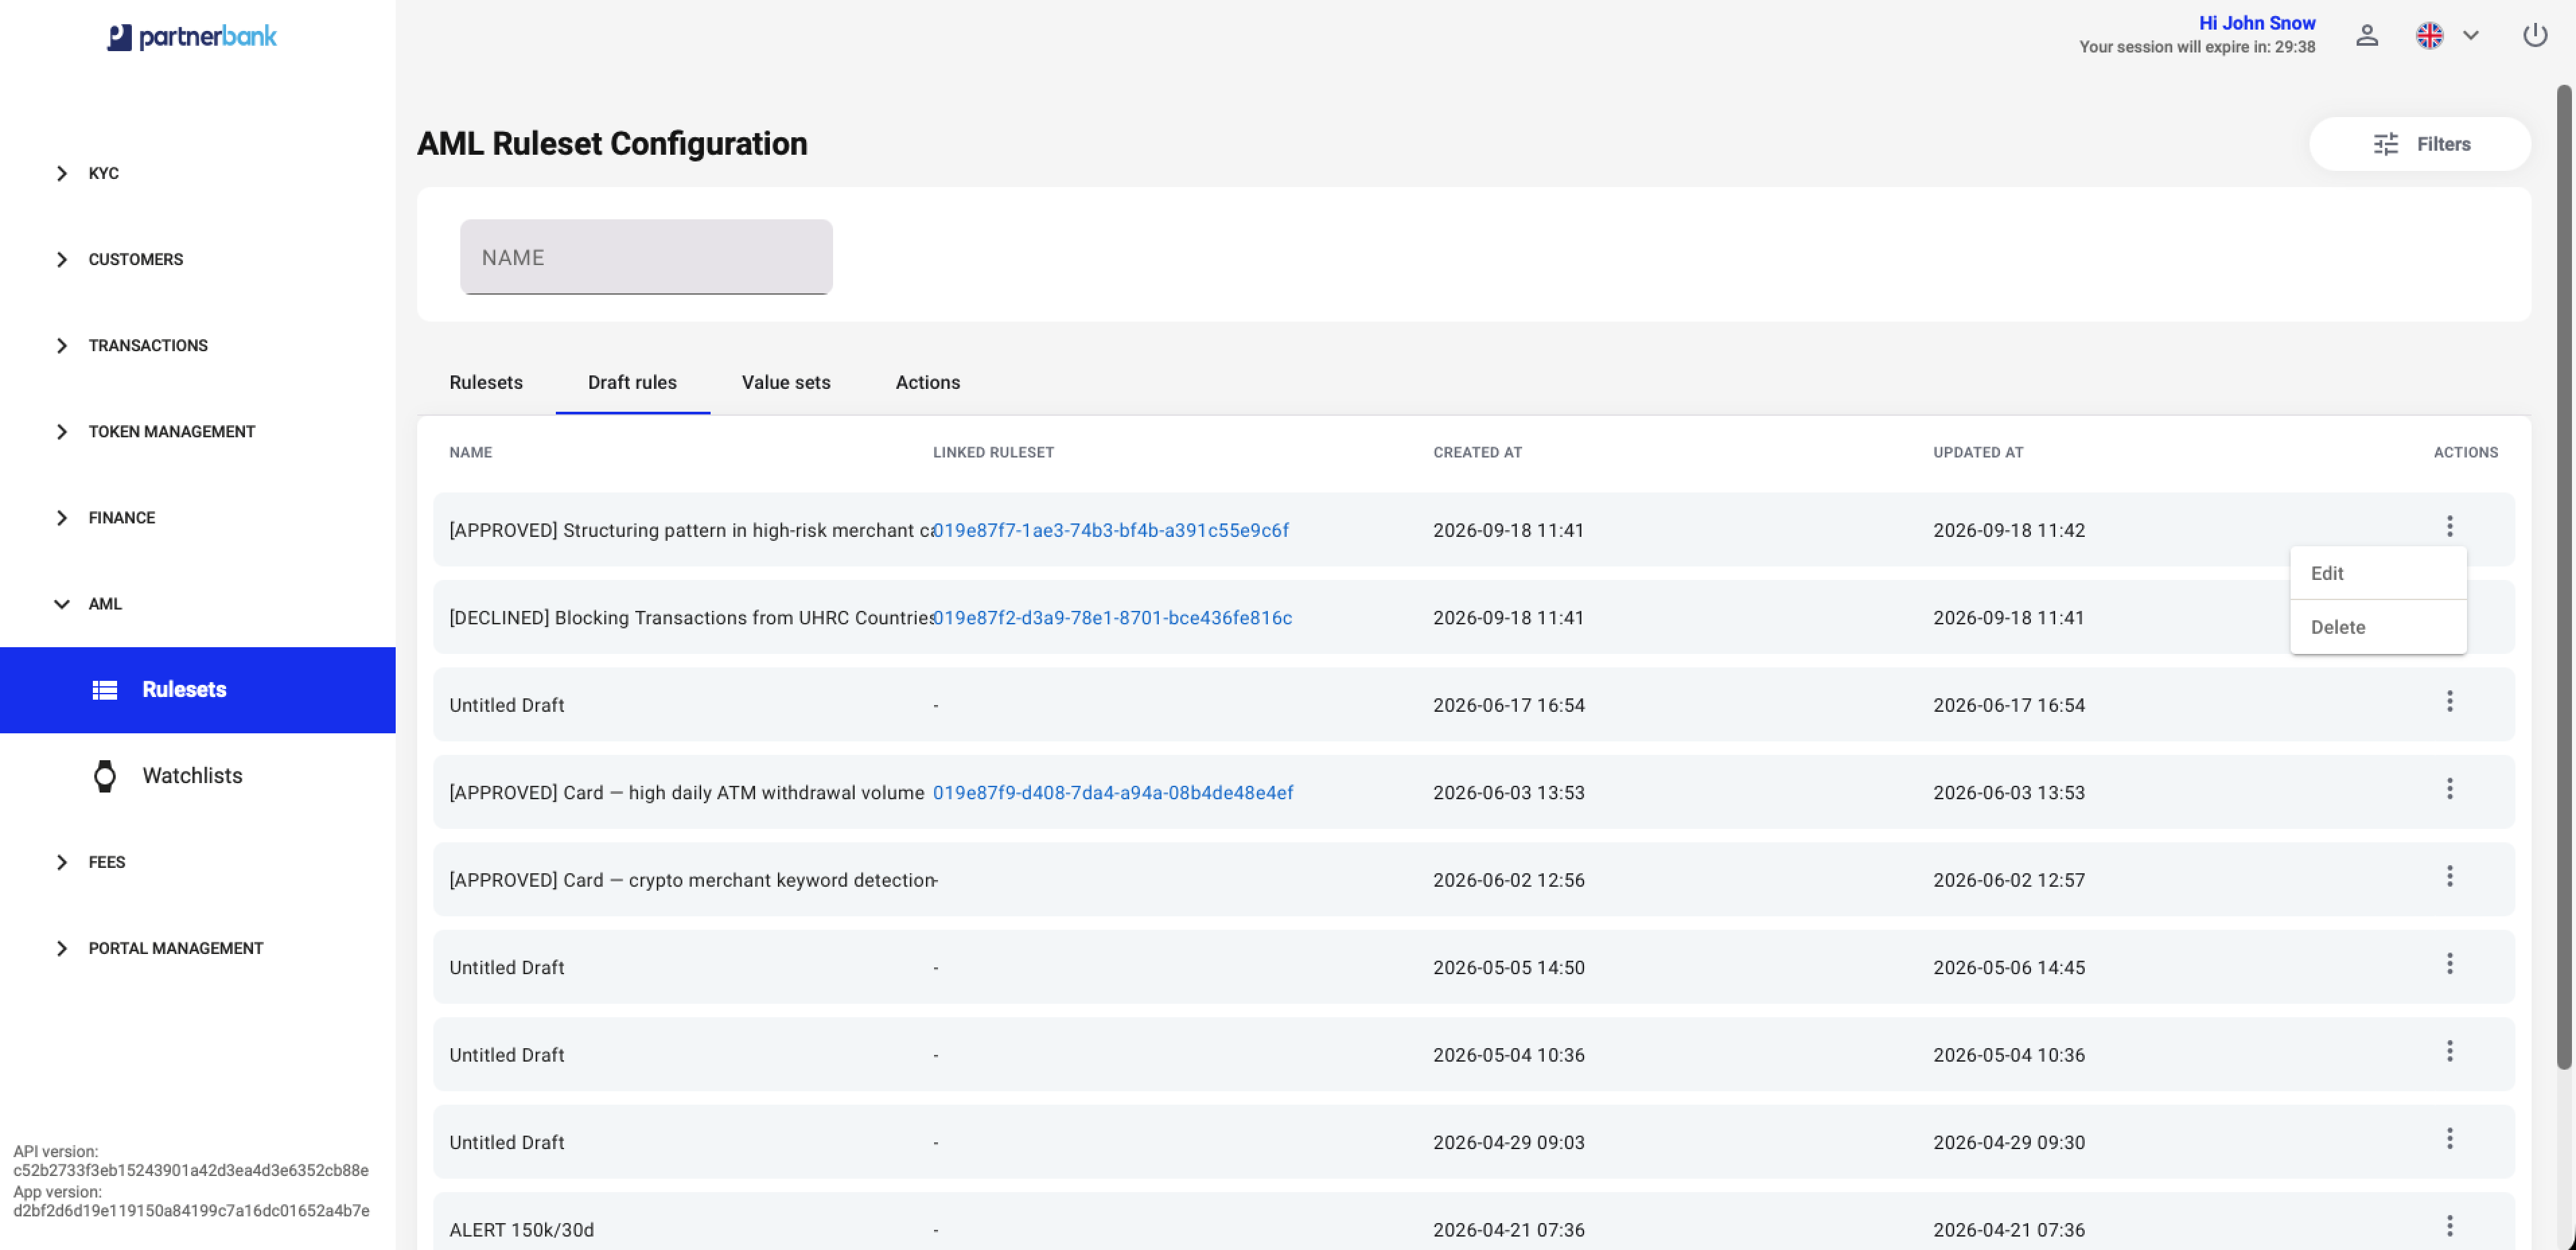
Open AML → Rulesets → Draft rules to find work in progress. Filter by NAME. The table shows Name, Linked ruleset, Created at, Updated at and ACTIONS. A dash in Linked ruleset indicates that no existing ruleset is linked.
Use the three-dot menu’s Edit operation to continue a draft. The same menu provides Delete for removing a draft that is no longer needed. Check the draft and any confirmation before deleting it.
Testing against historical transactions
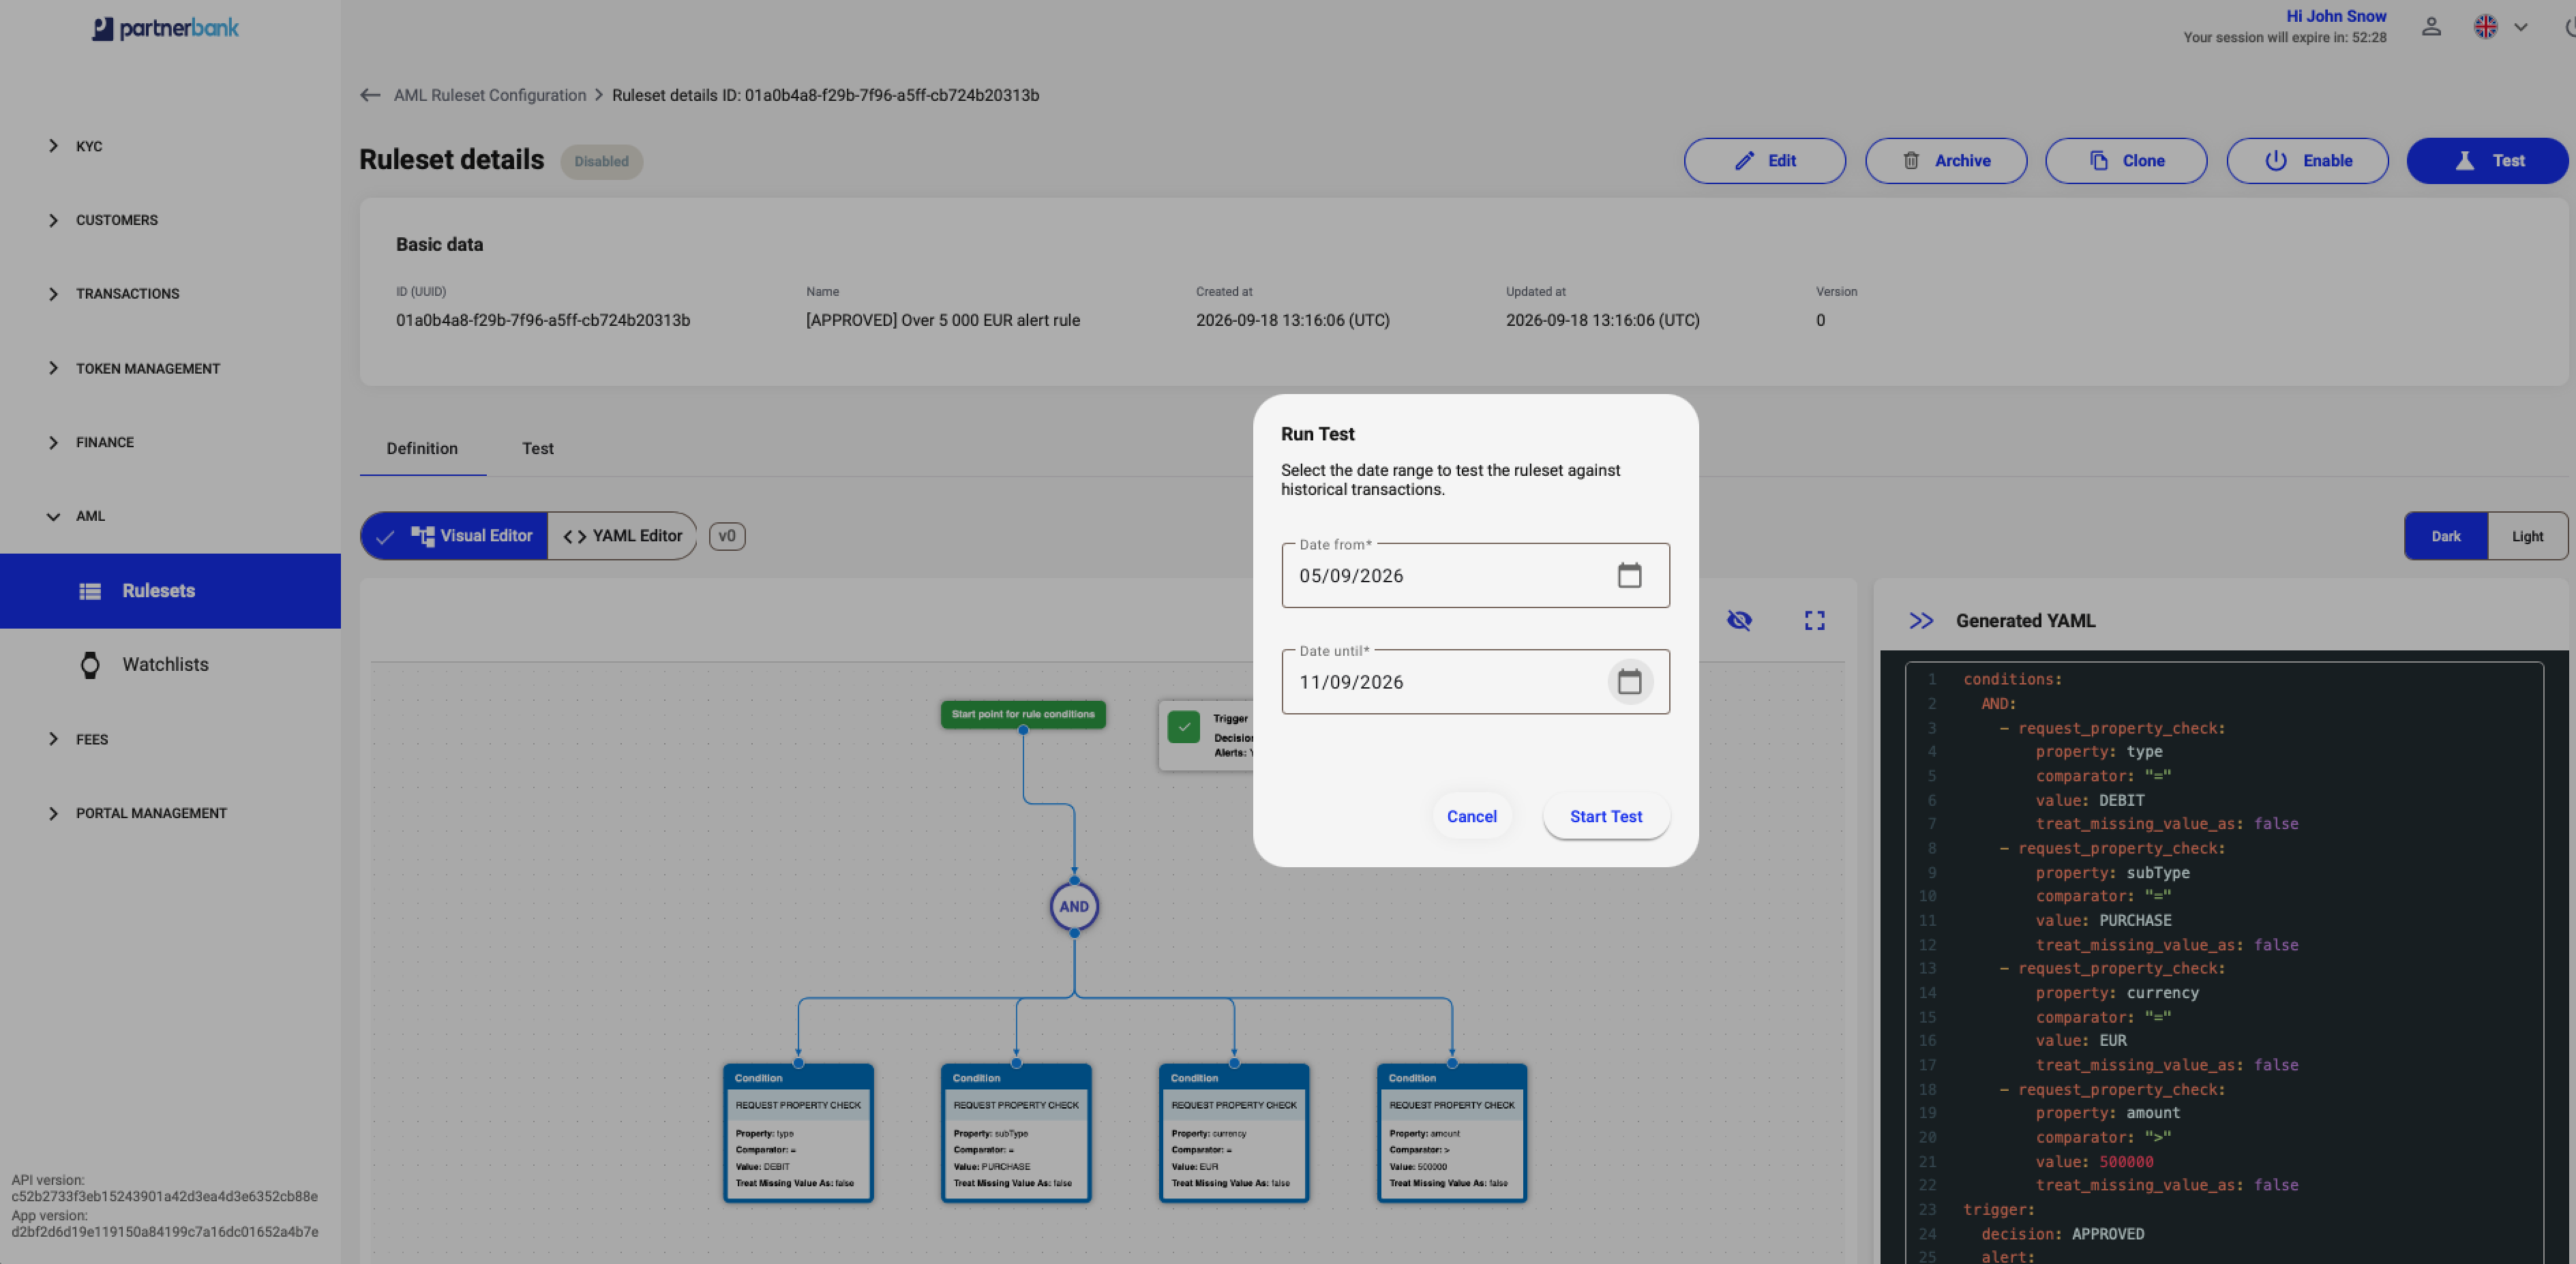
- Select Test in a ruleset’s action menu or details header. If no results exist yet, the Test tab also offers Run test.
- In the Run Test dialog, fill in the required Date from and Date until fields. Calendar controls are available for both dates.
- Select Start Test once the form is valid.
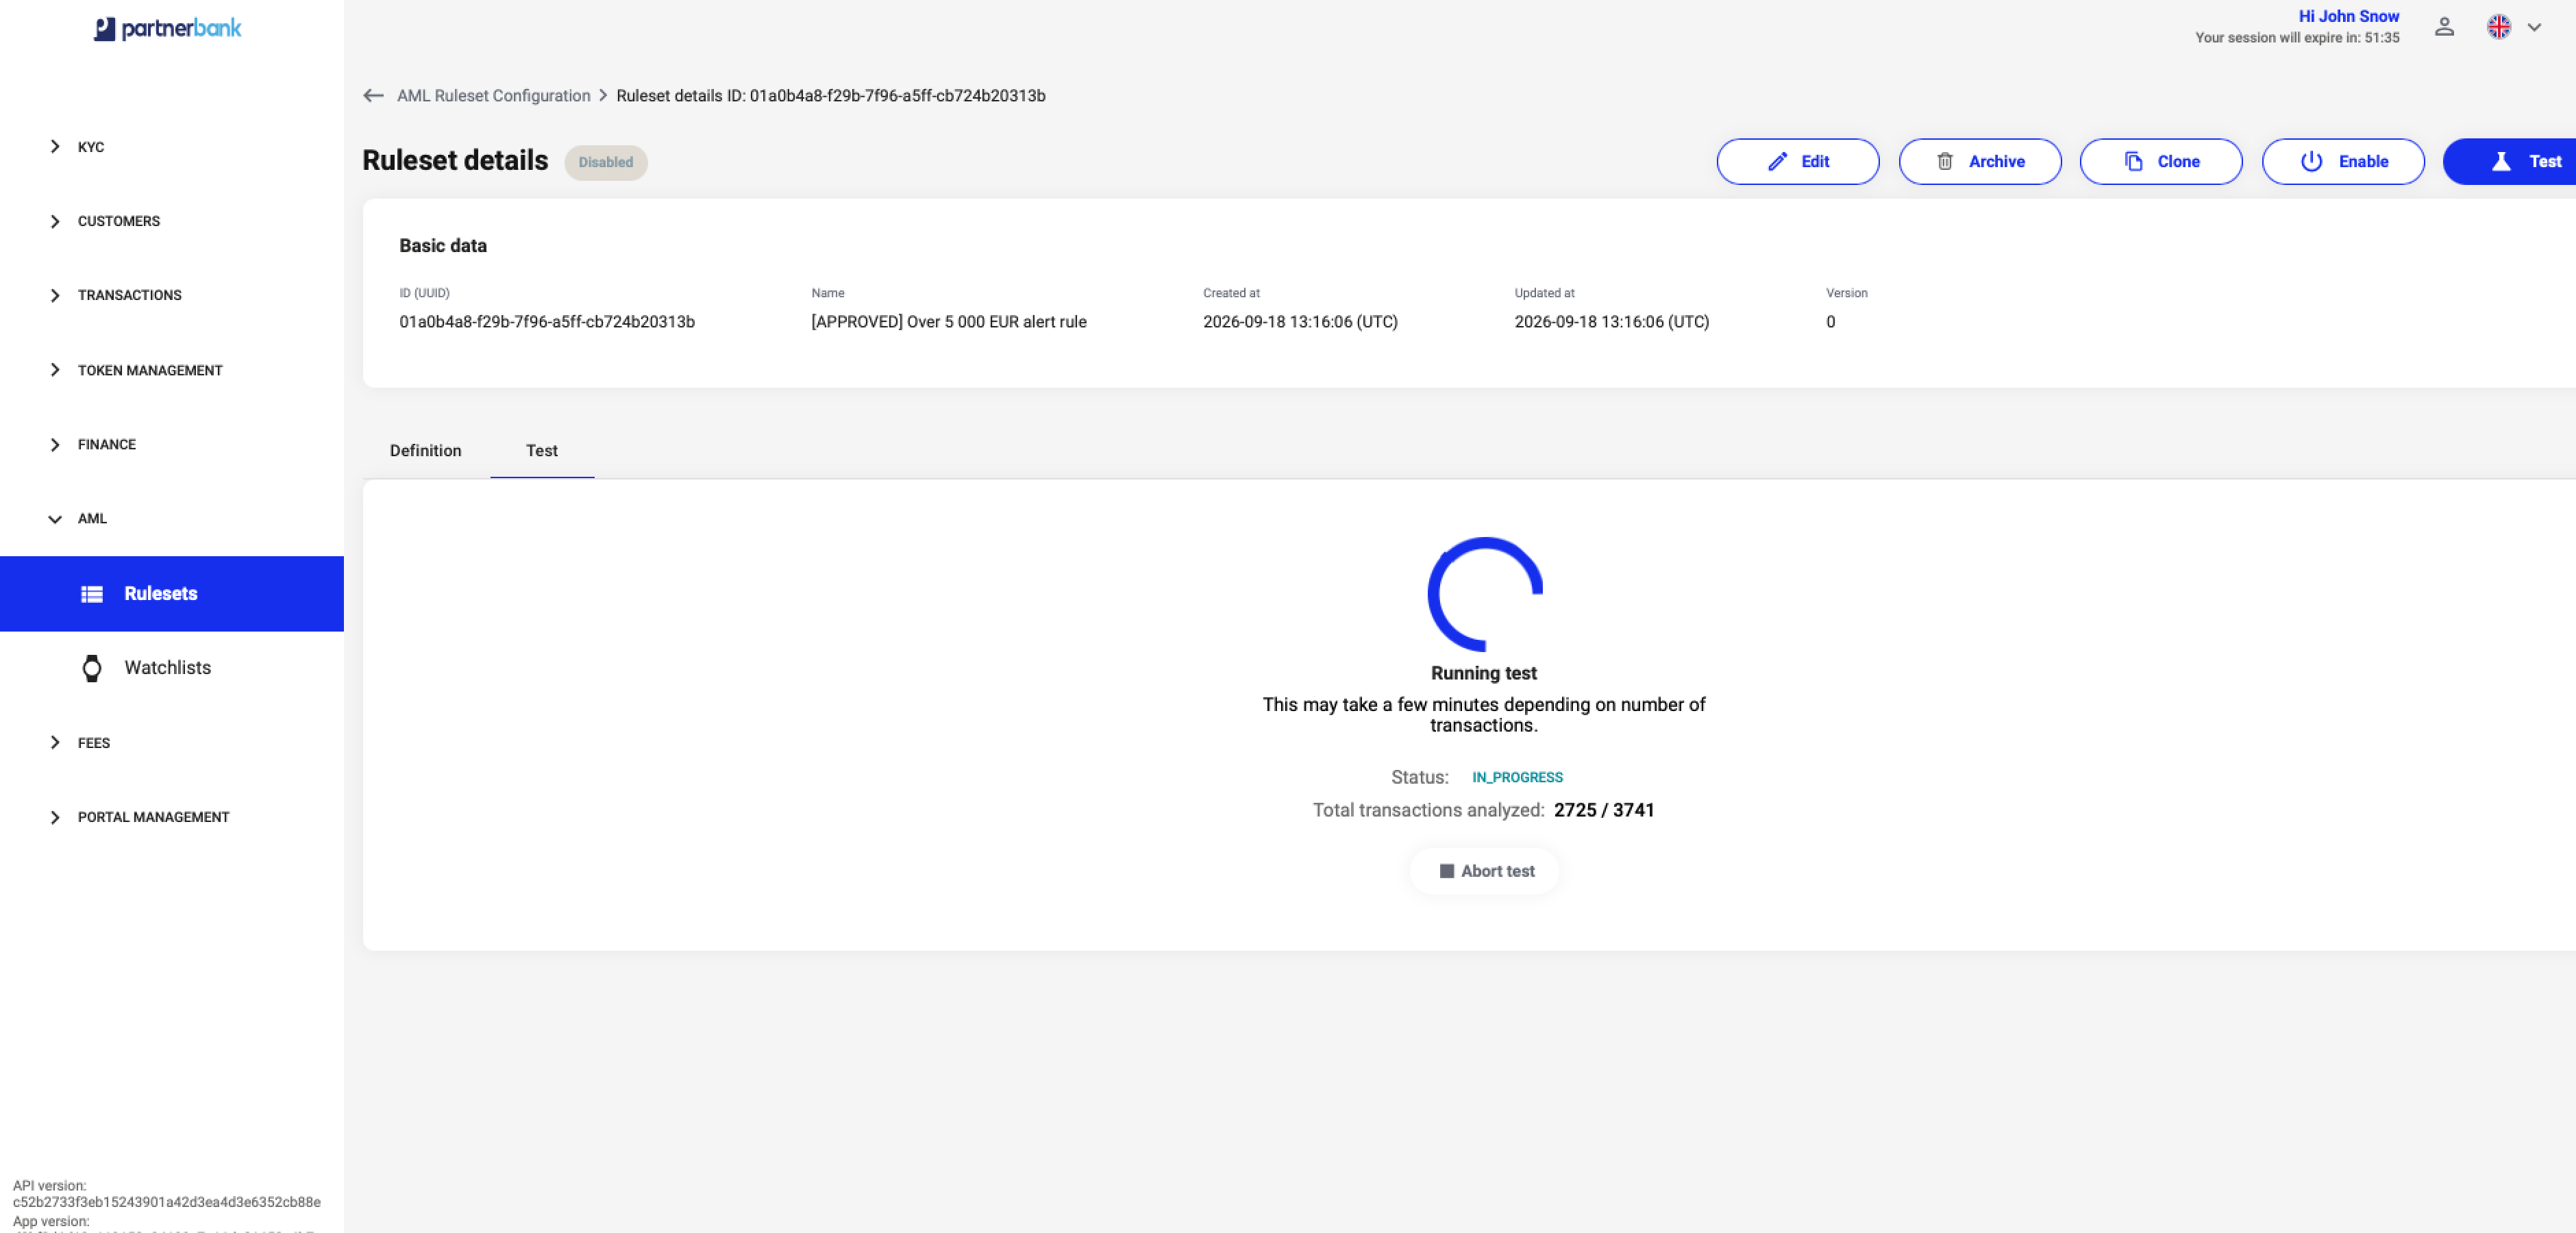
- Review the information in the ruleset’s Test tab.
The test view includes Test metadata: test run, transaction period, creation time, total transactions analysed and test duration. If no transactions fall in the selected period, the panel displays No transactions in the selected period and offers Run test with a different period. A run with zero analysed transactions does not demonstrate how the rule behaves on matching data.
Reading the test results
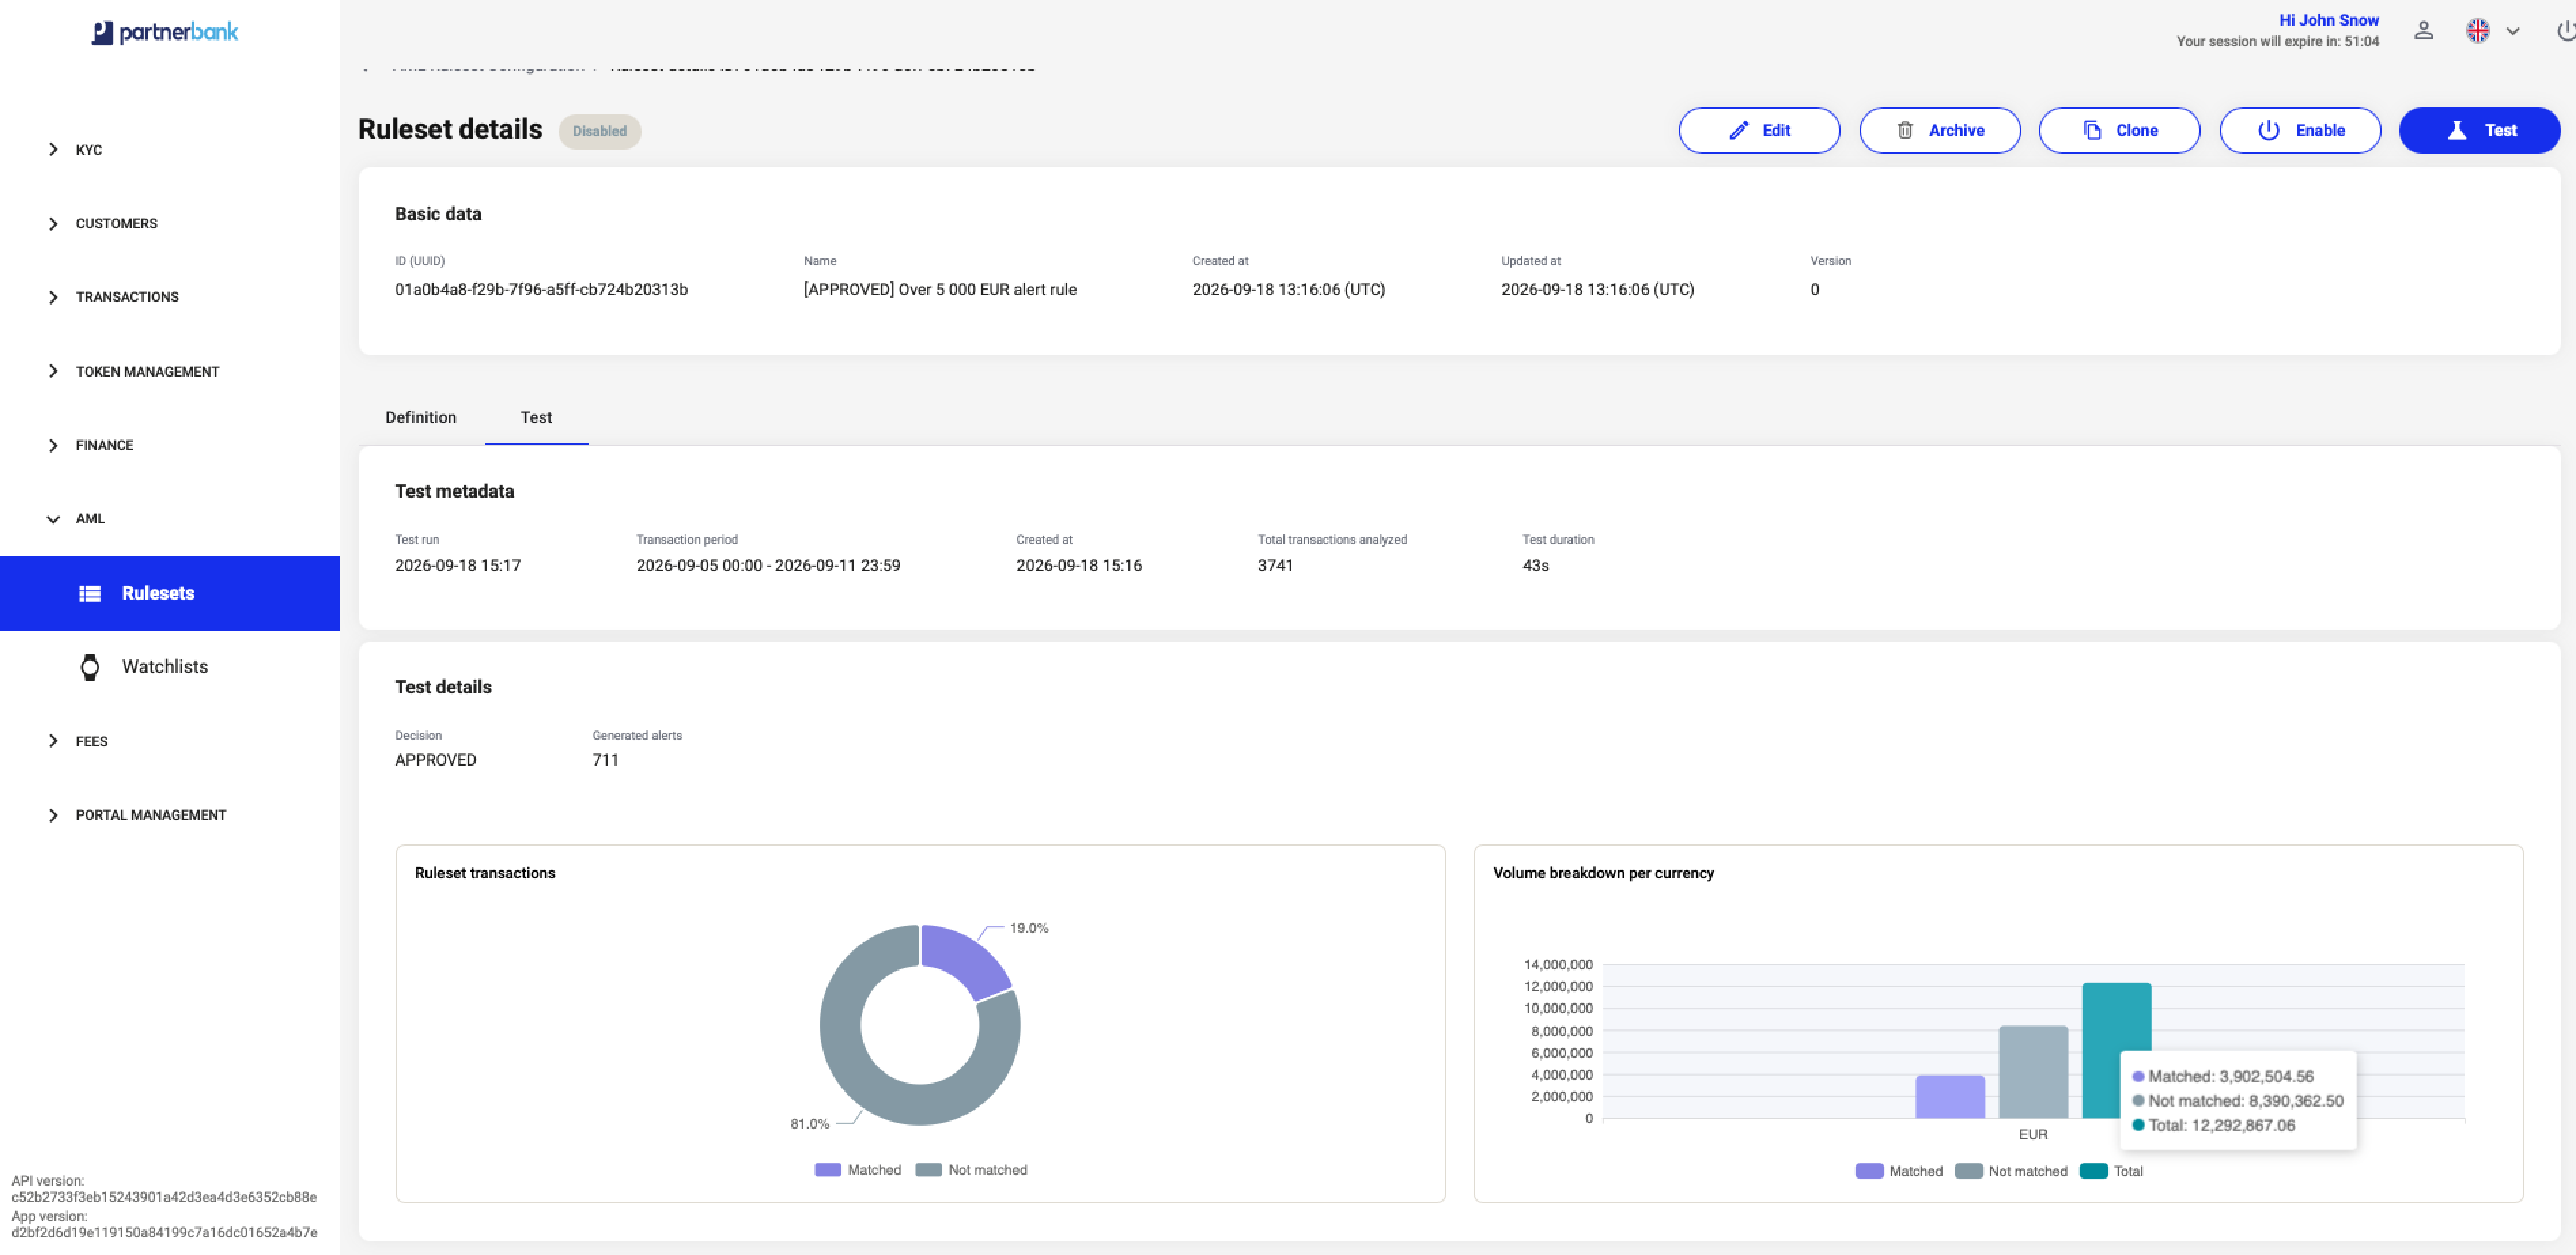
After the test completes, review Test metadata to confirm the transaction period, the number of transactions analysed and the test duration. The results below describe the tested ruleset within that selected period.
- Decision shows the decision associated with the tested ruleset, such as APPROVED. Use the matching statistics to see how many transactions met its conditions.
- Generated alerts shows the number of alerts reported by the test.
- Ruleset transactions shows the percentage of analysed transactions that met the ruleset conditions (Matched) and those that did not (Not matched).
- Volume breakdown per currency compares transaction amounts for each currency: Matched, Not matched and their combined Total. Hover over the chart to see the values for a currency.
In the example above, the test analysed 3,741 transactions in 43 seconds. 19.0% matched the ruleset conditions and 81.0% did not; the test reported 711 generated alerts. The displayed ruleset decision is APPROVED.
Value sets
List and details
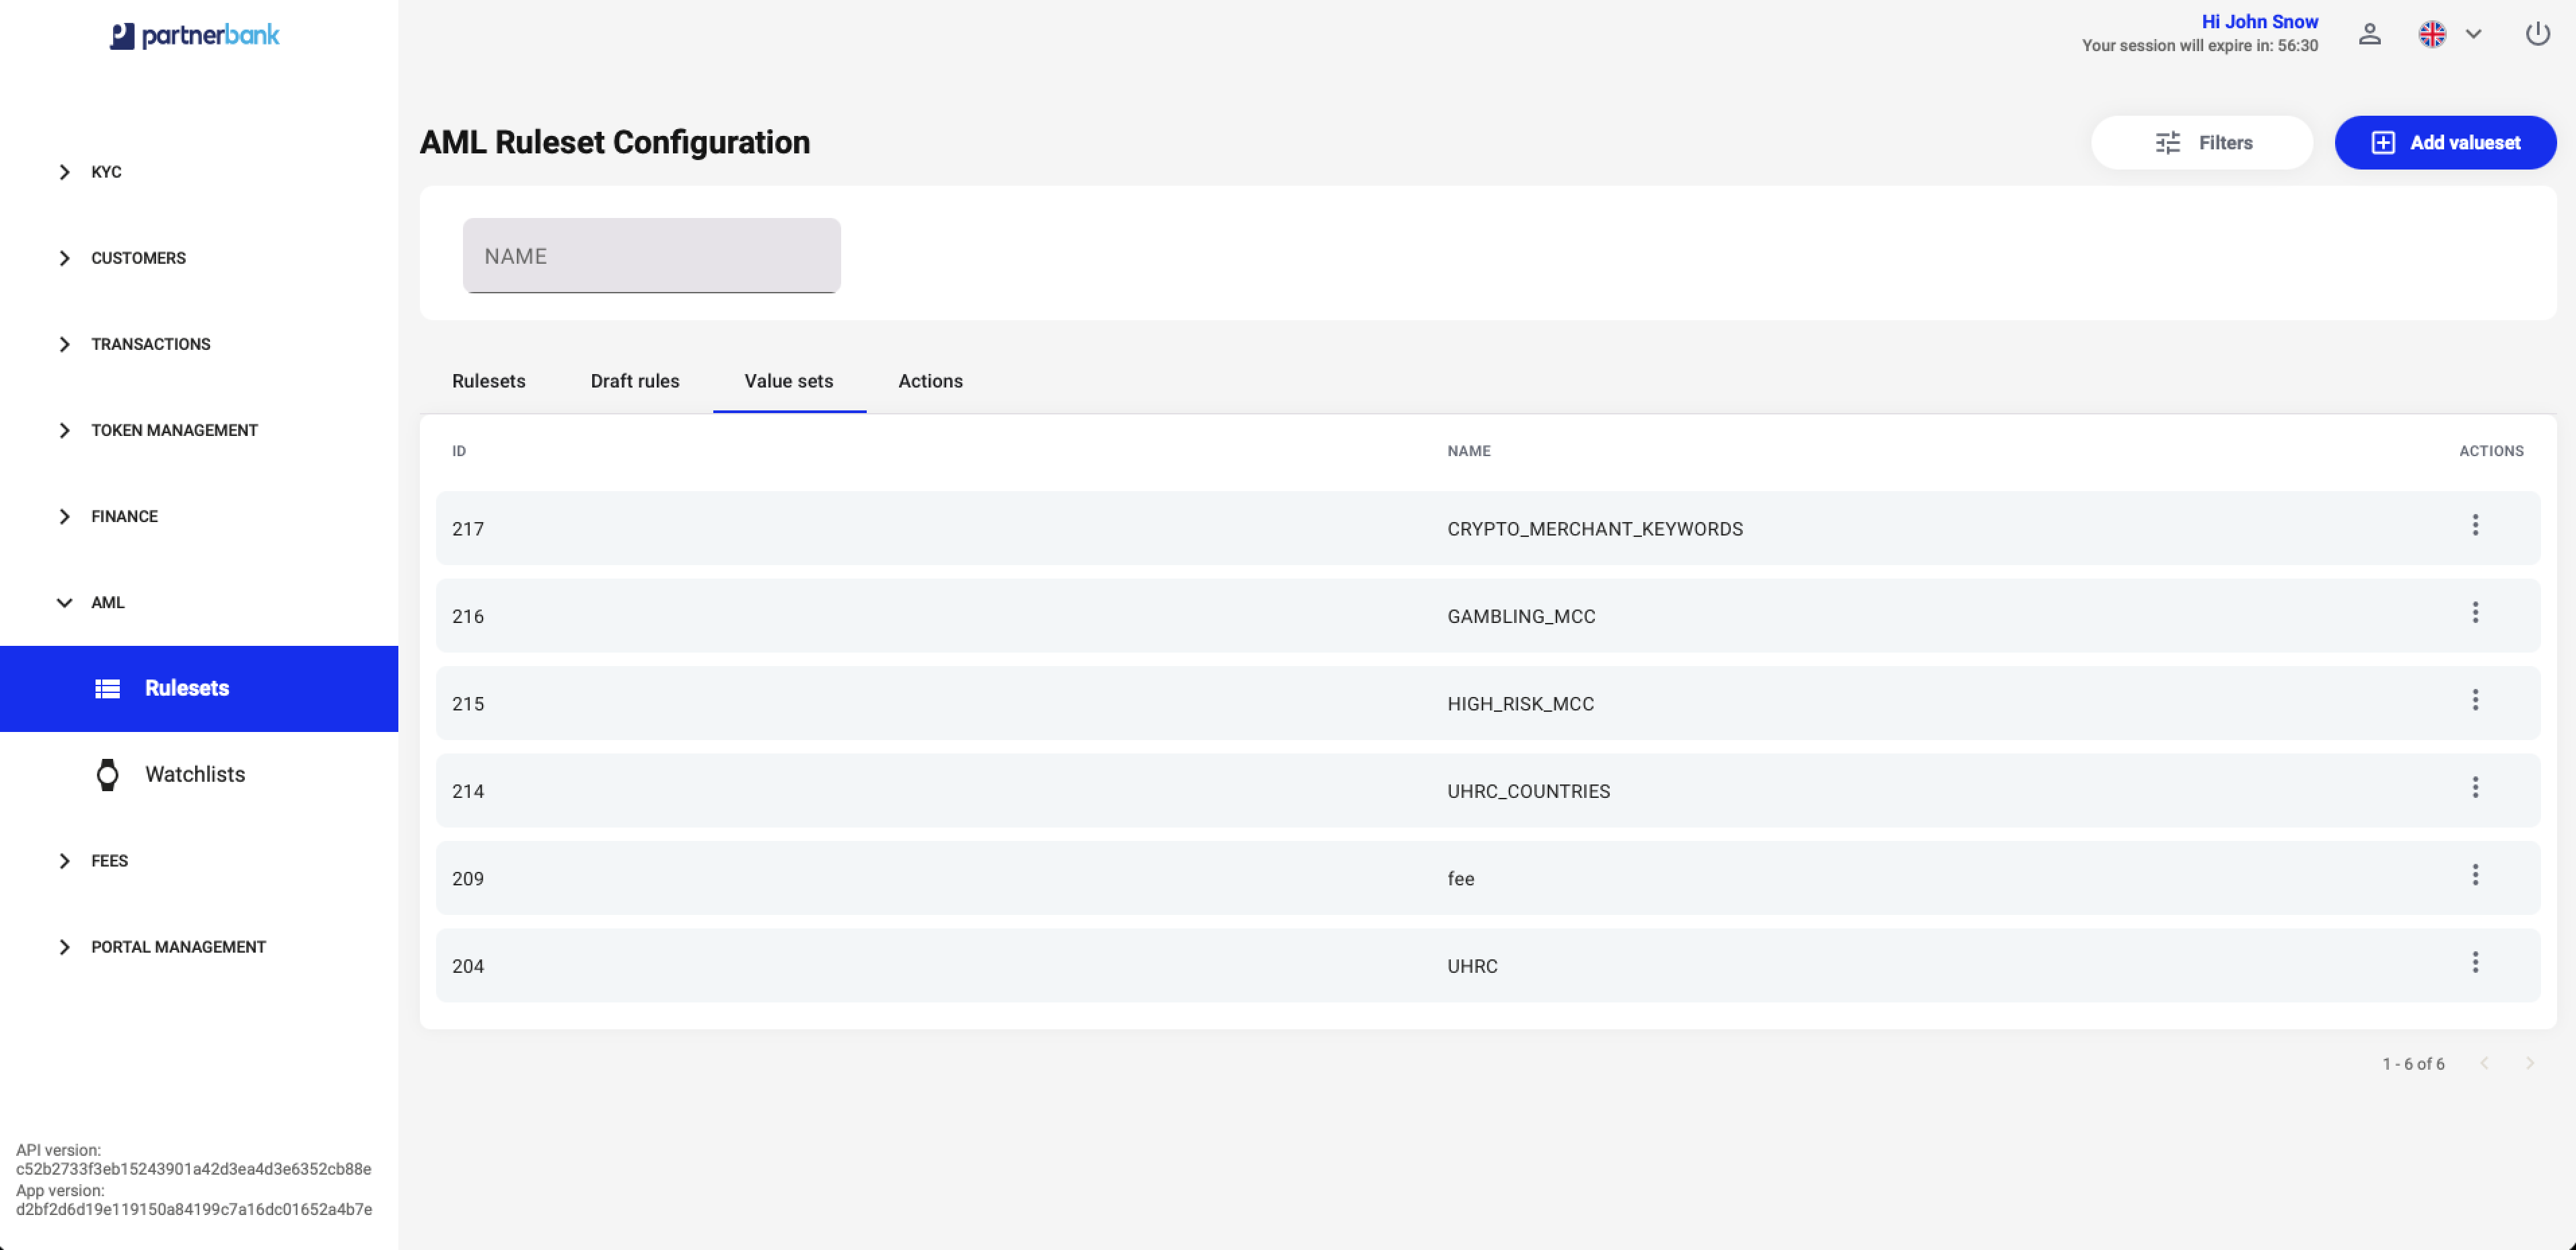
Open AML → Rulesets → Value sets. Filter by NAME and use the pagination controls as needed. The list shows ID, NAME and ACTIONS. Value set IDs in this interface are numeric.
Double-click a row to open Value set details. Basic data shows its ID and name; the Value set section displays the stored values. Select Edit to change the values. The list’s action menu provides Edit and Archive.
Creating and editing a value set
- Select Add valueset in the Value sets tab.
- Enter the required Name.
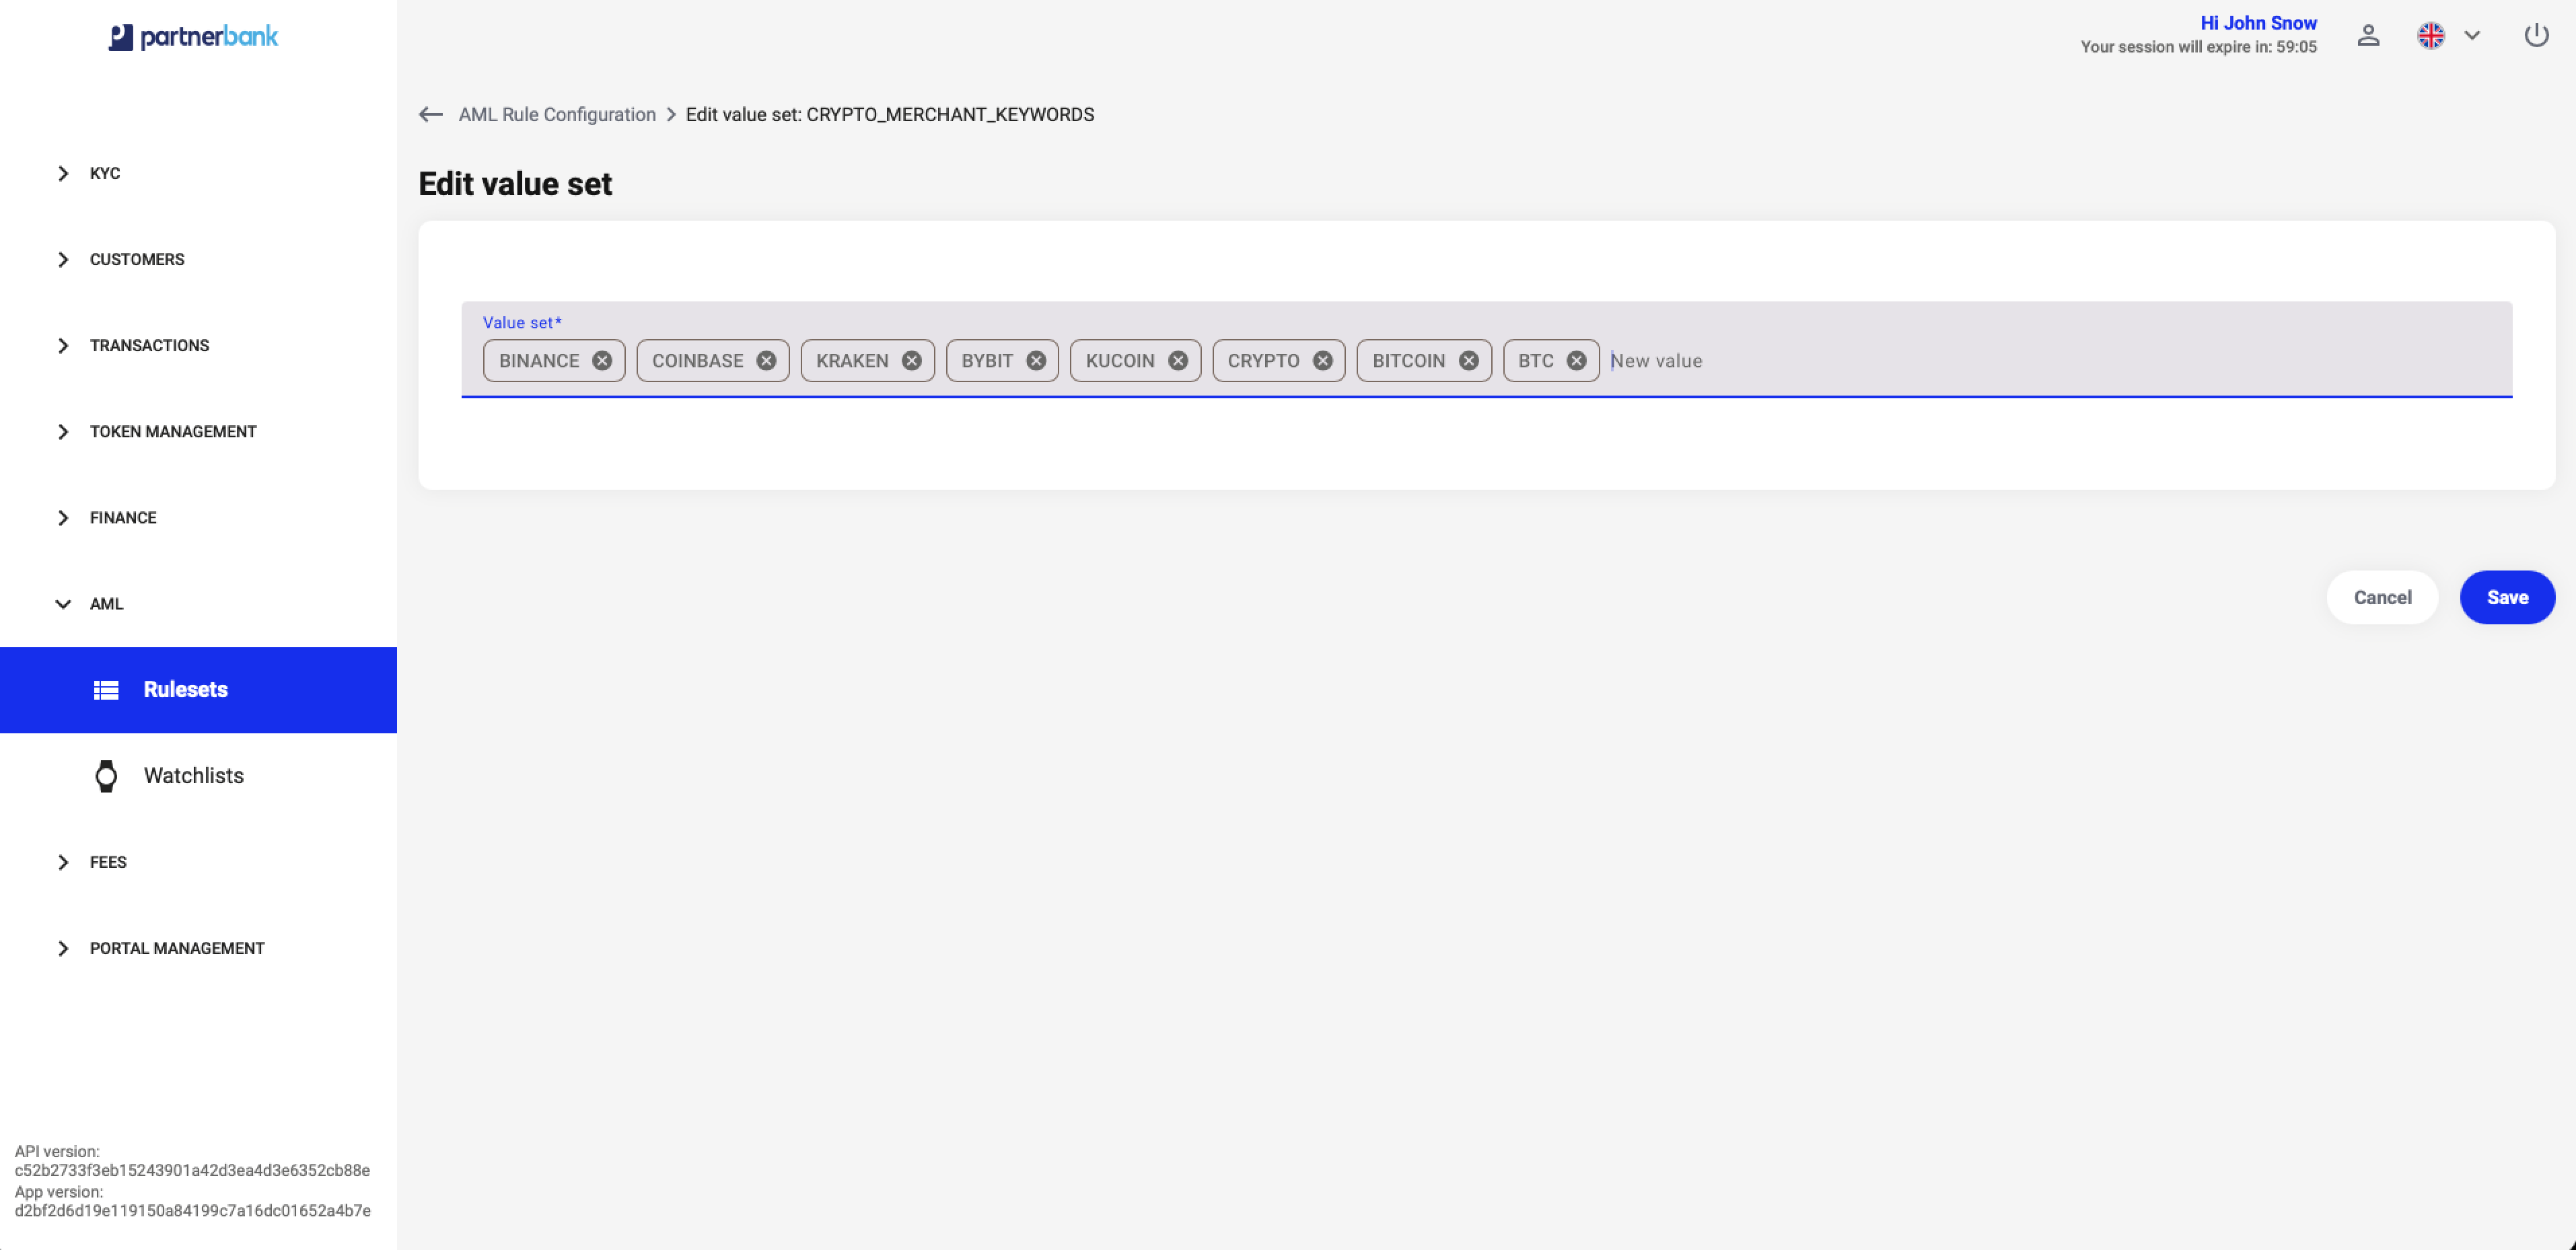
- Add the required values using the Value set field, whose placeholder is New value. Confirm that the entries appear as value tags.
- Select Save, or Cancel to leave the form.
The edit form exposes the value collection rather than the set name. Existing values are shown as tags with a remove control. Add or remove values, then select Save to apply the changes. Review rules that reference the set before changing its contents or archiving it.
Actions
List and details
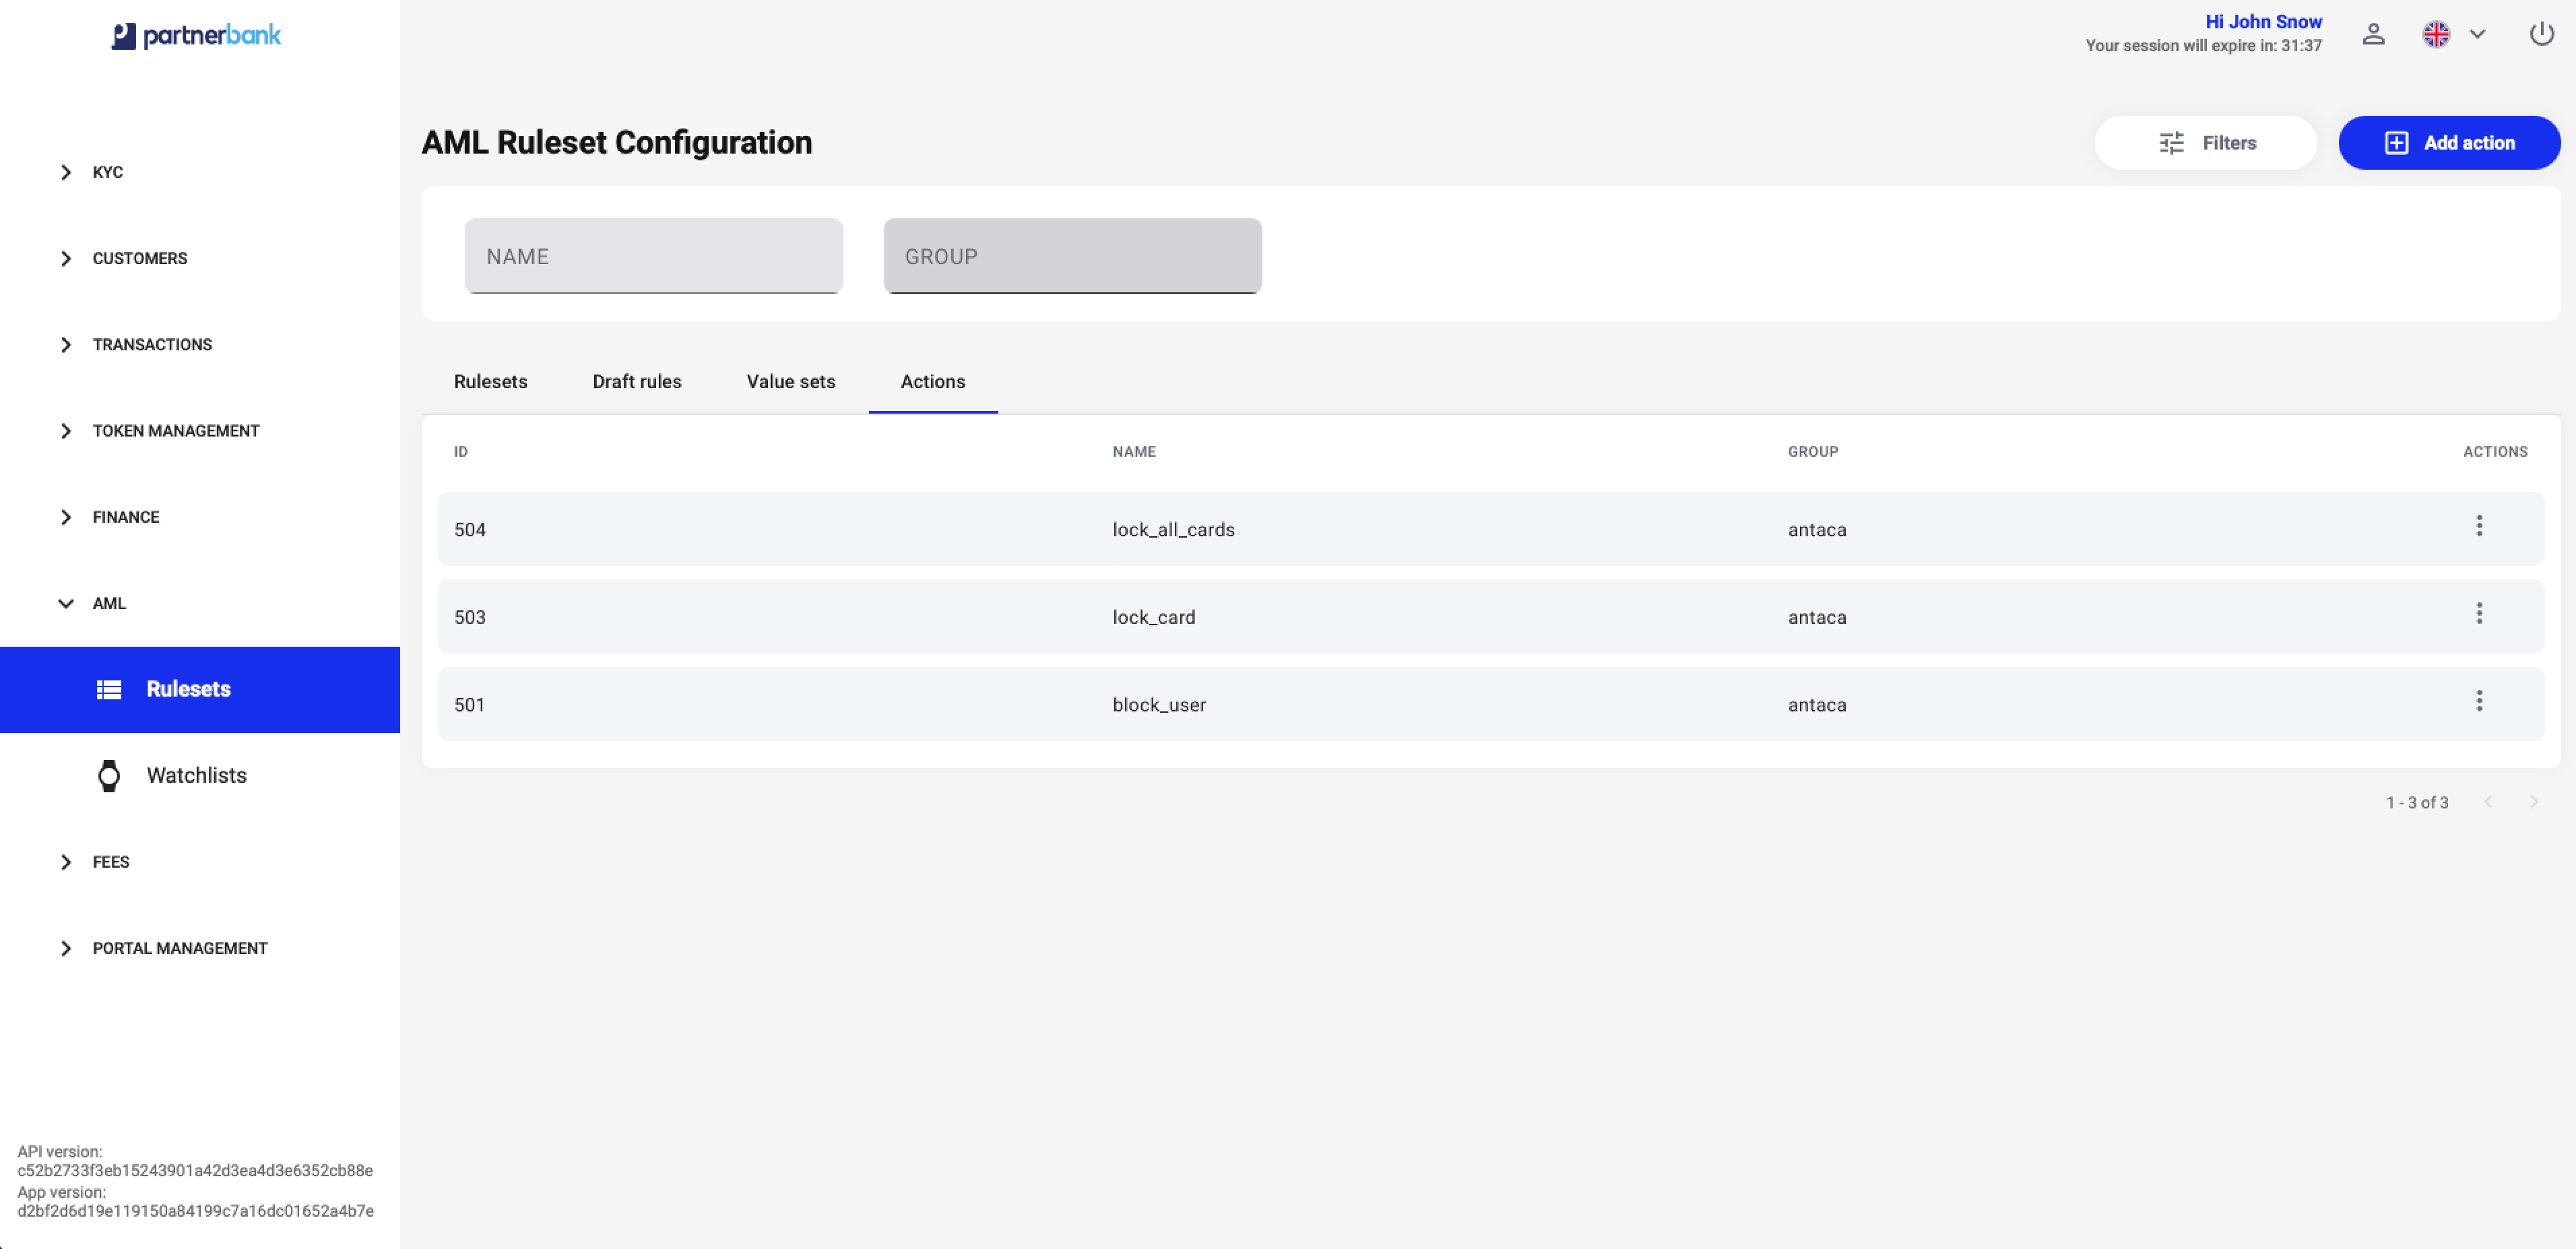
Open AML → Rulesets → Actions. The filters are NAME and GROUP. The table shows ID, NAME, GROUP and ACTIONS. Action IDs in this interface are numeric. The action menu provides Edit and Archive.
The Action details view contains its ID, name and group under Basic data, followed by each configured property’s name, required flag and values.
Creating an action
- Select Add action.
- Fill in the required Name and Group. Both are text fields.
- If the action needs properties, select Add new property.
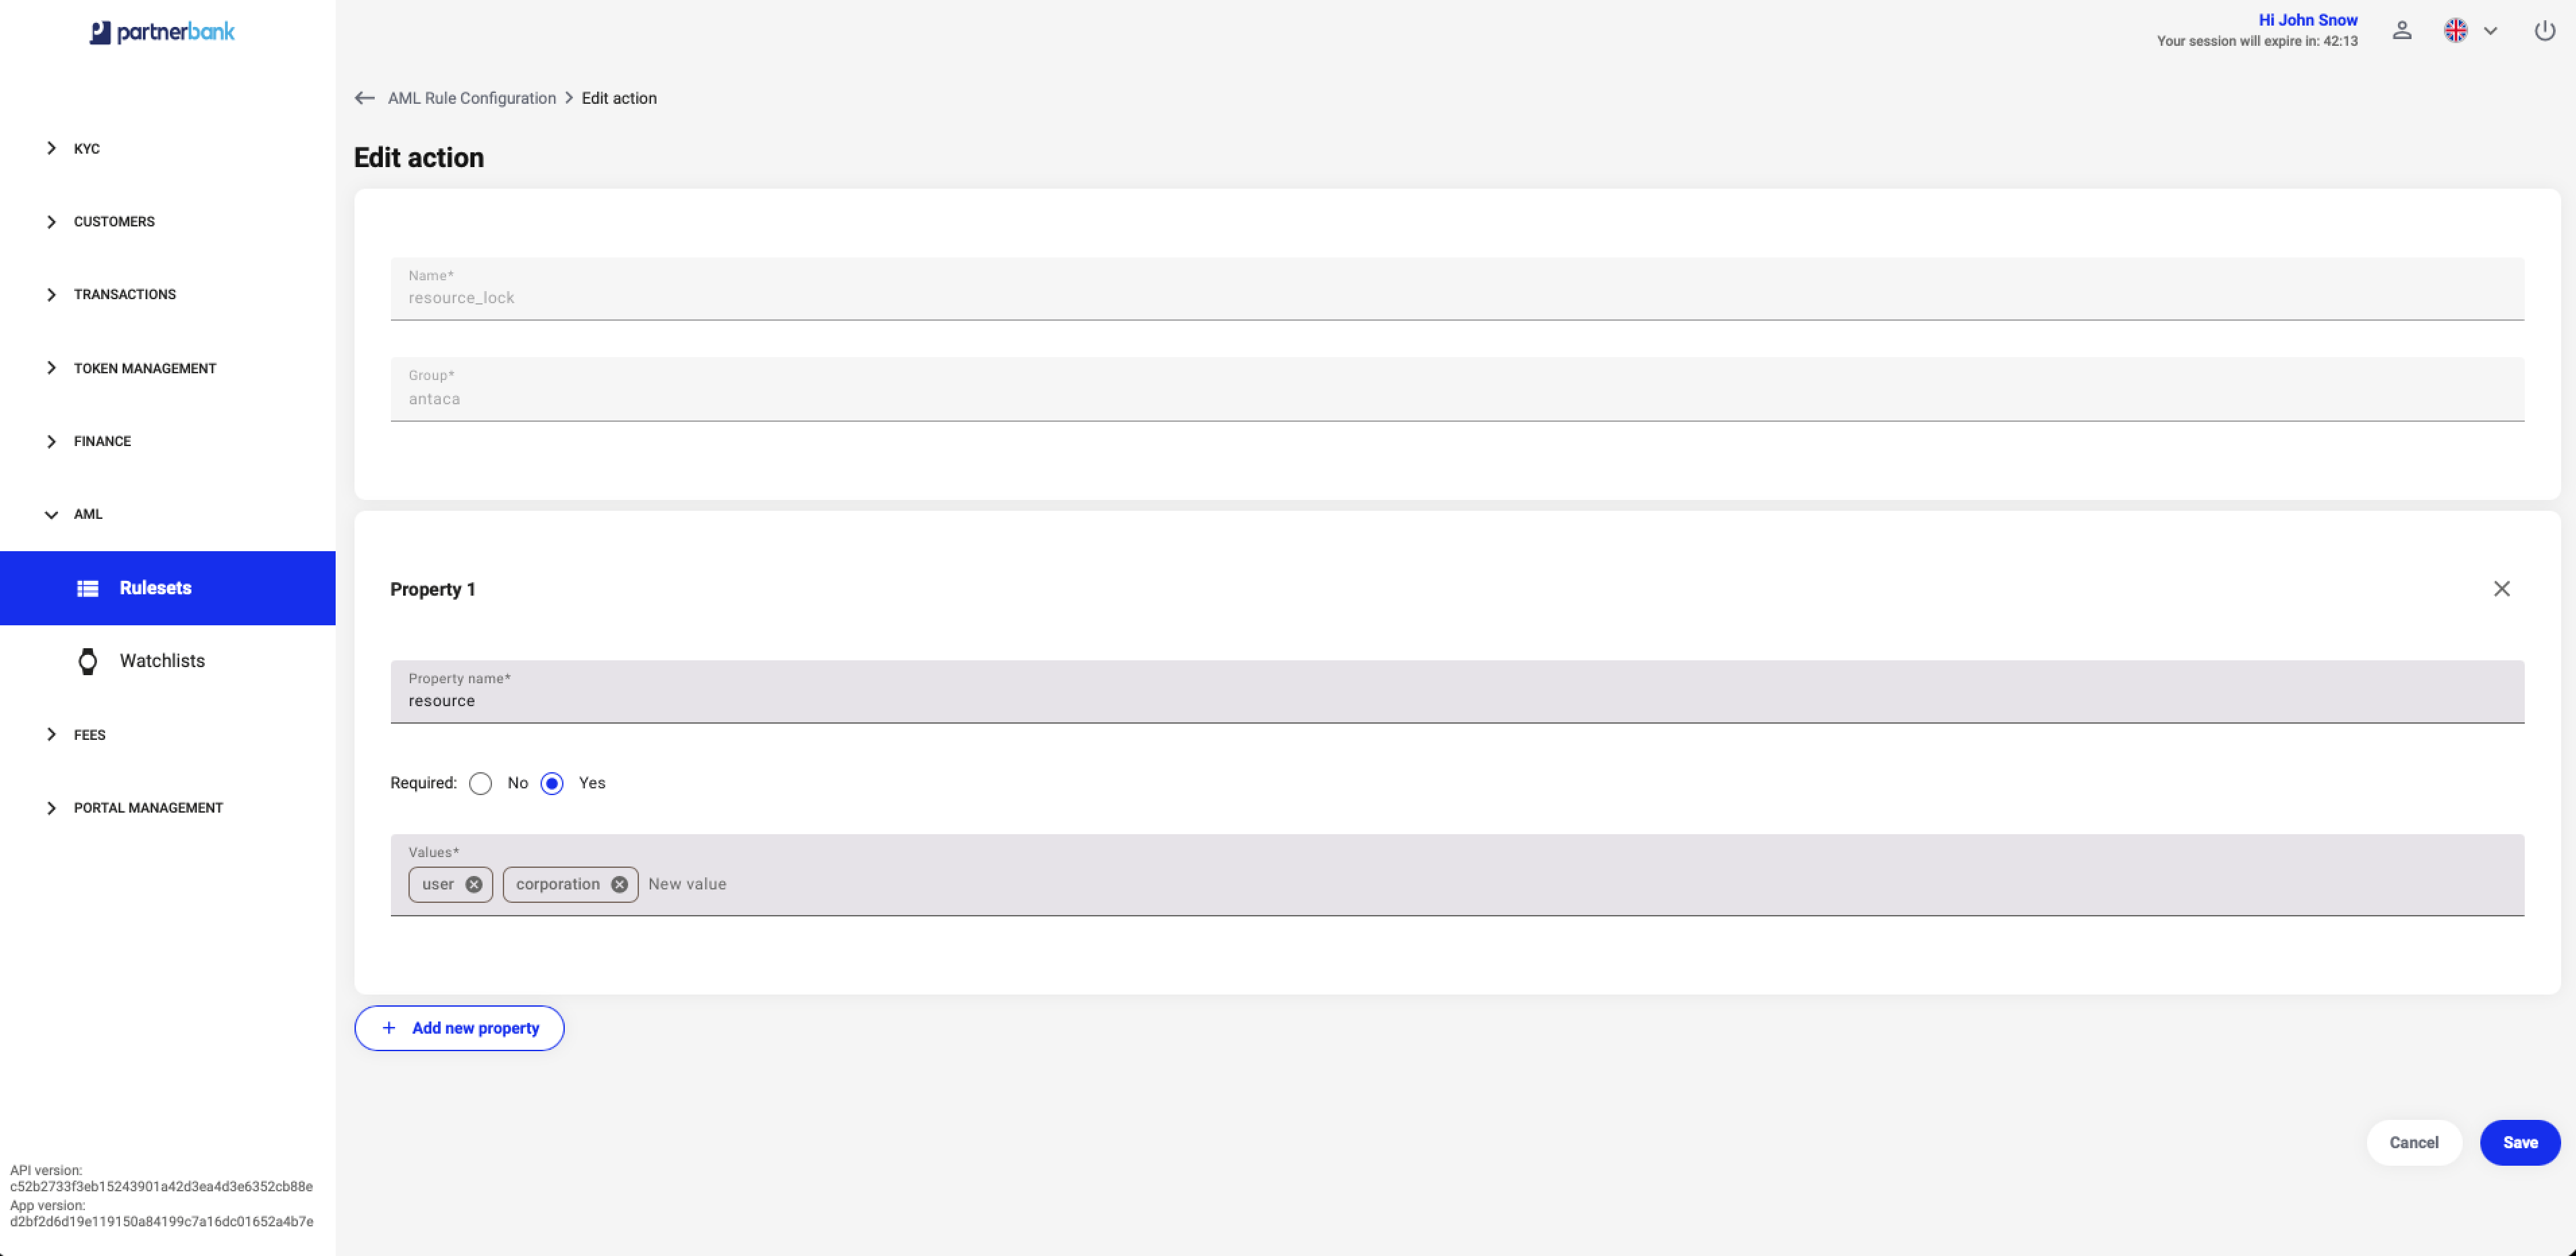
- For each property, provide the required Property name and Values. Set Required to No or Yes. Values are entered through the New value input and displayed as tags.
- Repeat Add new property for additional properties. The close control removes a property block from the form.
- Select Save when the form is complete, or Cancel to leave it.
Editing an action
Select Edit from the list menu or details page. Name and Group are disabled in the edit form. Update the property definitions and their values, then select Save. Review rules that use the action before changing its properties or archiving it.
Watchlists
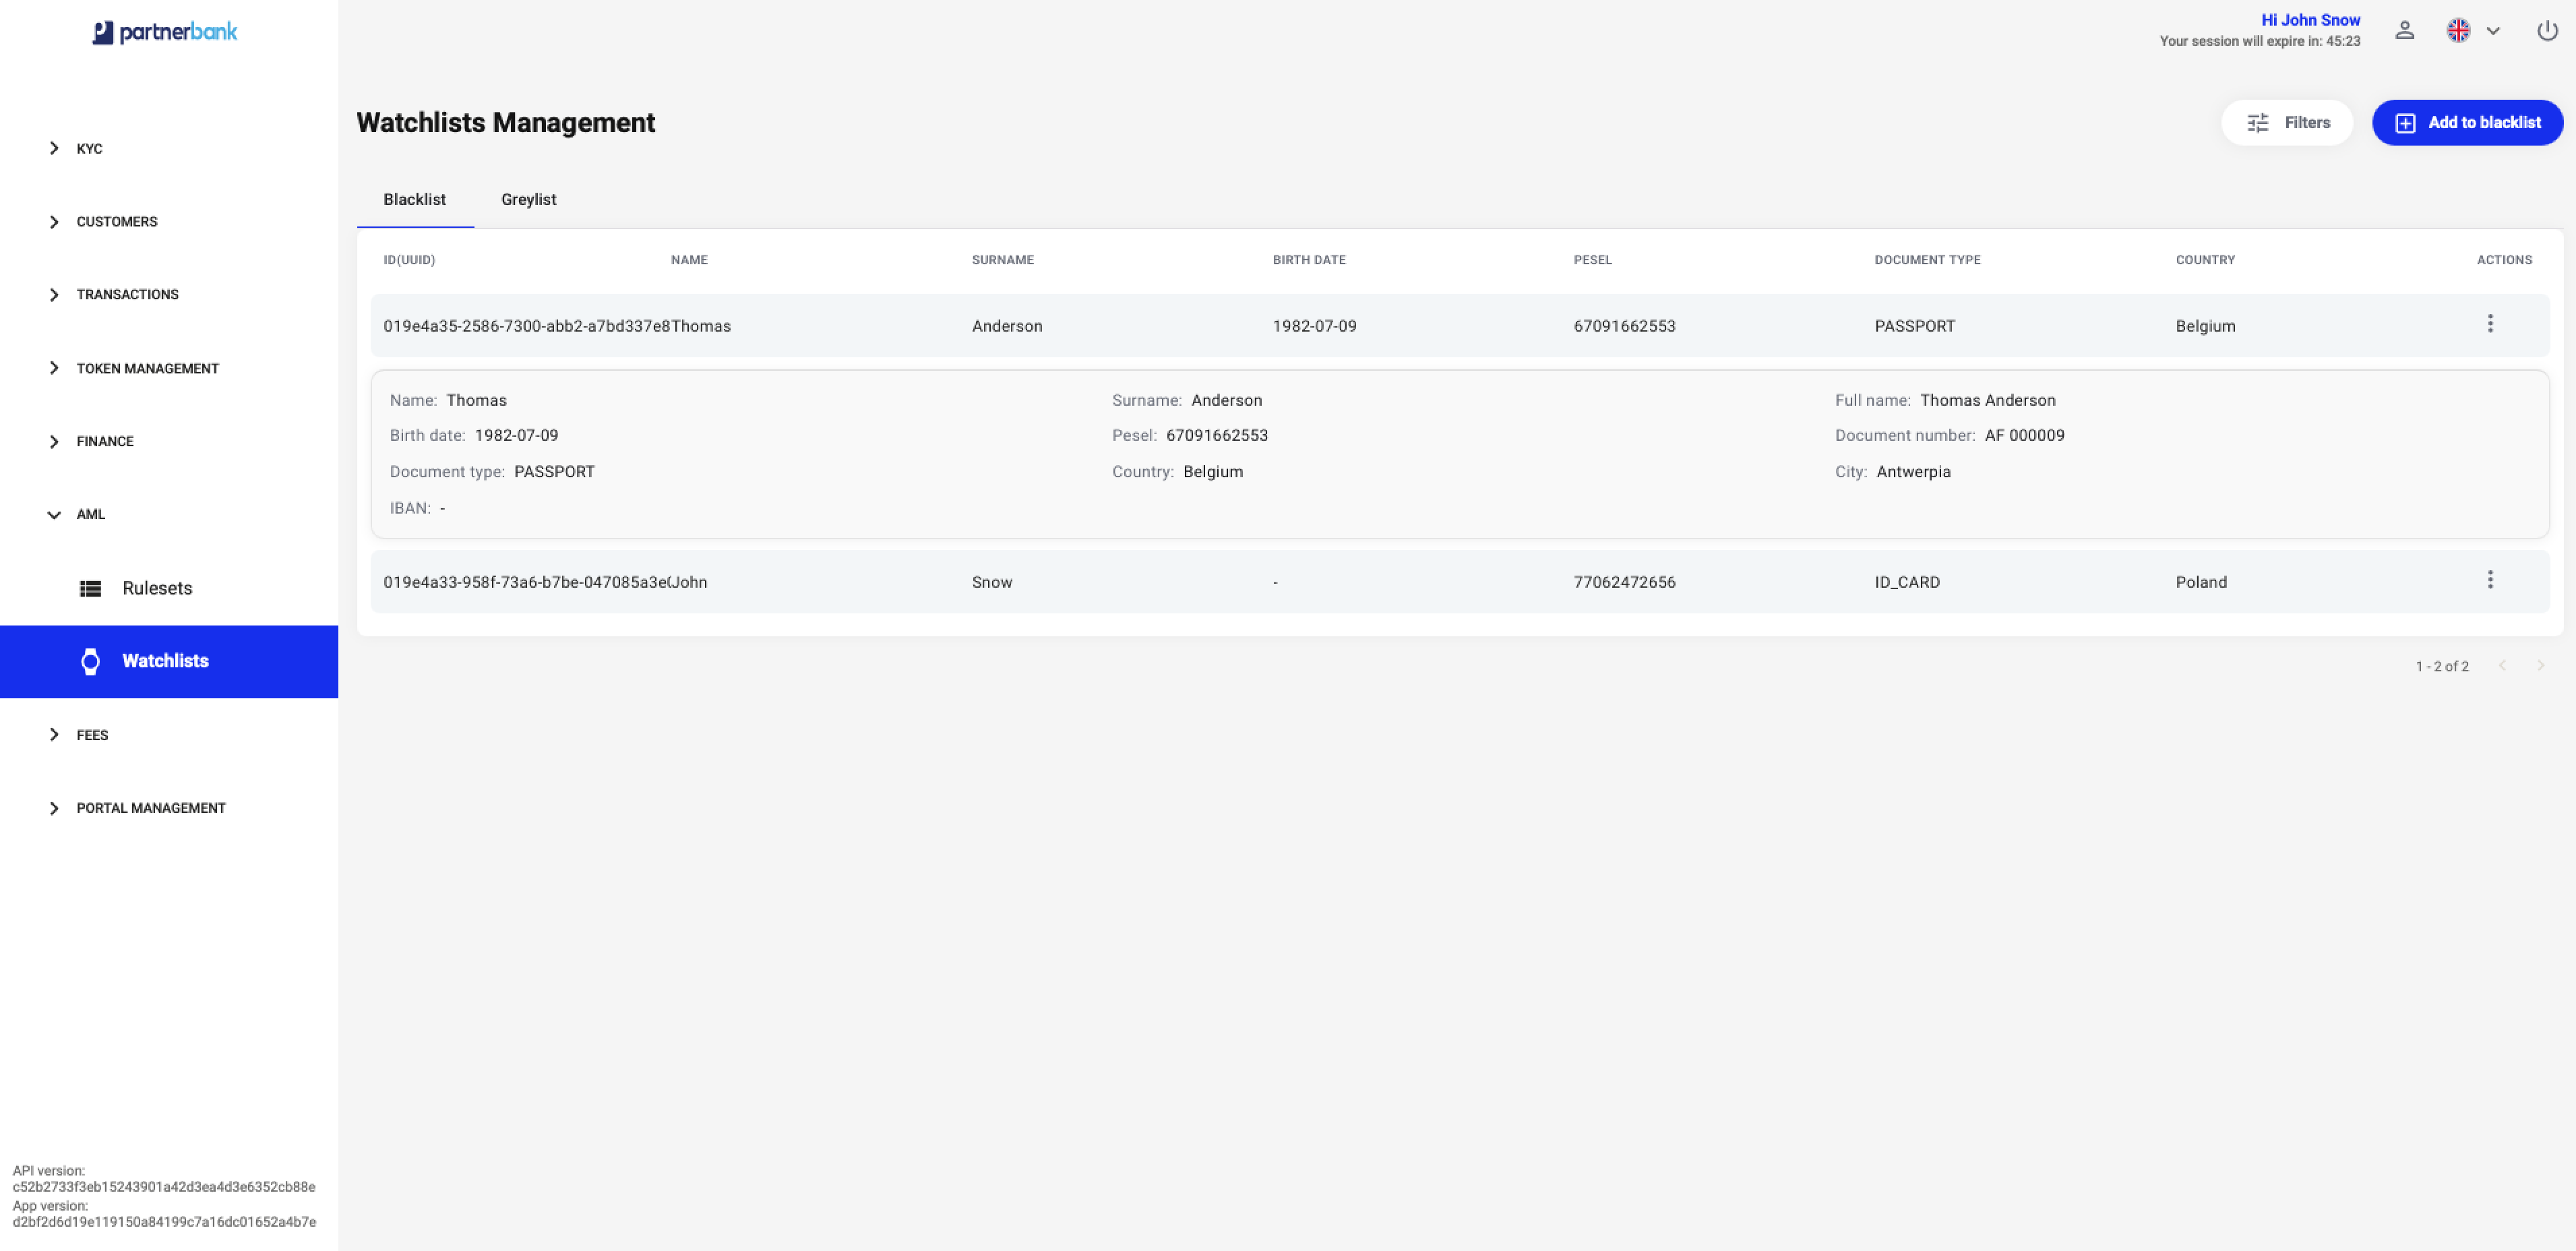
Open AML → Watchlists. The Blacklist and Greylist tabs provide the same set of entry fields and separate lists of records.
Watchlist membership is used by rules that reference the relevant list. Adding an entry alone does not define the transaction decision or the actions returned by AML; configure the corresponding rule logic as well.
Searching and filtering
Select Filters to display the filter fields: Name, Surname, Full name, Pesel, Document number, Country and City. Country is a dropdown. Use the pagination controls below the table to move between result pages.
Watchlist table
Both lists display ID(UUID), Name, Surname, Birth date, Pesel, Document type, Country and ACTIONS. The action menu includes Delete.
Adding an entry to the blacklist
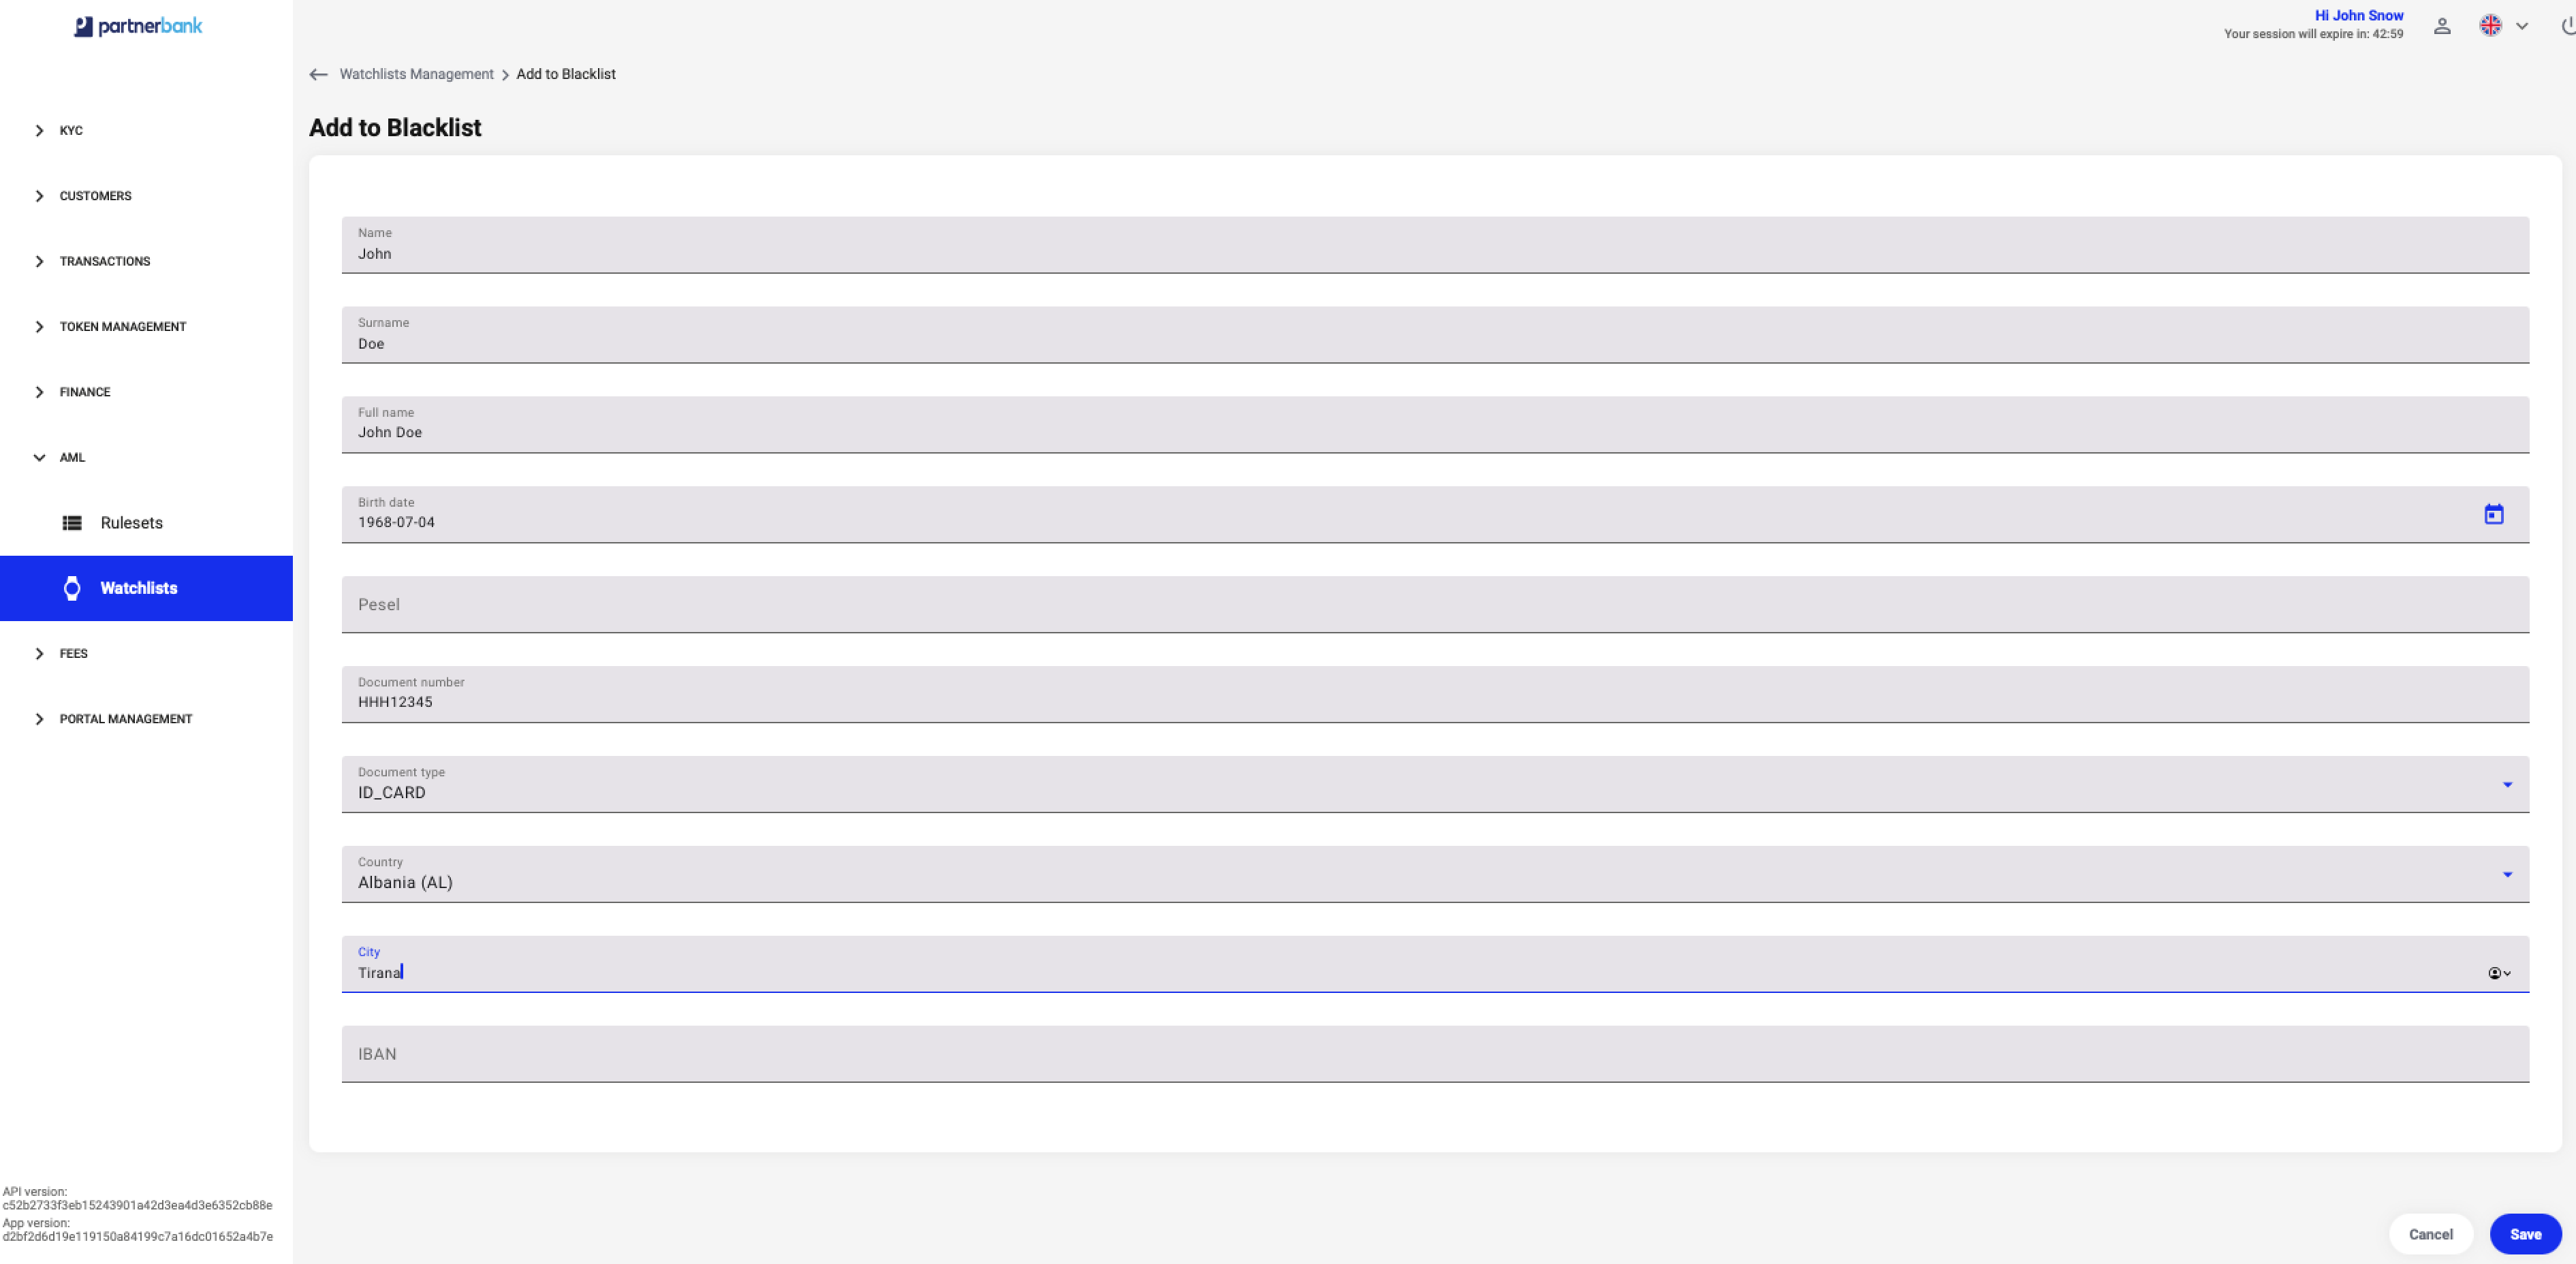
- Open the Blacklist tab and select Add to blacklist.
- Enter the identifying information available for the person in the Add to Blacklist form.
- Review the values and any validation messages, then select Save when the form allows it. Select Cancel to leave without submitting the entry.
| Field | Description |
|---|---|
| Name / Surname | First name and surname. |
| Full name | The full name as a separate field. |
| Birth date | Date of birth, with a calendar control. |
| Pesel | Personal identification number. |
| Document number | Identification document number. |
| Document type | Dropdown with PASSPORT, ID_CARD and a no-selection option. |
| Country | Country dropdown. |
| City | City name. |
| IBAN | Bank account identifier. |
The current watchlist form does not mark these fields individually as required. The empty form has Save disabled; entering a name alone enabled it during the interface review. Supply the identifying data relevant to the intended watchlist checks and follow the form’s validation messages.
Adding an entry to the greylist
Open the Greylist tab and select Add to greylist. The Add to Greylist form has the same fields as the blacklist form. Review the identifying information and select Save when the form is valid.
Removing an entry
- Open the appropriate Blacklist or Greylist tab.
- Use the filters to identify the correct entry.
- Open its three-dot action menu and select Delete.
- Check the selected entry and any confirmation before completing removal.